You might remember a time when you had full control over your sleep; you could just drift off to sleep in an instant whenever you’d like. Now, given the era we are in, your sleep is more likely to be lighter, and you might not always feel fresh and active. But don’t worry, in this post we will various yoga tools for good sleep and relaxation.
Today, people are mentally exhausted and completely drained out. Being emotionally unstable, constantly stressed, and suffering from anxiety and depression are some of the major reasons behind being mentally exhausted. Due to these factors, people are unable to sleep peacefully which in turn is affecting their body in many ways.
Besides, we all have collectively created a lifestyle where cut-throat competition is as common as butter on bread, people are running like crazy to chase a target, students are jam-packed with studies and assignments, and some of us are even working 2-3 jobs because clearly, one job isn’t enough!
Amidst all this chaos, maybe some of us are winning, but it is important to note that ALL OF US ARE LOSING. We are sacrificing our sleep in this deadly process and it will come back to haunt us sooner than we can imagine. Getting minimal sleep may not affect our body immediately, but in a long run, it is eating our body inside out.
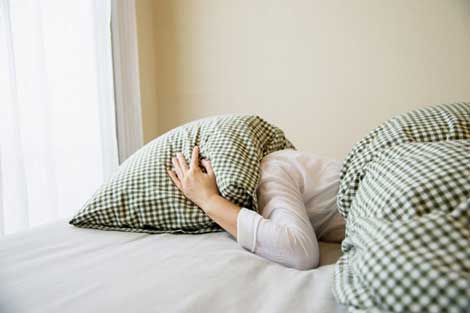
The National Institute of Health estimates that roughly 30% of the general population complains of general sleep disruption and approximately 10 percent have associated symptoms of daytime functional impairment consistent with the diagnosis of insomnia.
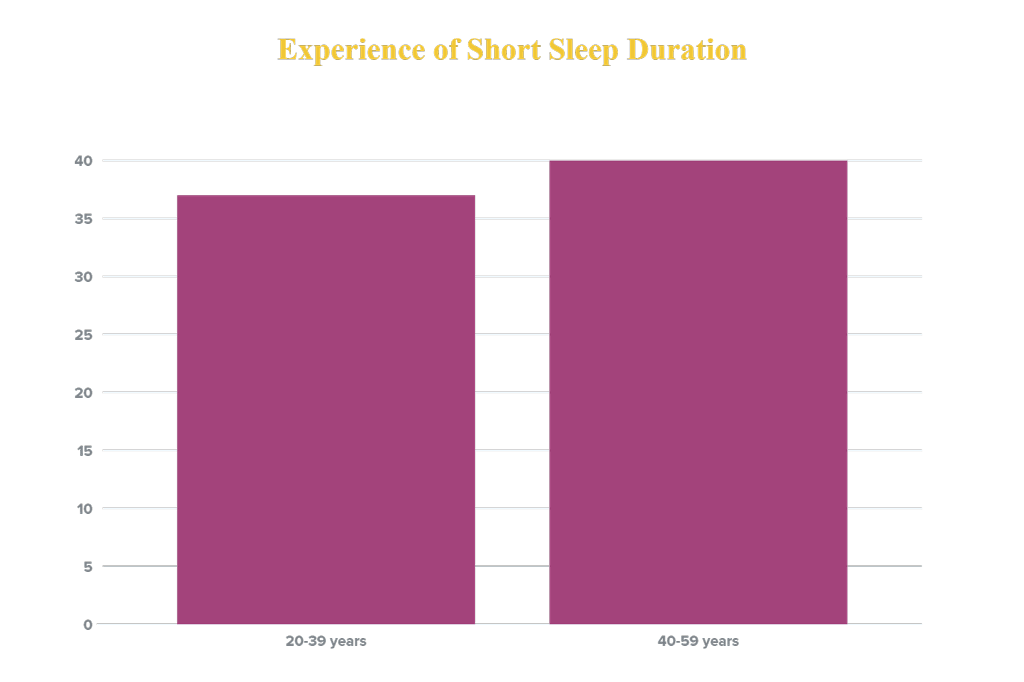
- 37% of 20-39 year-olds report short sleep duration.
- 40% of 40-59 year-olds report short sleep duration.
- 35% of people do not feel they get enough sleep, impacting both their physical and mental health
- 71,000 people suffer injuries every year due to sleep-related accidents.
- 1,550 people die because of sleep-related accidents.
- 46% of individuals with frequent sleep disturbances report missing work or events, or making errors at work, compared to 15% of healthy sleepers.
How we can overcome sleep and relaxation issues?
The answer lies in meditation, pranayama, and yoga. People practicing meditation, pranayama, and yoga regularly are found to be able to sleep more peacefully and lead a less stressful life. We have listed below the best-suited meditation, pranayama, and yoga practices that can help you sleep better.
How can Meditation in yoga help you sleep and relax better?
Meditation gives you a sense of calmness, peacefulness, and balance that benefits our mental and physical health. During meditation, you let your body loose, allowing it to enter a state of complete bliss. Follow these simple meditation practices to sleep peacefully:
1. Mindfulness Meditation | Yoga for sleep and relaxation
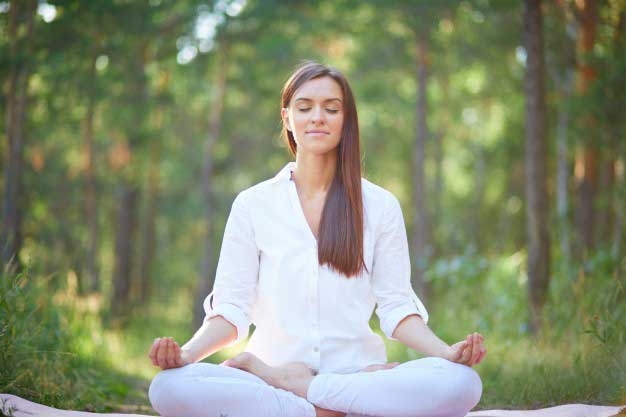
Steps:
- Sit comfortably and focus on your breathing. Observe your breathing rhythm and feel the effects of inhaling and exhaling all over the body.
- Close your eyes.
- When you feel calm, your mind might wander here, and there, many thoughts might rush in, do not run away from these thoughts. Give attention to your thoughts, try to analyze your thought without any judgment.
- Do not get too involved with one thought, just let it pass.
- This kind of meditation helps to create awareness of one’s own thought process.
- It is easy and can be practiced alone.
2. Om-Chanting | Yoga for sleep and relaxation
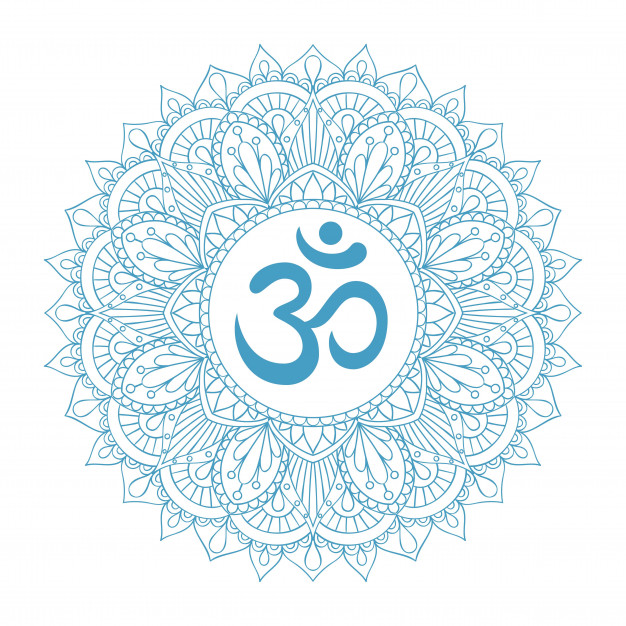
Steps
- While you breathe in and breathe out, chant ‘om’
- Fit the chant to your breath duration rather than breathing to the chant.
- Breakdown the ‘om’ syllable to ‘A-A-U-U-U-M-M-M-M’ followed by silence and back again.
- Try to emphasize on ‘O’ and ‘M’ separately.
- Say the first two syllables with your mouth opened widely and the next two by pursing your lips together.
- Place the top pf tongue on the roof of your mouth to pronounce the last two syllables.
- Then go engrossed in the silence that ensues.
How can Pranayama in yoga help you sleep and relax better?
Pranayama mainly focuses on breathing exercises. These breathing exercises maintain a good flow of oxygen resulting in continuous regeneration of cells in our body. The simple act of breathing is the fastest and most efficient way to receive oxygen into our bodies. The better the air quality and the deeper you breathe the more you can help your immune system work properly. Routinely practicing deep breathing exercises can improve your overall immune system as well.
1. Anulom Vilom Pranayama | Channel Cleaning Breathing

Steps:
- Sit comfortably on your mat and sit straight so that your back, neck, and head are aligned.
- Let your left-hand rest on your left knee.
- There is this particular hand pose that one has to perform with his right hand. There is a reference image. You have to curl up your index and middle finger and let the other fingers be open and not curled up.
- Maintaining the same hand pose, use your thumb to press your right nostril and inhale deeply from your left nostril.
- Hold your breath for 5 seconds and then press your left nostril with your ring finger and lift your thumb from your right nostril and exhale slowly.
- Keep repeating this 15-20 times.
Precautions:
- Avoid practicing it if you are suffering from high blood pressure or any heart disease.
2. Bhramari Pranayama | Humming bee breath

Steps:
- Sit comfortably on your mat and sit straight so that your back, neck, and head are aligned.
- Keep your hands on your knees or near your ears, closing them with your palm.
- Take a deep breath by inhaling slowly, hold it for 5 seconds.
- Then exhale without opening your mouth and making a humming sound from inside.
Precautions:
- Avoid this Pranayama if you occur to have an active ear infection.
3. Abdominal breathing | Vashisht pranayama
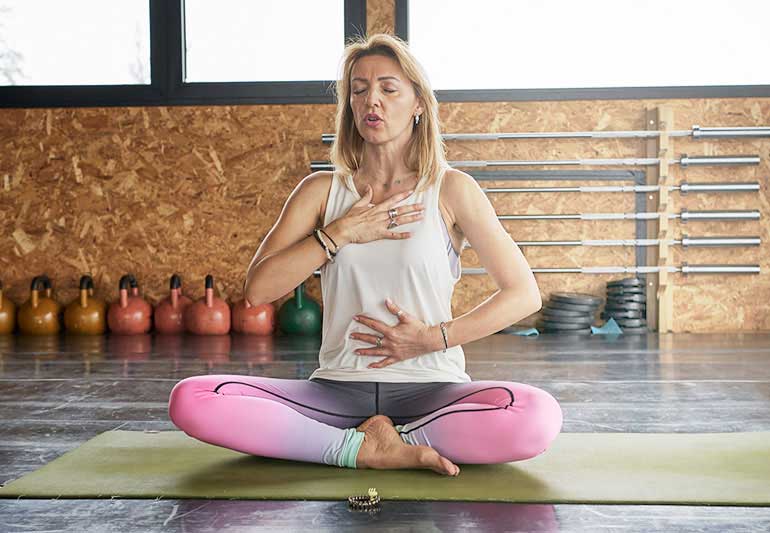
Steps:
- Relax and lie down on your back.
- Bend your knees and your feet touching the floor.
- Stretch your arms in a way that it has a one-inch distance between your hips and your arms.
- Let your palm face the sky.
- Now you must inhale and exhale and keep focusing on your breath.
- When you inhale air, your stomach stretches and expands while when you exhale, your stomach contracts.
- Breathe slowly and hold your breath between inhaling and exhaling every time.
- Repeat this 15-20 times.
How Yoga helps you sleep and relax better?
Yoga has been popularly known for improving core strength and flexibility. However, the miraculous benefits of yoga are not just limited to improving physical health. Yoga plays a vital role in overcoming stress, depression, anxiety, and it helps you sleep better.
Yoga combined with several pranayama exercises and meditation works like a magic in providing you with a better good night’s sleep. People performing yoga and pranayama on daily basis are found to be falling asleep faster and having a long sleep.
Your mind needs to be at peace before you go to sleep and yoga gives you that calmness and helps you fall asleep smoothly. While you are adapting yoga, you may also want to make changes in your eating habits. This change would seem difficult in the beginning, but once you see the results on your body, you will not want to go back to your previous lifestyle.
We have come up with a list of dedicated yoga poses and pranayama exercises that works best when it comes to sleeping disorder or insomnia. The following yoga stretches can help you relax and allow you to enjoy a peaceful and sound sleep:
1. Hero Pose | Virasana

Steps:
- At first, sit on the floor or the Yoga mat in a kneeling position (Refer Vajrasana).
- Maintain some distance between your feet. It should be slightly more than the width of your hips.
- Keep both your knees under your buttocks.
- Place your hands on your thighs.
- Take a deep breath and lower your buttock to sit on the floor between your feet. You might have to roll your calf muscles to make this happen.
- Make sure your toes are not tucked under your hips. You should be seated right between your feet.
- See that your toes are pointed backward.
- Remain in this posture for 30 seconds to one minute.
- To release, press your palms into the floor and lift your buttocks slowly. Cross your ankles beneath your body and extend your legs forward.
Precautions:
- Stop continuing this asana if you find sharp, twitching sensations or pull in your calves or knees.
- If you have knee pain, you can sit on a block and not on the floor directly.
- Do not push your body. Only practice this asana if completely comfortable.
2. Legs up the wall pose | Viparit Asana

Steps:
- To perform this pose, you need to find a space near a wall.
- Sit in front of the wall and lie down and keep your knees bend.
- Keep your hands by your side and raise your legs and let it touch the wall.
- Maintain distance between your buttocks and the wall so that you can push it to stretch more.
- Make sure your back and head are resting on the floor, making a 90-degree angle.
- If needed, use your hands to support your hips and form a curve in your lower body.
- Do not put pressure on your neck.
- Close your eyes and breathe. Hold the position for at least five minutes. Relax and roll yourself on any side.
Precautions:
- To be avoided during menstruation.
- Avoid practicing this pose if you have eye problems like glaucoma.
- If you notice a tingling in your feet when you practice this pose, bend your knees and touch the soles, bringing your heels close to the pelvis.
3. Happy baby pose | Anandasana

Steps:
- Lie on your back.
- Bend your knees into your belly after exhaling.
- Then inhale deeply and hold your feet with your hands.
- Open your knees slightly wider than your torso and bring them up toward your armpits.
- Keep pulling your hands down gently to create resistance.
Precaution:
- A pregnant woman should avoid this pose.
- Avoid this pose if you are suffering from any kind of knee injury or neck injury.
4. Reclining bound angle pose | Supta Baddha Konasana

Steps:
- To begin with, get into ‘Staff pose | Dandasana’ with your legs stretched in front of you. Use a mat or blanket if possible.
- Bend your knees and bring the heels towards your pelvis. Press the soles of your feet together and allow your knees to drop open on respective sides. This is the Bound Angle pose or Cobbler’s Pose or Baddha Konasana.
- Now gently lean backward and place your elbows on the floor. Then slowly lower your back all the way to the floor. ]
- Now adjust your position by gently pushing your buttocks from side to side so that your spine lengthens along the floor maintaining the natural curve of the lower back.
- Let your arms relax with palms facing up and draw your shoulder blades gently inwards.
- Lengthen your tailbone towards the heels and relax your buttocks.
- Close your eyes. Take a few deep breaths. Allow your body to feel heavy.
- Stay in this position for one minute and gradually extend your stay anywhere from five to ten minutes at your convenience.
- To come out, draw your knees together, roll to your right side, and use your hands to press yourself up to a comfortable position.
Precautions:
- Avoid this Asana if you have an injury in the knee, hip, groin, lower back or shoulder.
- Always work with your own range of limits and abilities. Do not push your body.
5. Janu Shirasana | Head to knee pose.
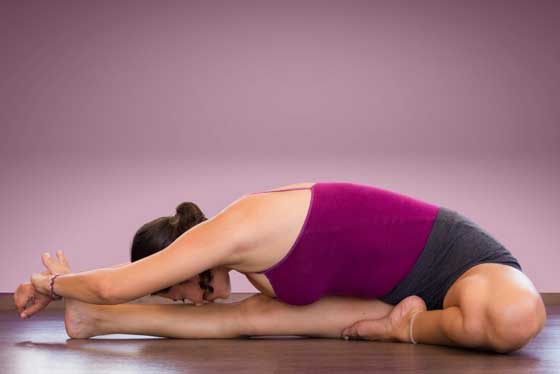
Steps:
- Firstly, sit on the floor with legs stretched out in front of you. Keep your back erect. You may use a blanket under your hips if necessary.
- Bend your right knee; place the bottom of your right foot against the inner part of your left thigh. Your right leg and knee should be comfortably pressed on the floor.
- See that your chest and navel are lined up with your left leg, setting your torso in the right position.
- Your hands must be placed right beside the hips. Let your hands provide support.
- Inhale and extend your belly and torso right up to the top of the head.
- While your exhale, let the energy pass through your left leg till the ball of the foot.
- Inhale and stretch your arms such that it lengthens your spine. Then exhale and slowly bend forward from your hips. Try to reach your ankles or toes with your hands or stretch till you are comfortable.
- Hold this position while you take a few deep breaths.
- To release this pose, lift your torso and stretch out your right leg. Let the muscles in your abdomen contract.
- Relax for a few seconds and repeat this for another side.
Precautions:
- Avoid this asana if you have diarrhea or Asthma.
- Do not flex too much in case of a knee injury. Instead, use a folded blanket for support.
6. Locust Pose | Salabhasana

Steps:
- To begin with, lie down on your mat on your belly and place your hands on the inside.
- Breathe in and lift your head away from the floor.
- Keeping your lower belly and pelvis on the floor, raise your leg upwards using your inner thighs. Do not bend your knees.
- Now, raise your arms parallel to the floor and stretch back a little.
- Make sure all your body weight is on your abdomen and lower knees.
- Keep breathing slowly. Stay in this position for 45-60 seconds and then release while exhaling.
- Repeat this asana 2-3 times.
Precautions:
- Refrain from this asana if you have severe back problems or issues with knees or hips.
- Do not practice this asana if you have a headache or migraine.
7. Cat-Cow pose.

Steps:
- First, come to a position same as a baby crawling that would be palms on the floor and knees on the floor.
- Be in a neutral position with your head and neck and spine aligned.
- Then we will begin with Cow Pose, so inhale when you drop your belly towards the mat. Lift your chin and chest, and gaze up toward the ceiling.
- Then, we will move to Cat Pose, you exhale and push your belly to your spine, and round your back toward the ceiling. The pose should look like a cat stretching its back.
- Inhale, coming back into Cow Pose, and then exhale as you return to Cat Pose.
- Repeat 5-20 times and rest.
Precautions:
- Avoid this pose if you have any knee injury.
- A pregnant woman should also avoid this pose and it might stress the belly or practice it when supervised.
8. Corpse Pose | Shavasana
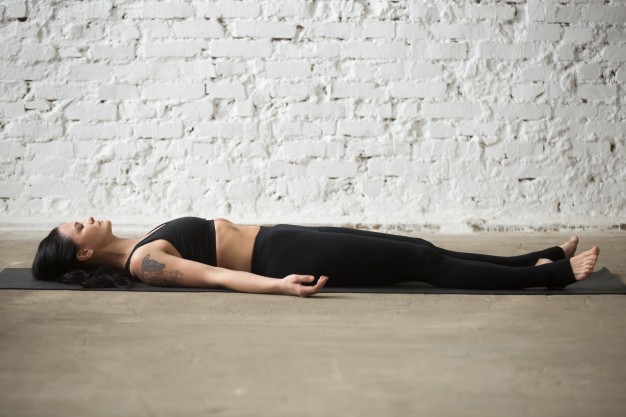
Steps:
- Lie flat on the floor keeping your back straight.
- Your palms, facing upwards, must be placed slightly apart from your body.
- Close your eyes and place your legs comfortably apart from each other. Make sure your toes are facing sidewards.
- Keeping your head and spine in a straight line, lay peacefully.
- Take a deep breath, draw attention to every part of your body.
- Breathe slowly, setting your body in a state of deep relaxation. Let it soothe your body, mind, and soul.
- Forget everything and try to focus on your body while breathing. Feel each and every breath going in and out.
- Remain in this position for a few minutes (make sure you don’t fall asleep) and slowly come back to your normal position.
Precautions:
- Avoid doing this Asana in a noisy/disturbing environment.
- Make sure not to move your body while performing this asana. You need to remain completely still as even the slightest movement may disturb your practice.
Getting a good night’s sleep makes us feel like we can tackle every problem on our plate. Yoga has the ability to eliminate Insomnia and other sleeping disorders and help you sleep peacefully. The soothing practice of Yoga has proven to be an effective sleep remedy as it lowers stress levels, calms the mind, and frees the body from all sorts of tension. Apart from making several lifestyle changes, the regular practice of Yoga can help you sleep better. As we all know stress is also one of the reasons for unstable sleep, recover that from practicing these three routines mentioned below:
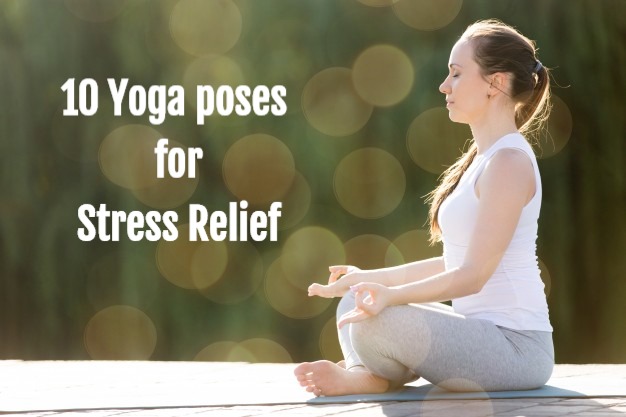
YOGA YOGA FOR STRESS RELIEF
I hope these routines are helpful for you my dear readers, I wish you get the best sleep every night! Thank you
