Yoga has become one of the most popular health practices among teens. It is even so more beneficial for teenage girls and in this post we will cover in detail why yoga should be part of every teenage girls lifestyle.
The first word that pops in our mind after hearing the word teenager is the adrenaline rush. Massive hormonal changes are occurring in the body during the turbulent years of adolescence. Not only our energy is at its peak, but we also experience major bodily changes. These transformations are beautiful and painful at the same time. Skin problems, mood swings, impulsive behaviour, etc are the results of fluctuating hormones of puberty. It is very crucial to focus this energy in the right direction. Cultivating the habit of yoga in the teenage girls is very fruitful in the coming years .
Yoga is a boon to humankind. Yoga is the one-stop solution for a flexible and confident body with glowing skin for every teenage girl. It has the potential to fight menstrual cramps and focus on positive things by calming the mind. All you need to do is follow a regular yoga routine and you will see the miracles in your body.
Yoga for issues faced by teenage girls:
- Yoga poses helpful for PCOS
- Yoga poses helpful in Menstruation.
- Yoga poses for weight maintenance.
- Yoga poses for a better body posture.
Yoga poses for PCOS in teenage girls
PCOS is the abbreviation for Polycystic Ovarian Syndrome. It is a common condition in teenage girls. It is the hormonal imbalance that raises the level of androgen (male hormones) in a woman’s body which leads to body morphology and functioning of internal organs changes. Usually, PCOS is caused by a combination of hereditary as well as environmental factors.
However these days, PCOS is on the rise among young girls because of stress, obesity, unhealthy eating habits, anxiety, depression, lack of exercise, and inadequate sleep. The most common symptoms of PCOS are irregular periods, excessive body and facial hair, acne, difficulty in losing weight, dark and thick patches on neck, armpits, or between your breasts.
PCOS is something that can be cured by changing your lifestyle. Introduce yoga in your daily routine, avoid high-calorie desserts, and sugary cold drinks if you are looking to cure PCOS naturally. Yoga is not just exercise, it is a way of life. That is why we advise all teenage girls to include yoga in their daily routine.
Yoga poses and breathing exercises for teenage girls for PCOS
1. Kapalbhati | Skull shining breath | Yoga for every teenage girls
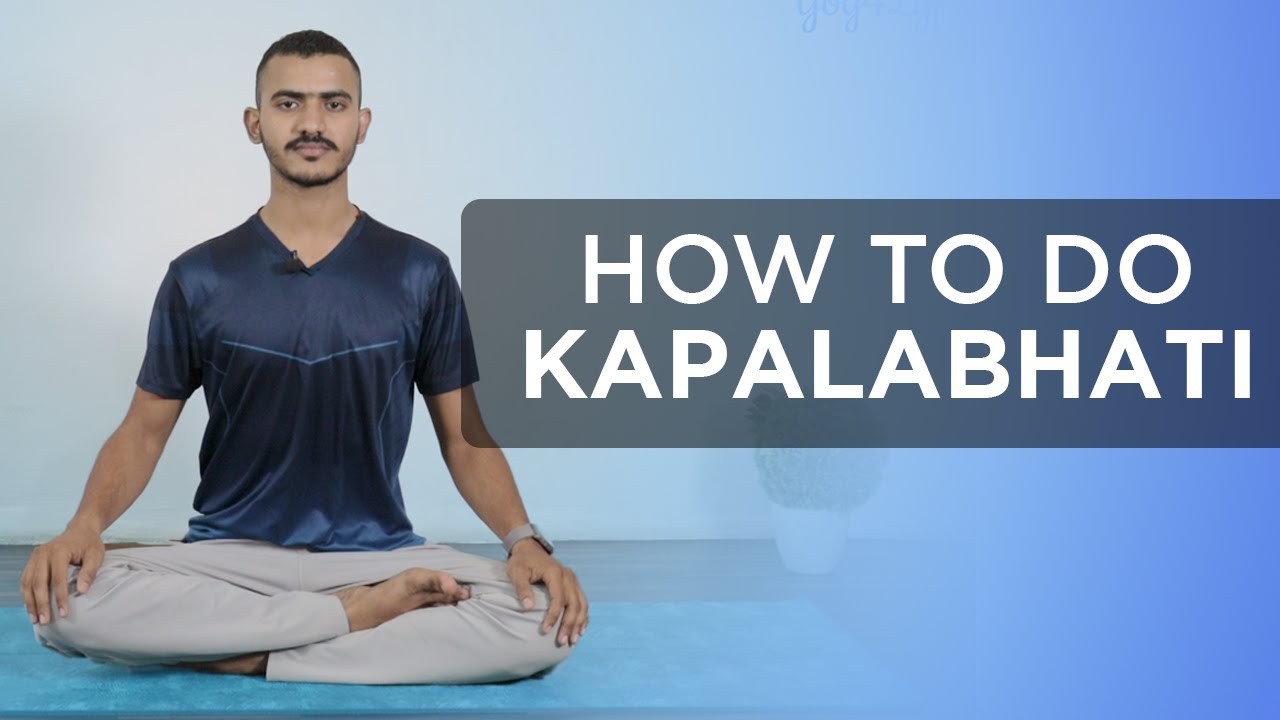
Steps:
- Sit comfortably on your mat and sit straight so that your back, neck, and head are aligned.
- Inhale passively and exhale forcefully through your nostrils only.
- Keep inhaling and exhaling in this manner for 30 -50 seconds.
Precautions:
- Avoid Kapalbhati if you are pregnant.
- Avoid if you are suffering from high blood pressure or heart-related discomforts.
- Not to be practiced when having an asthma attack.
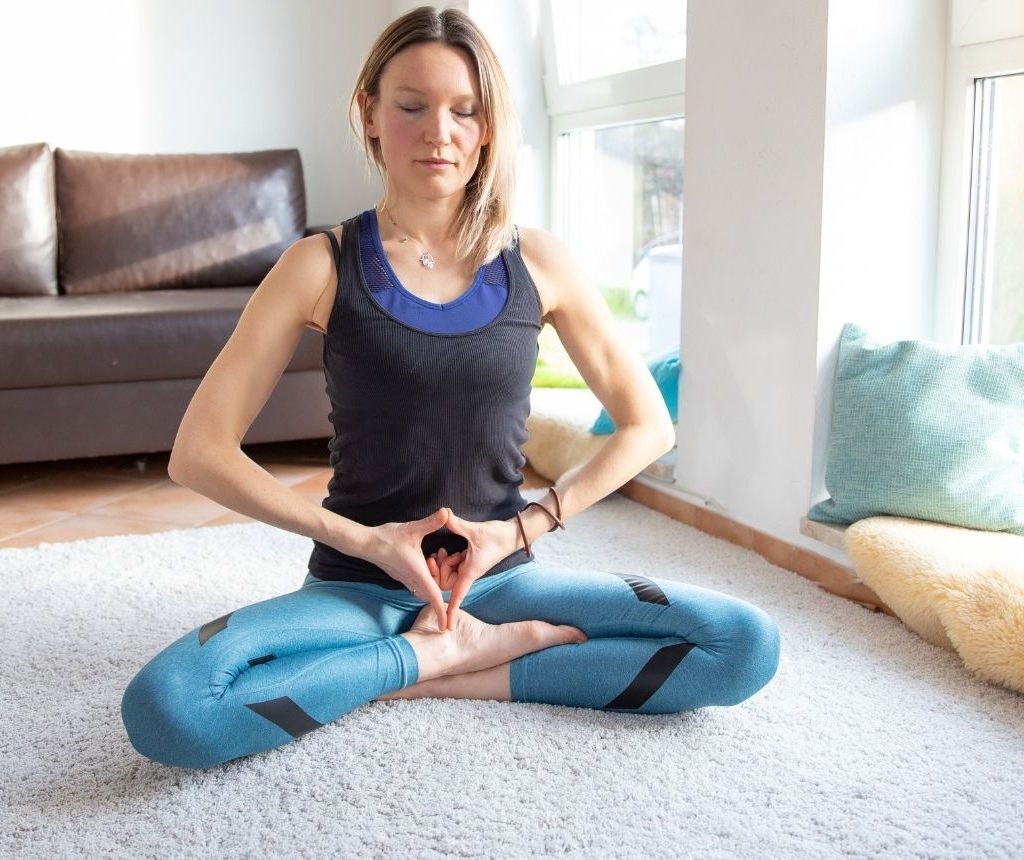
2. Yoni Mudra | Yoga for every teenage girls
Steps:
- On your mat sit in Padmasana with eyes closed. Make sure your spine is erect and head straight.
- Place your hands on the knees with fingers opened out. Take a few breaths here.
- Bring your palms together in ‘Namaste Position’ and point the thumbs up towards the ceiling.
- Now, while the fingertips of both the hands are joined together, open your palms wide apart.
- Next, as the fingertips and thumbs are still joined together, fold the little fingers, ring fingers, and middle fingers inwards so that the backs of fingers from one hand touch base to those of the other hands.
- Meanwhile, see that the two index fingers and two thumbs form a closed ring-like shape.
- Now, slowly press the pointed thumbs on your navel. Take a few breaths in this position. Make sure your eyes are closed while breathing.
- The importance of this mudra is the shape that is formed, which represents the source of the womb in a woman.
- Relax to release hands and repeat the practice of Yoni Mudra.
- Make a habit of practicing this mudra for 20-30 minutes every morning.
Precautions:
- Keep in mind the practitioner’s comfort while performing this mudra.
- Avoid this mudra if you are suffering from psychological disorders like depression.
3. Butterfly pose | Baddha Konasana | Yoga for every teenage girls

Steps:
- Sit straight on your mat with spine erect and legs stretched out in front of you.
- Now, bend your knees and bring your feet towards your pelvis. See that the soles of the feet are touching each other.
- Now hold your feet tightly with your hands.
- Now inhale deeply and as you exhale, press your thighs and knees down towards the floor.
- Keep breathing normally and start flapping both your legs up and down like a butterfly.
- Increase the speed slowly and gradually as much as you comfortably can.
- Slow down and stop. Take a deep breath and as you exhale, bend forward keeping the spine erect and chin up.
- Press your elbows on thighs or knees, pushing the knees and thighs closer to the floor.
- As you take long deep breaths, you will feel stretch in your inner thighs. Your muscles will feel relaxed.
- To release the posture, slowly bring the torso up, straighten your legs out in front and relax.
Precautions:
- If you are suffering from groin or knee injury, avoid this asana or place a blanket under your thighs for support.
- Do not speed up immediately. Take your time and gradually increase the speed of flapping.
- Sciatica patients should either completely avoid or practice this asana under expert guidance.
- Should be avoided by ladies if menstruating.
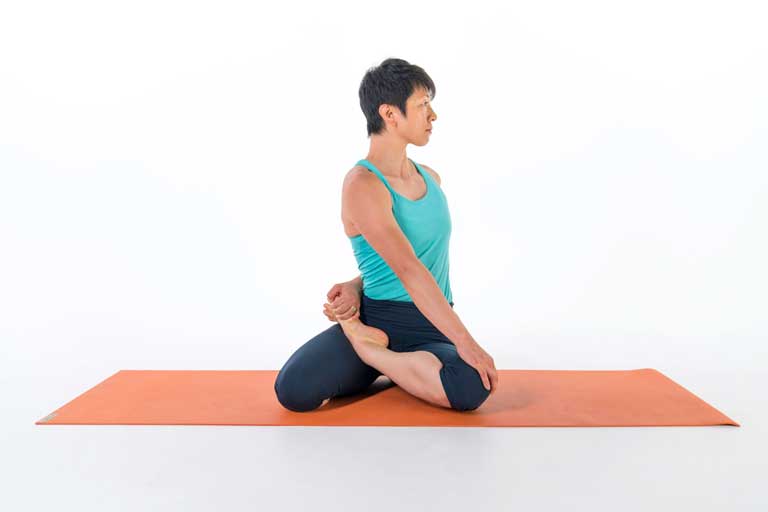
4. Bharadwaja’s twist | Bharadwajasana | Yoga for every teenage girls
Steps:
- Sit on the floor with legs stretched out straight in front of you. Your back must be erect and hands placed close to your hips.
- Slowly bend your knees and bring them close to your left hip, such that your right buttocks carry the weight of your body
- Rest the inner side of your left ankle on the arch of your right thigh.
- Take a deep breath and as you inhale, stretch your spine by extending as much as you possibly can. As you exhale, twist your upper trunk as much as you possibly can. Place your right hand on the floor and your left hand on the right outer thigh.
- See that your left hip presses your bodyweight down on the floor.
- Now slowly bend the upper part of your back and twist it around your backbone in a way that you feel the effect from the lower back to the tip of your head.
- Turn your head over the right shoulder and hold this pose for a minute or two.
- Exhale and slowly untwist your trunk to come back to the center position.
- Repeat on the other side.
Precautions:
- Avoid this asana if you have diarrhea, headache, high-low blood pressure, and if you are going through menstruation.
- Pay attention to your knees, end this asana if you feel pain.
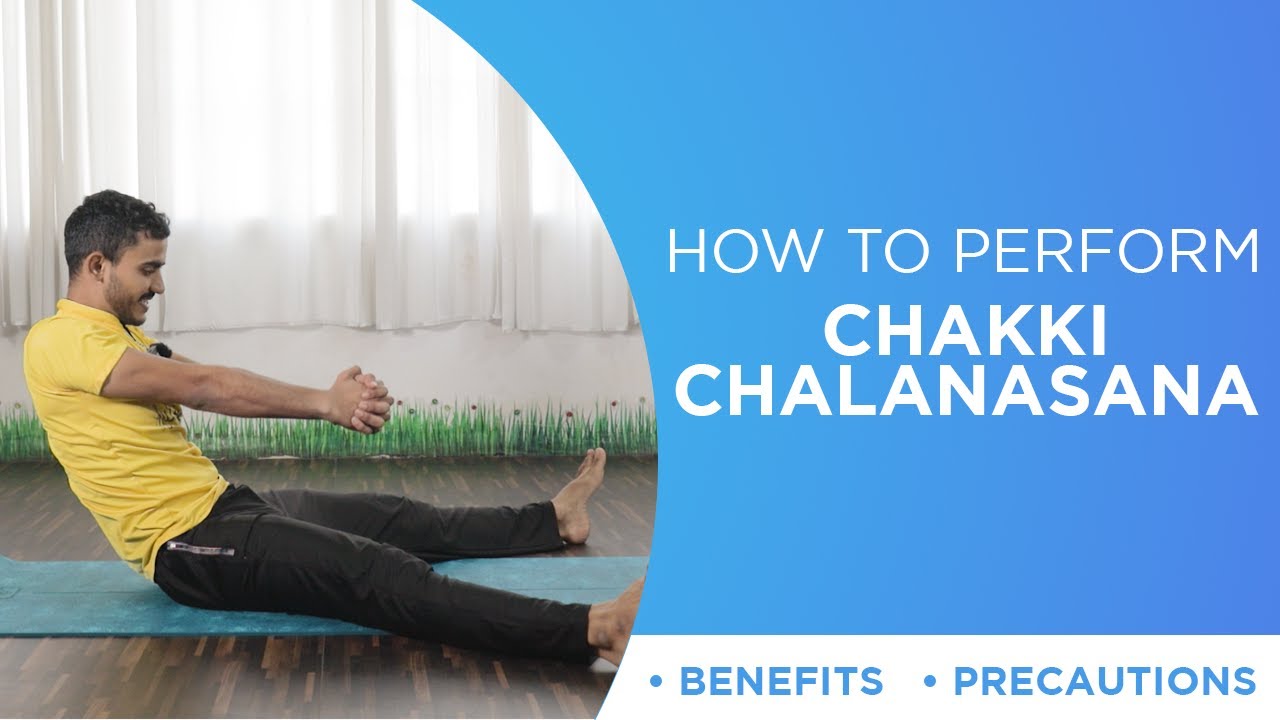
5. Mill Churning pose | Chakki Chalanasana | Yoga for every teenage girls
Steps:
- Sit down comfortably with your legs splayed apart.
- Outstretch your arms & clasp your hands at shoulder height in front of you.
- Take a deep breath and start moving the upper part of your body by leaning it to front and right making an imaginary circle.
- Inhale while you lean forward to the right and exhale while you move back to your left.
- Make sure to outstretch your arms while performing this asana.
- Take deep breaths while you perform this Mill Churning pose several times as per your convenience.
Precautions:
- Pregnant women having low blood pressure should not perform this asana. Also, people suffering from migraine or headache, lower back pain due to slip disk, or had recent abdominal surgery should avoid this asana.
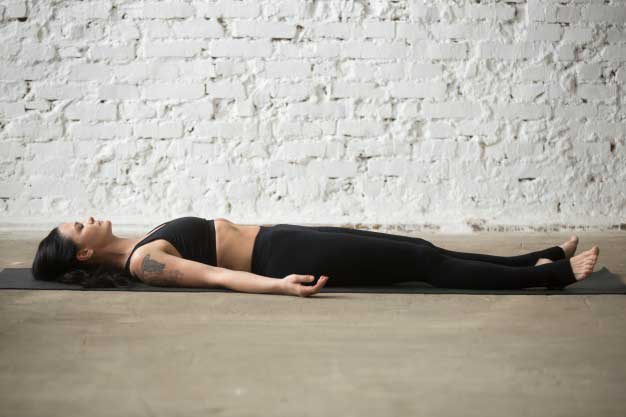
6. Corpse Pose | Shavasana | Yoga for every teenage girls
Steps:
- Lie flat on the floor keeping your back straight.
- Your palms, facing upwards, must be placed slightly apart from your body.
- Close your eyes and place your legs comfortably apart from each other. Make sure your toes are facing sidewards.
- Keeping your head and spine in a straight line, lay peacefully.
- Take a deep breath, draw attention to every part of your body.
- Breathe slowly, setting your body in a state of deep relaxation. Let it soothe your body, mind, and soul.
- Forget everything and try to focus on your body while breathing. Feel each and every breath going in and out.
- Remain in this position for a few minutes (make sure you don’t fall asleep) and slowly come back to your normal position.
Precautions:
- Avoid doing this asana in a noisy/disturbing environment.
- Make sure not to move your body while performing this asana. You need to remain completely still as even the slightest movement may disturb your practice.
Yoga poses for teenage girls during menstruation
Menstruation is a recurring phenomenon that is introduced to every girl during her teen years. Also known as periods, menstruation is a result of hormonal changes in the body. It is basically the excretion of female hormones estrogen and progesterone in the form of blood and tissues from the inside of the ovary. Menstruation prepares a girl for pregnancy, however, if no pregnancy occurs, the uterus or womb sheds its lining. ]
There is no denying the fact of how excruciating and painful it is. You will feel it in your body when you are about to menstruate with symptoms like headache, acne, abdominal pain or cramps, bloating and sore breasts, tiredness, mood swings, and food cravings. But including yoga in lifestyle can help teenage girls in accepting the period cycle and alleviating the pain. In the coming para we will learn how.
How yoga can help teenage girls in menstruation
We all know there is no sure shot cure for menstruation, but there is something that will help you ease out your pain and it’s nothing but our very own, ages old and scientifically proven yoga regime. Yoga plays a significant role in regulating your monthly menstrual cycle and alleviating the pain to a large extent. It not only helps you physically but also calms your mind and helps you stay positive.
Yoga also has the potential to lift you up from the everlasting symptoms up cramps, premenstrual syndrome, mood swings, and put you in a place where you feel less suffering. With a little consistency in yoga poses, you will find solace and your body will feel relieved and cramp-free during the periods.
We have listed down yoga poses that will help you with menstrual cramps, mood swings, and smooth blood flow.
Yoga poses for teenage girls for menstrual cramps
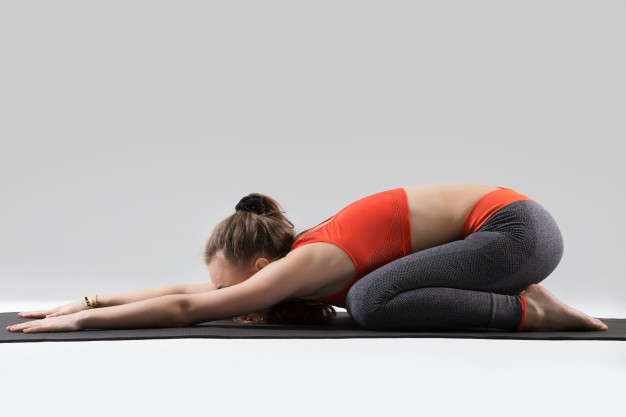
1. Child Pose | Balasana | Yoga for teenage girls
Steps:
- Sit on your knees resting your upper body on the thighs. Your feet should be lying on the floor.
- Make sure to keep your waist straight and maintain a short distance between your knees.
- Inhale and lean your upper body forward and try to rest your forehead on the floor. Use a pillow if you are unable to place your forehead comfortably on the floor.
- Stretch your arms in front of you. Your chest should touch your thighs.
- Try to lengthen your tailbone towards the pelvis.
- Now bring your arms back alongside your thighs, palms facing upwards.
- You are now in Balasana | Child pose, remain in this posture for 30 seconds to 2 minutes, and keep breathing slowly.
- Now to come back to your normal position, bring your palms under the shoulders and slowly raise your upper body. Lift your torso from the tailbone as it presses down and into the pelvis.
Precautions:
- People suffering from Diarrhea should avoid this asana.
- If you have a knee injury or joint pain, avoid this asana or practice it under expert guidance.
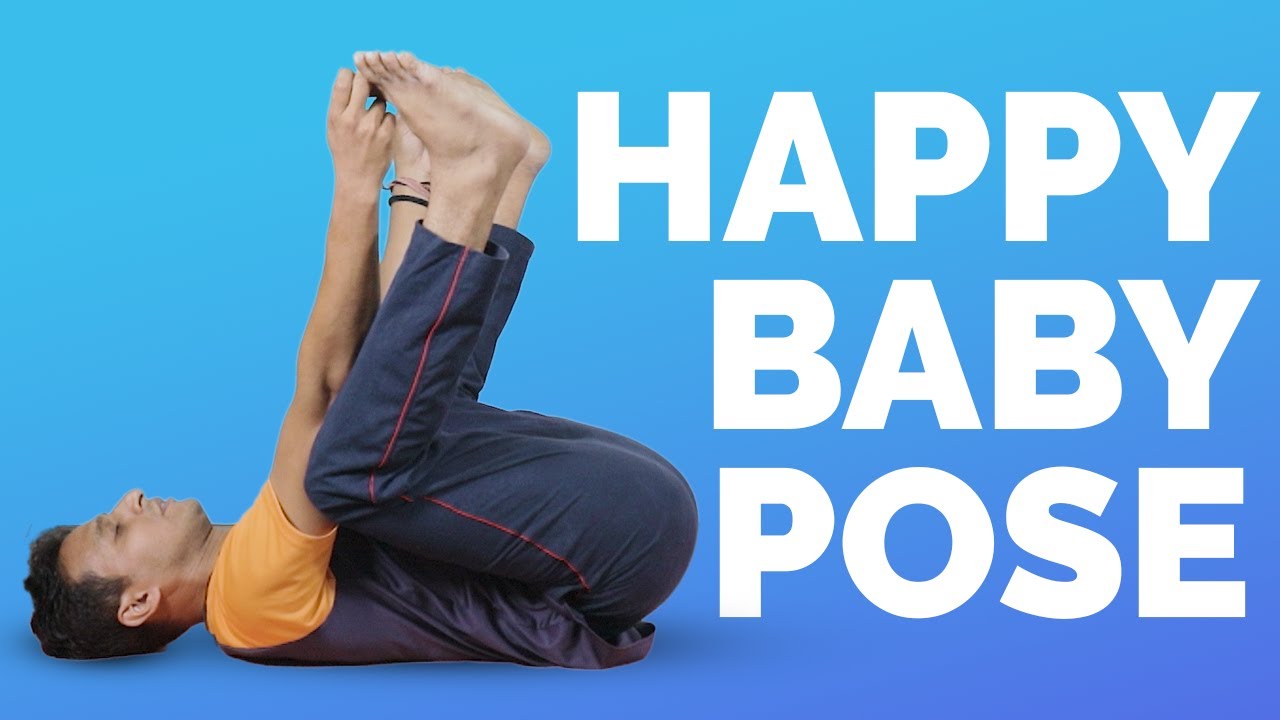
2. Happy baby pose | Anandasana | Yoga for every teenage girls
Steps:
- Lie on your back.
- Bend your knees into your belly after exhaling.
- Then inhale deeply and hold your feet with your hands.
- Open your knees slightly wider than your torso and bring them up toward your armpits.
- Keep pulling your hands down gently to create resistance.
Precaution:
- A pregnant woman should avoid this pose.
- Avoid this pose if you are suffering from any kind of knee injury or neck injury.
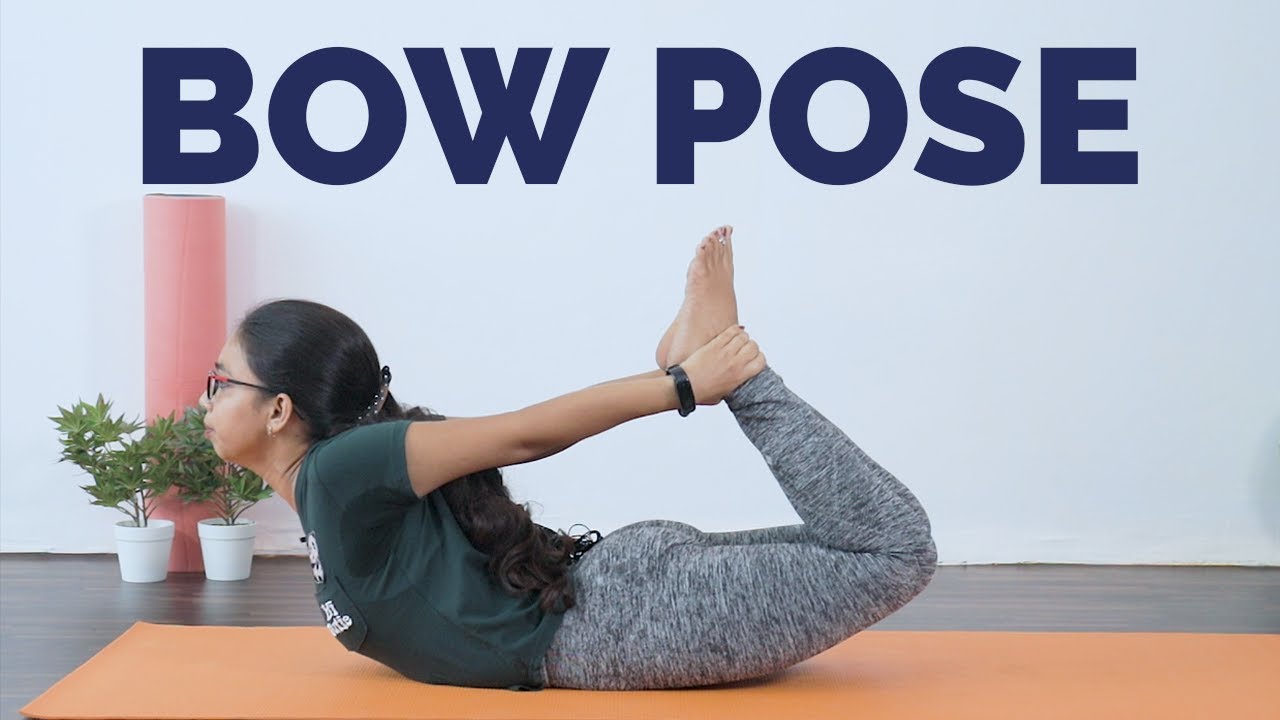
3. Bow Pose| Dhanurasana | Yoga for every teenage girls
Steps:
- Lie stomach-down on the floor.
- Raise front torso, supporting weight on the stomach.
- Raise legs off the floor, fold at knees.
- Take hands back and take hold of your ankles, arching up and back as much as you can.
Precautions:
- One should not practice this right after having a meal or right before sleeping.
- Avoid this pose if you are suffering from high blood pressure or any heart problems.
4.Camel Pose | Ushtrasana | Yoga for every teenage girls
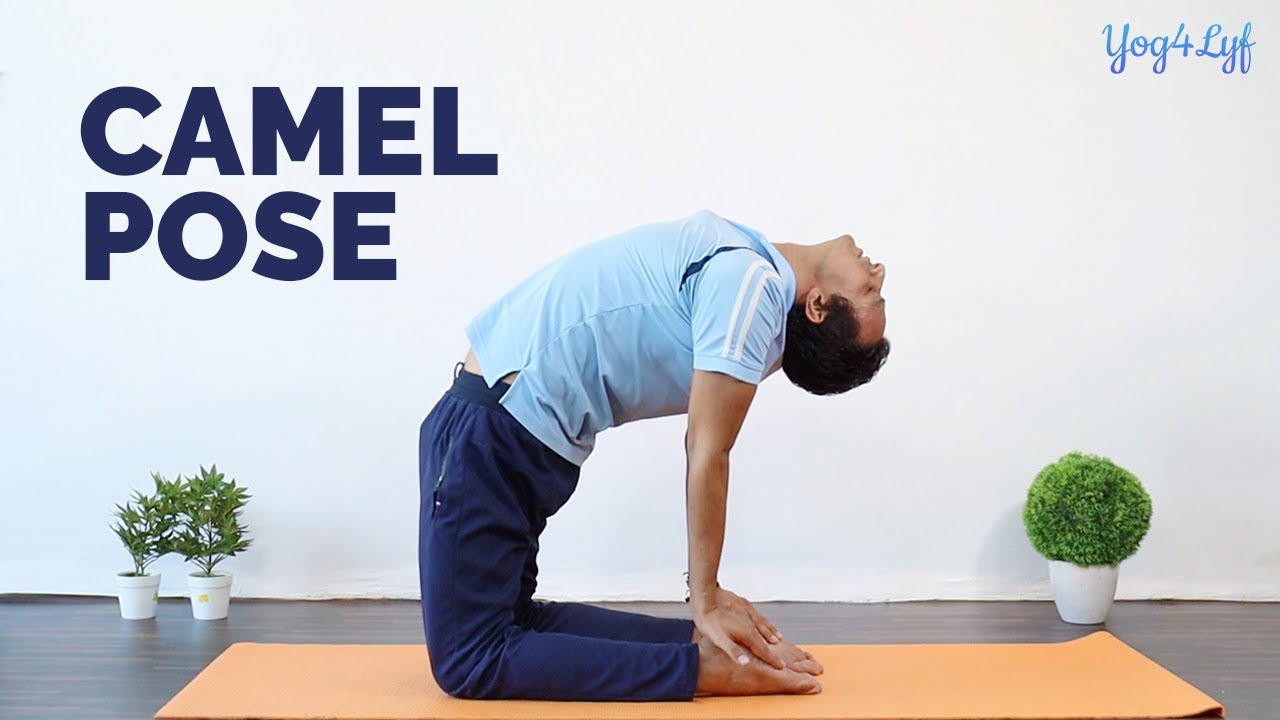
Steps:
- First of all, kneel down on the floor.
- Keep your thighs and feet together.
- Toes should be pointing back and resting on the floor.
- Bring the knees and the feet about one foot apart and stand on the knees.
- Inhale, bend backward slowly.
Precautions:
- Avoid this pose if you are suffering from high or low blood pressure.
- Do not practice the camel pose if you have Migraine, serious lower back or neck injury.
- Avoid it if you are suffering from Insomnia.
5. Cat-Cow pose | Yoga for every teenage girls
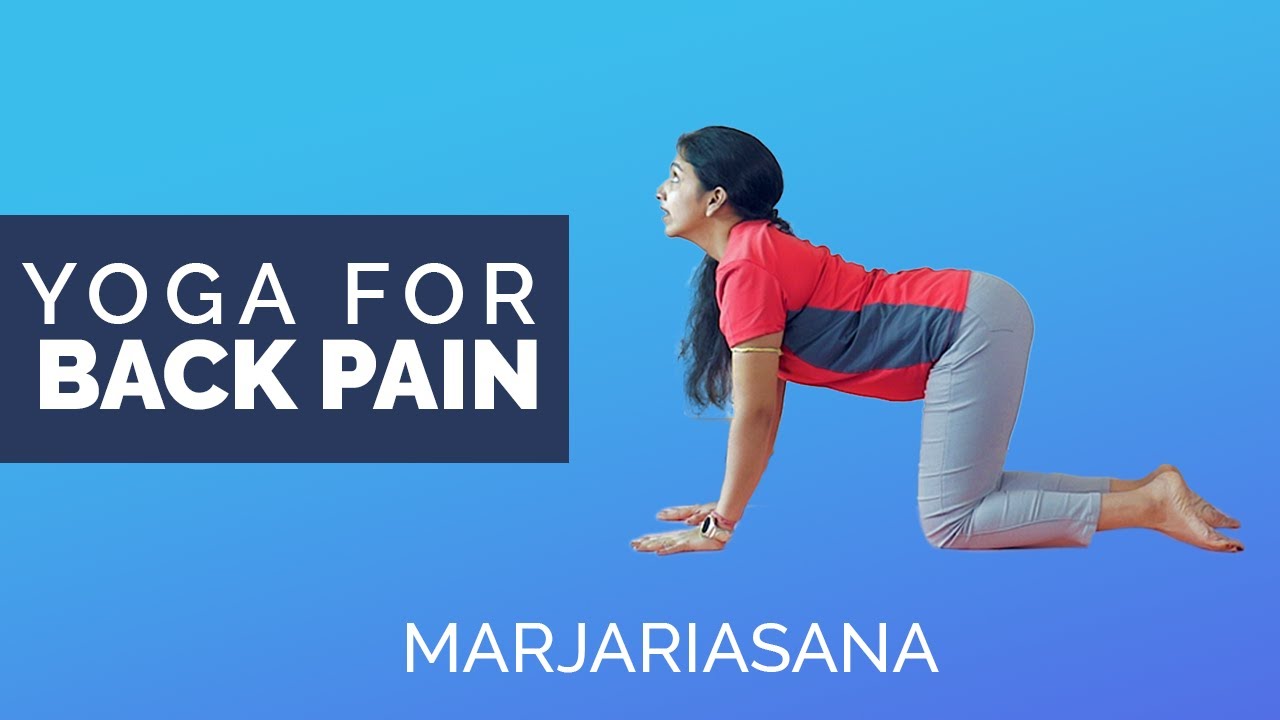
Steps:
- First, come to a position same as a baby crawling that would be palms on the floor and knees on the floor.
- Be in a neutral position with your head and neck and spine aligned.
- Then we will begin with Cow Pose, so inhale when you drop your belly towards the mat. Lift your chin and chest, and gaze up toward the ceiling.
- Then, we will move to Cat Pose, you exhale and push your belly to your spine and round your back toward the ceiling. The pose should look like a cat stretching its back.
- Inhale, coming back into Cow Pose, and then exhale as you return to Cat Pose.
- Repeat 5-20 times and rest.
Precautions:
- Avoid this pose if you have any knee injury.
- A pregnant woman should also avoid this pose and it might stress the belly or practice it when supervised.
Yoga poses for teenage girls for Smooth Blood Flow
1. Lying Spinal Twist | Supta Matsyendrasana
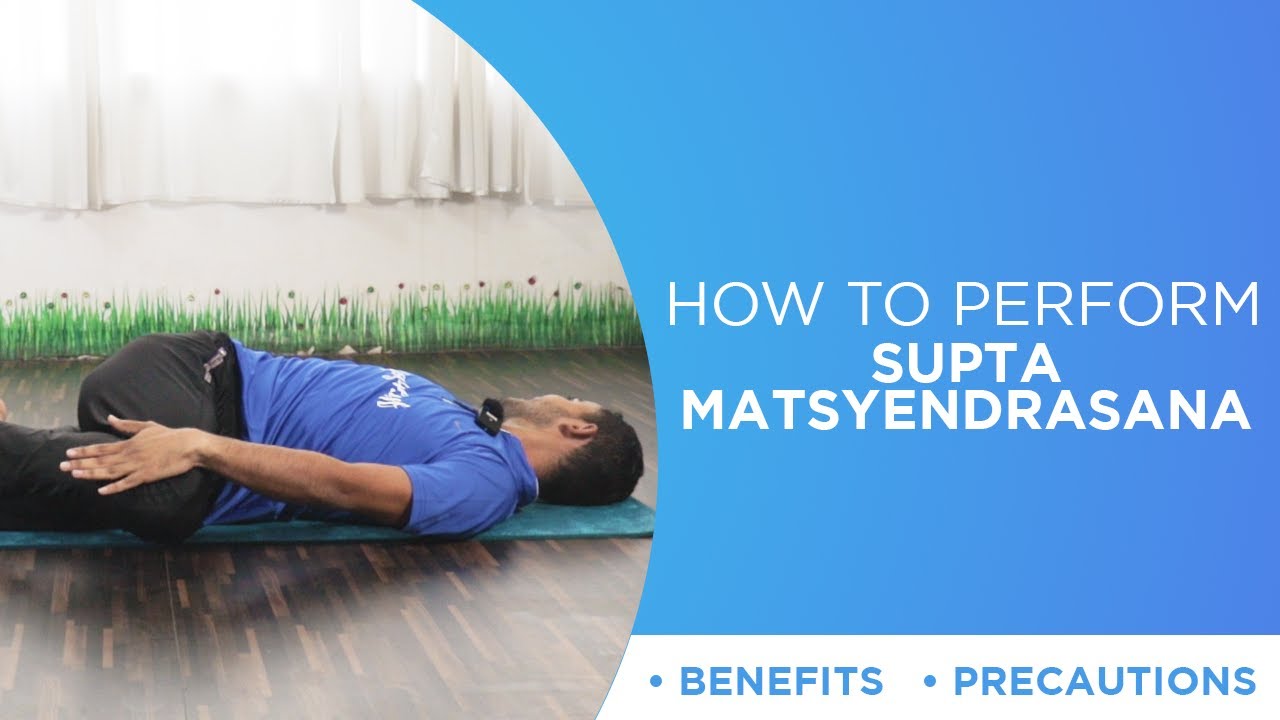
Steps:
- Lie down gently on your back.
- Bend your knees and bring your feet towards your hip. Make sure the sole of your feet is resting flat on the floor.
- Interlock your fingers and place your palm under the back of your head. Push your elbows towards the floor as much as you can.
- Take a deep breath and turn both your legs on the right side. Try to touch your right thigh to the floor.
- Hold your breath for 3-5 seconds and inhale while you bring your knees right back to the center.
- Lower your knees & gently bring back your hands to the side of your body to release this position.
Precautions:
- Those having any kind of hip, knee, or spine injury should avoid this asana.
2. Pigeon Pose | Rajakapotasana

Steps:
- Begin this asana with Downward Facing Dog pose ( Adho Mukha Shvanasan ).
- See that your knees are right under your hips and hands placed a little ahead of your shoulders.
- Now extend your right knee forward such that it is just behind the right wrist. While you are at it, keep your right shin under your torso and bring your right foot in front of your left knee. The outsides of your right shin must be on the floor.
- Slowly slide your left leg to the back. Keep your knees straight and place the front of your thighs on the floor. Lower your right hip on the floor and place your right heels in front of your left hip.
- You can also direct your right knee towards the right making sure it is outside the line of the hip.
- Your left leg must be extended straight from the hip. Make sure it is not angled or turned to the left side.
- Now rotate it inwards such that its midline is pressed against the floor. Slowly inhale and as you exhale, bend your left leg at the knees. Then try to stretch your torso backward so that your head touches your foot.
- Raise your arms, gently folding them at elbows. Use your hands to bring your foot towards the head.
- Keep up this upright position of your pelvis. Push it down. At that point, lift the lower edges of your rib confine against the weight of the push.
- Stay in this position for 30 seconds to one minute.
- Now bring your hands back to the floor and drop your left knee down. Slide your left knee forwards.
- Breathe out and get into Downward Facing Dog pose.
- Repeat on the other side.
Precautions:
- This is an advanced level asana. Its best practiced under expert guidance.
- Avoid this asana if you have severe ankle, knee, or back injury.
3. Corpse Pose | Shavasana
4. Knee to chest stretch | Apanasana

Steps:
- Lie down on your back and bend your knees.
- Gradually inhale and lift your knees towards your chest, support your knees with your arms.
- Lift your neck and try to touch your knees with your nose.
- Hold for 3-4 breaths and relax.
- Continue the process for 5-10 times to throw out all the toxins in your body.
Precautions:
- Avoid this pose if you have a spinal, knee, neck injury, or hip injury.
- Women who are pregnant should not practice this pose after the first trimester.
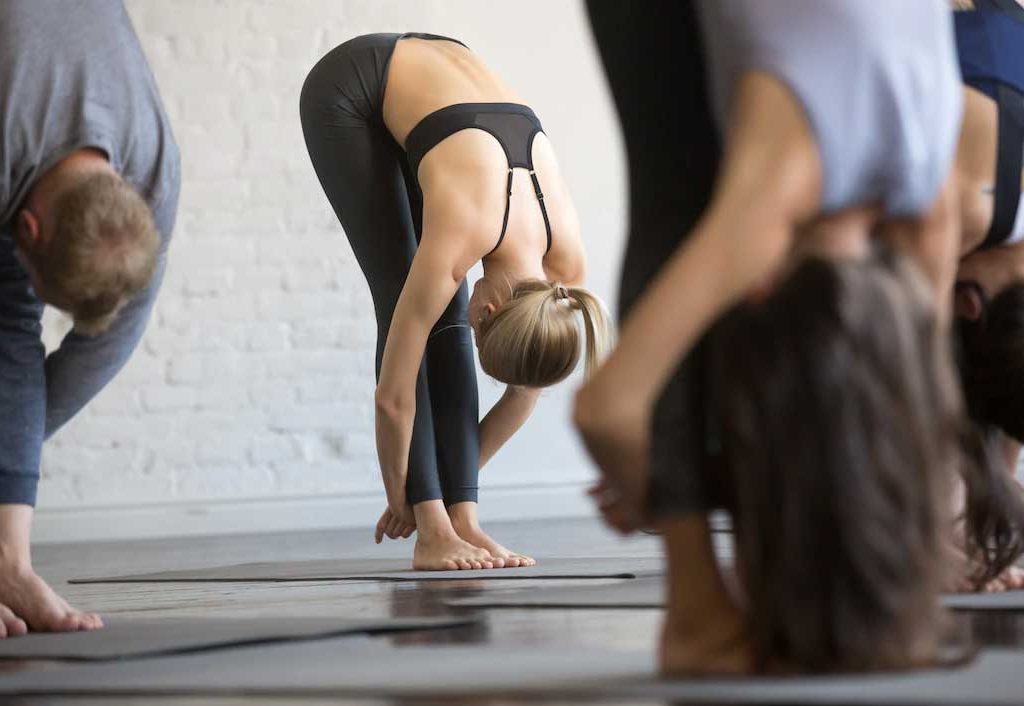
5. Standing forward bend | Uttanasana
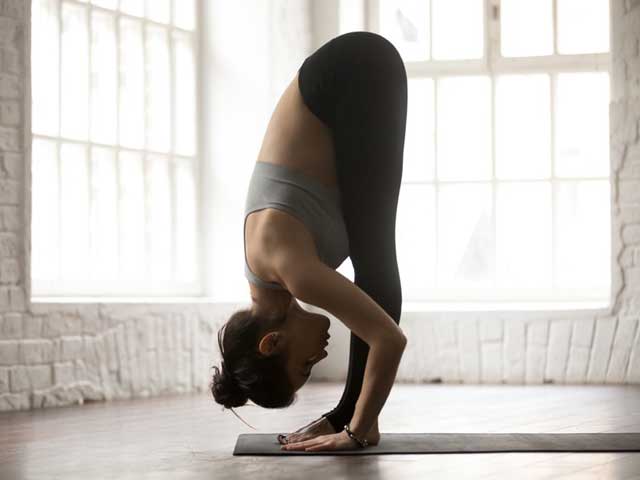
Steps:
- Stand straight on the ground and maintain distance between your feet.
- Raise both your arms together towards the sky with a deeply focused inhalation.
- Exhale and bend forward, letting your palm touch the floor.
- Your hips would act as a common point between the upper body and lower body, maintain balance.
- Feel your back stretching in opposite directions as you pull the head down and in and press the hips up.
- Breathe and hold for 4-8 breaths, pressing the belly into the thighs on the inhalation.
Precautions:
- You need to refrain from practicing this pose if you face chronic problems or have a history of any injury in your knee joints, ankle joints, or back.
Yoga poses for PMS & Mood Swings
1. Tree pose | Vriksasana
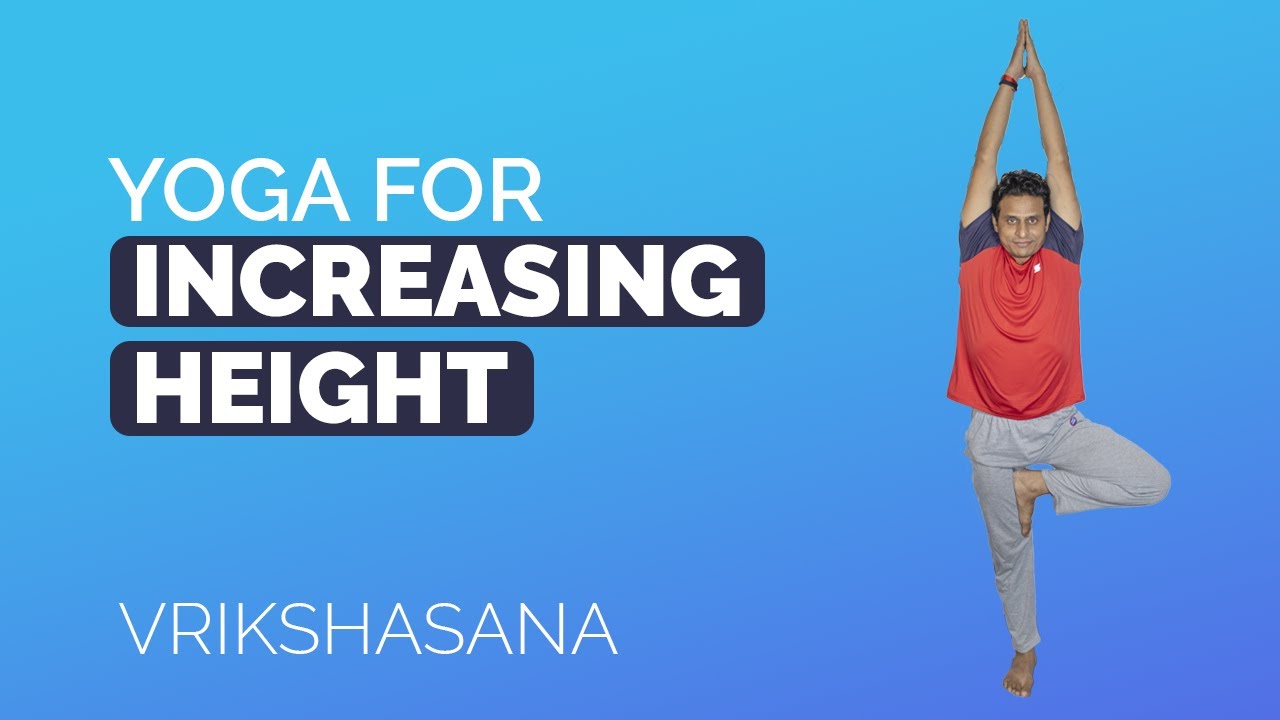
Steps:
- Stand straight with both your legs well balanced.
- Raise your feet and place it on your inner thigh of another leg, above knees.
- Your whole sole area of the raised leg should be touching the inner thigh
- Maintain a balance on one leg might be difficult, try putting a right and balanced amount of weight on the body parts.
- Raise your hands above your head and let your palm face each other, and then brought close to each other, joining.
- Maintain the balance and hold the pose as long as possible, practice it every day, and try keeping a goal of maintaining the pose for 1 minute.
Precautions:
- Never place your feet exactly on the side of the knees, as the pressure would damage your knee, thus it should be always placed above knees in the inner thigh area.
- If you are suffering from high blood pressure, do not keep your hand above your head, place them near your chest.
- Avoid this pose if you are suffering from insomnia or migraine.
2. Cobra Pose | Bhujangasana

Steps:
- To begin with, first, lie down flat on your stomach.
- Place your legs comfortably and toes touching the floor and sole facing the roof.
- Then place your palm near your chest,
- Keep your elbows closely tucked inside.
- Then without moving your lower body, raise our upper body supported by your hands.
- Keep breathing normally and stay in the same position for 30 second
- Withdraw from that position, take rest, and try again for more 30 seconds.
Precaution:
- Do not practice Cobra pose, if you have any recent back or wrist injury.
3. Legs Up The Wall Pose | Viparit Asana
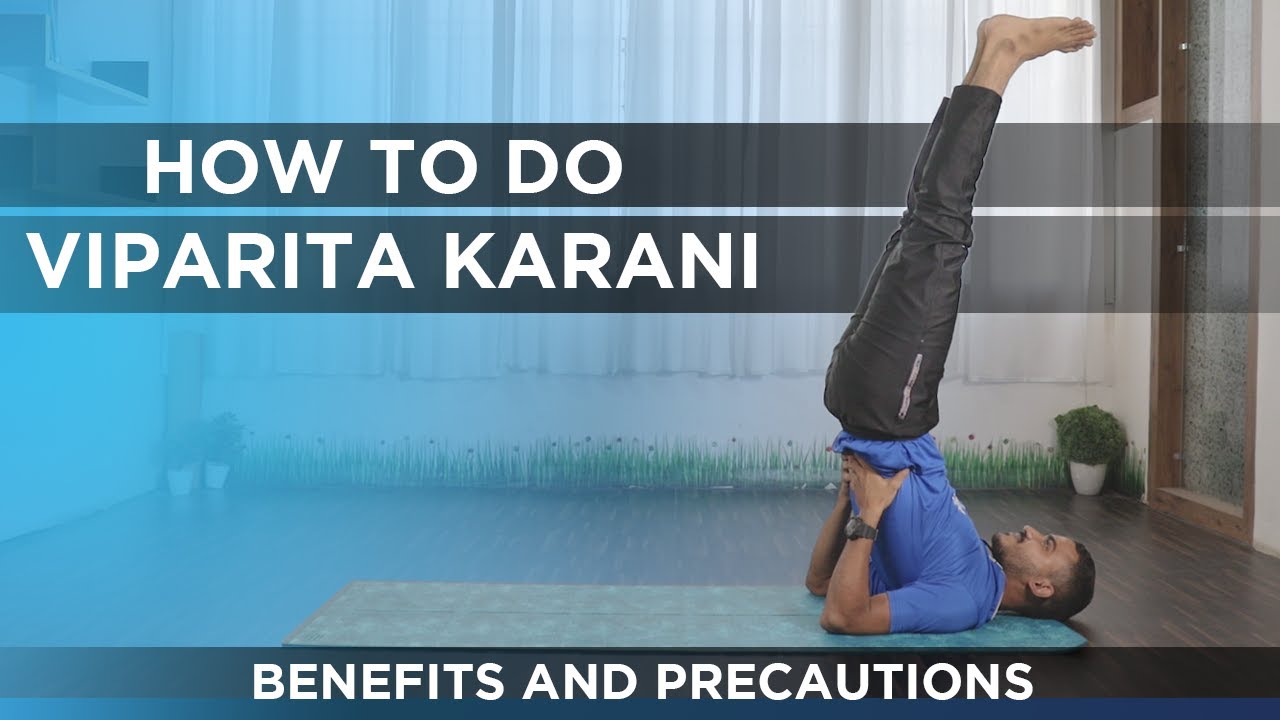
Steps:
- To perform this pose, you need to find a space near a wall.
- Sit in front of the wall and lie down and keep your knees bend.
- Keep your hands by your side and raise your legs and let it touch the wall.
- Maintain distance between your buttocks and the wall so that you can push it to stretch more.
- Make sure your back and head are resting on the floor, making a 90-degree angle.
- If needed, use your hands to support your hips and form a curve in your lower body.
- Do not put pressure on your neck.
- Close your eyes and breathe. Hold the position for at least five minutes. Relax and roll yourself on any side.
Precautions:
- To be avoided during menstruation.
- Avoid practicing this pose if you have eye problems like glaucoma.
- If you notice a tingling in your feet when you practice this pose, bend your knees and touch the soles, bringing your heels close to the pelvis.
4. Alternative nostril breathing | Anulom Vilom
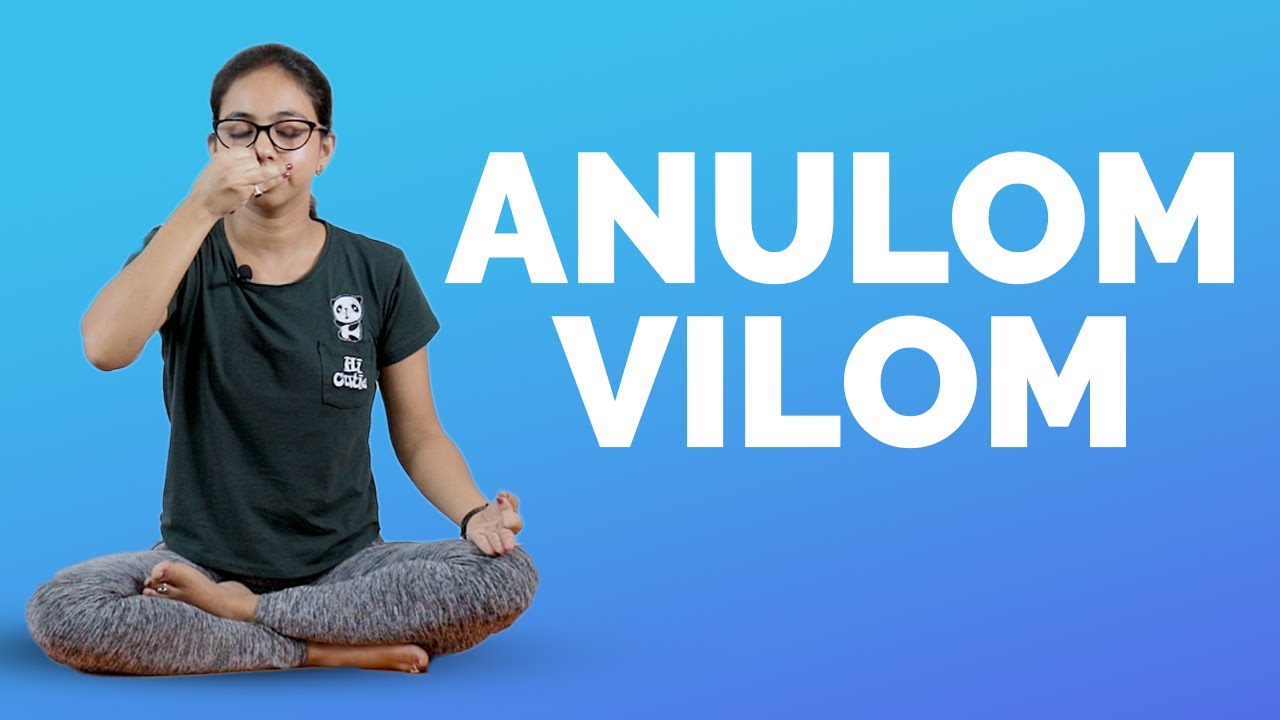
Steps:
- Sit comfortably on your mat and sit straight so that your back, neck, and head are aligned.
- Let your left-hand rest on your left knee.
- There is this particular hand pose that one has to perform with his right hand. There is a reference image. You have to curl up your index and middle finger and let the other fingers be open and not curled up.
- Maintaining the same hand pose, use your thumb to press your right nostril and inhale deeply from your left nostril.
- Hold your breath for 5 seconds and then press your left nostril with your ring finger and lift your thumb from your right nostril and exhale slowly.
- Keep repeating this 15-20 times.
Precautions:
- Avoid practicing it if you are suffering from high blood pressure or any heart disease.
Yoga poses for Weight Maintenance
Adolescent age is a very crucial phase in our lives. With the body going through vast hormonal changes, it is highly likely to gain weight during this phase. On average, about 20% of teens between the age of 12 to 19 are overweight. And obese teens are more likely to turn into obese adults.
Factors resulting in overweight teenage girls
- Eating high calorie food
- Lack of exercise
- Stress-eating or binge-eating
- Medical illness
- Heredity
Weight management is often linked with yoga, not just because of the stringent nature of this practice but also because of the effectiveness and mindfulness of it. By including regular yoga in your lifestyle along with basic changes in food habits, you can witness miracles in your body. Teenage is the best time to sow seeds of yoga in our body and keep reaping the fruits of it throughout the lifetime. Yoga is the most important step towards a fit and stress-free lifestyle. We have listed below the best suited and most effective yoga poses for weight maintenance.
1. Plank pose | Phalakasana
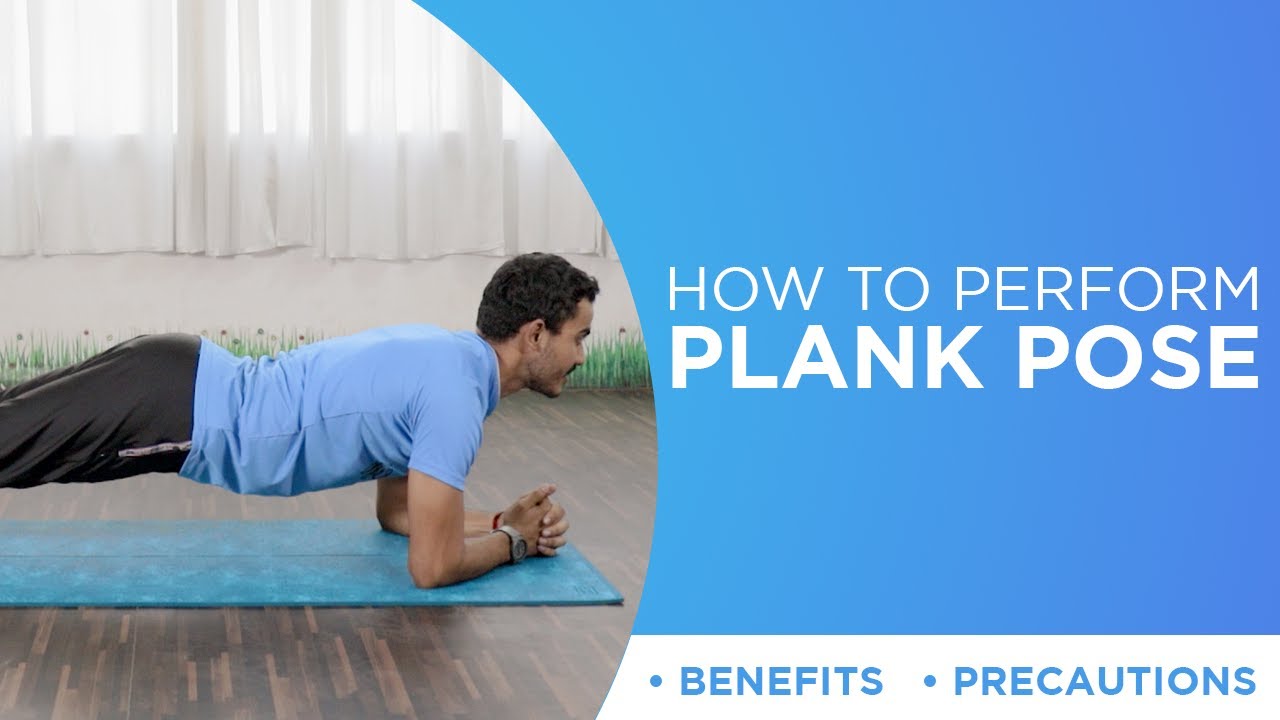
Steps:
- Calm yourself and lie down on the mat on your stomach.
- Bring your palm near your shoulders and raise your torso towards the ceiling.
- Make sure that your shoulders are parallel to your palms.
- Allow your buttocks to be near the shoulder level.
- You should be on your toes while doing so that the pose is properly done.
- Hold this pose for as long as you can and with practice aim it to hold it at least for 30 seconds and gradually increase the time.
Precautions:
- Avoid practicing this pose if you are suffering from carpal tunnel syndrome.
- Those with osteoporosis should also avoid Plank Pose due to the risk of fractures.
2. Warrior pose | Virabhadrasana
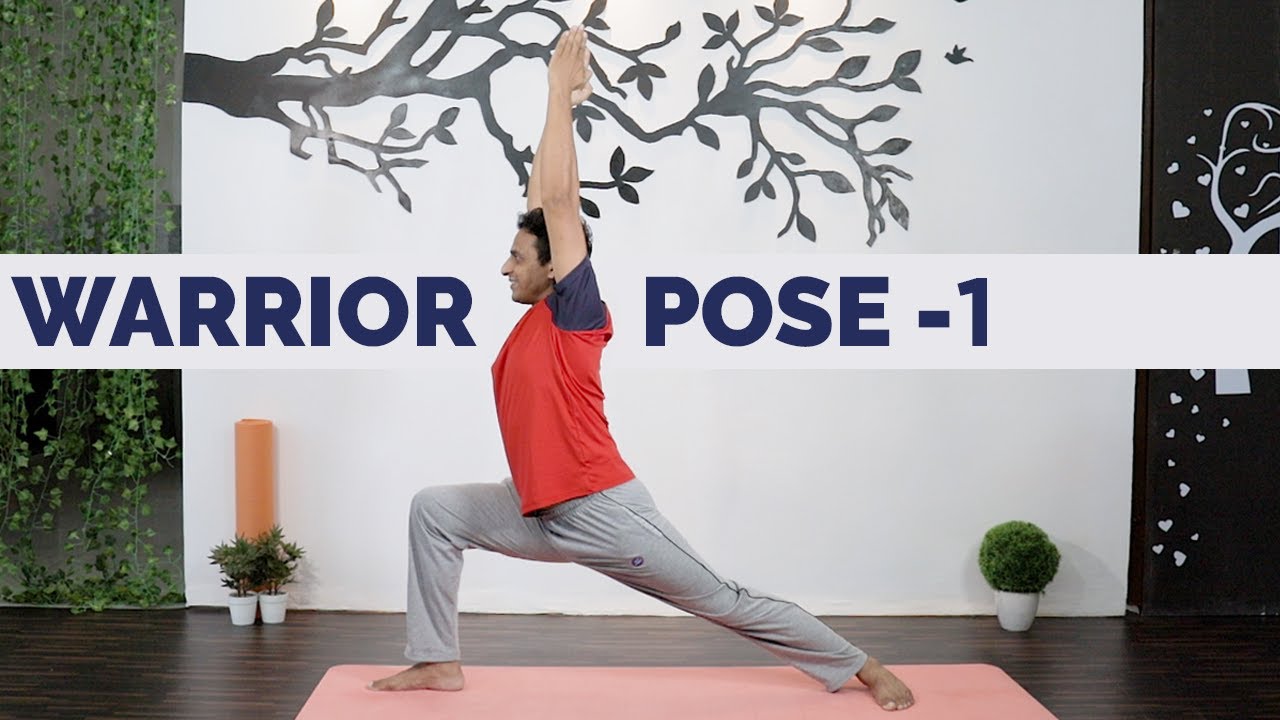
Steps:
- Stand straight and keep 3 ft. distance between your legs.
- Turn your right leg to a 90-degree angle and the left leg be kept in a comfortable angle.
- Then turn your upper body to your right side and bend a little, folding your right leg and left leg straight.
- Raise your hands above your head and hold the pose for 30 seconds
- Repeat the same on the other side too
- You can gradually increase the time of holding the pose can repeat the same after taking some rest.
Precautions:
- Avoid this pose if you are suffering from high blood pressure and any heart problems.
- Avoid this pose if you recently suffered from Diarrhea.
- Use some support if you have any knee-related issues, like any kind of injury or arthritis.
3. Triangle pose | Trikonasana

Steps:
- Stand on your mat with your feet apart. (4-5 feet)
- Keep your heels are aligned with each other.
- Turn your right foot out 90 degrees.
- Raise your arms to the side of your shoulder, and parallel to the ground with your palm facing down.
- Exhale and position your right hand in the same direction as your right foot. Shift your left hip back so your tailbone and pelvis tilt toward the wall or space behind your left foot.
- Turn your left palm forward, with your fingertips towards the sky.
- Rest your right hand near your ankle. Align your shoulders so your left shoulder is directly above your right shoulder.
- Hold this position for 1 minute, take rest and so the same with your left leg turning to 90 degrees this time and repeat the above-mentioned steps with your left hand.
Precautions:
- Avoid practicing this pose if you are suffering from high blood pressure or headache.
4. Downward Facing Dog Pose | Adho Mukha Svanasana

Steps:
- Stand straight on your legs then bend forward.
- Place your palms on the floor, note that your fingers are widely spread and balanced.
- There should be enough space between your knees and palm.
- Now, take note that your wrists are exactly aligned with your shoulder, and knees aligned with hips.
- Stretch your elbows and let your upper back relax.
- Lift both your knees from the floor and raise your pelvis too.
- Straighten your legs gradually, as straight as possible.
- Bring your body into the shape of the alphabet ‘A’.
- Stay stable and do not change the distance between your palms and feet.
- Draw your shoulder blades into your upper back ribs and toward your tailbone.
- Hold this position for 30 seconds and later you can increase your time limit.
- To relax from that position, relax your knees, and bend down.
Precautions:
- If the person practicing this pose has stiff or weak back muscles, tight hamstrings, sciatica, or knee problems should practice this pose gently and gradually easing in and out of the pose while keeping the knees bent and back straight.
- Those with Carpal Tunnel Syndrome should press down into the base of their fingers.
5. Twisted Chair Pose | Parivrtta Utkatasana
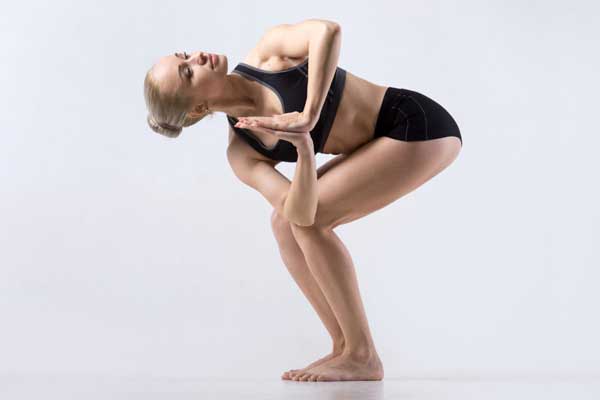
Steps:
- To begin with, stand straight with your feet joined together touching your big toes. You may refer Mountain Pose (Tadasana).
- Squat down and come to chair pose (Utkatasana). Make sure your knees are together and weight should fall on your heels.
- Bring your hands in front of your chest in Namaste Position.
- Take a deep breath and lengthen your spine. While your exhale, hinge forward and then twist to your right. See that your left elbow is outside your right thigh.
- Press your palms together to create more space between your collarbones.
- Try to lower your hip an extra inch keeping your knees together.
- Hold this position for 3-5 breaths before releasing it to forward fold.
- Repeat this for another side.
Precautions:
- Avoid this pose if you have knee, ankle, or back injury.
- Try to maintain a slight arch in your back; don’t keep your back flat.
- Remember to breathe smoothly during this asana. Your heart rate will increase, but if your breath becomes strained, ease up until you can breathe deeply again.
Yoga poses for improving body posture
Our sedentary lifestyle has gifted us something that will take a toll on our body in ways we can’t even imagine, yes we are talking about incorrect body posture. Sitting on desk all day in front of computers with minimal body movement results in slouching and affects our body posture immensely. It is something that is in front of our eyes yet we fail to see through. Incorrect body posture not only affects your metabolism but also causes back pain, cardiovascular issues, and obesity.
Yoga is a fantastic way to combat the factors the contribute to bad body posture. Regular practice of a few asanas is all you need. These easy to adapt asanas are specifically designed to counteract your tendency to slouch as well as increase your body awareness and core strength resulting in improved body posture.
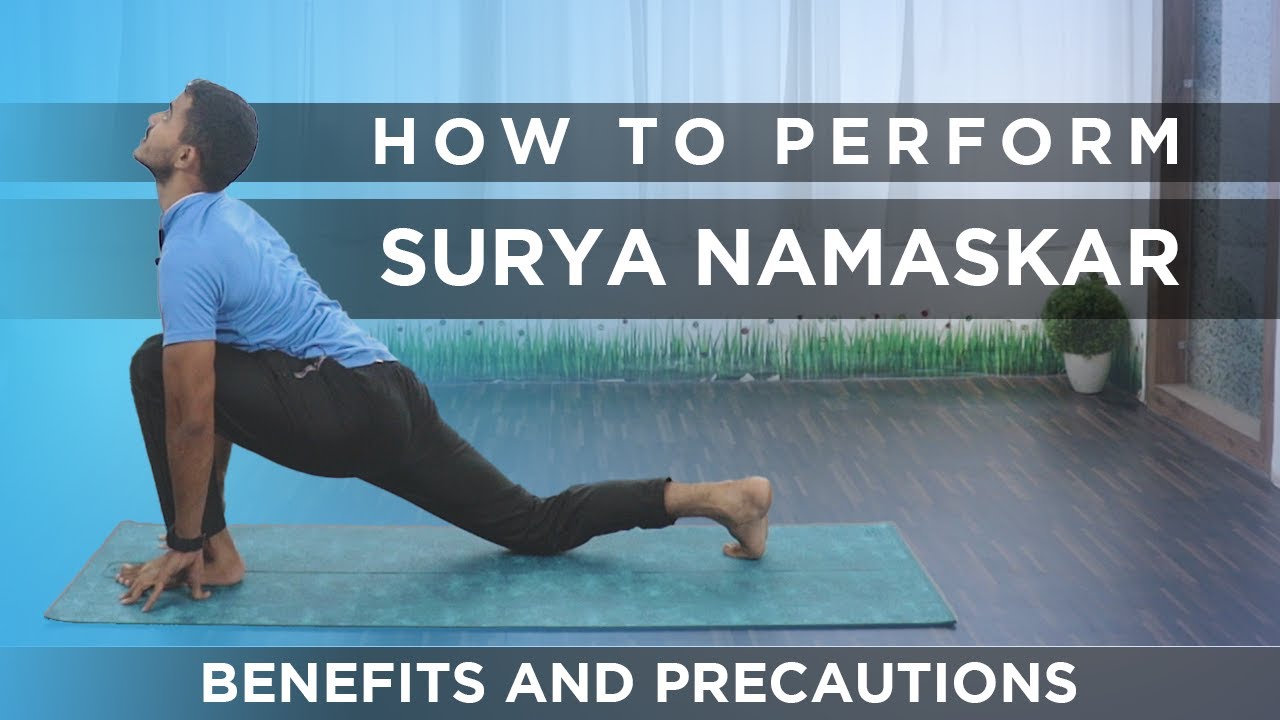
1. Sun Salutation | Surya Namaskar
Sun Salutation or Surya Namaskar is a yoga regime that comprises of 12 powerful yoga poses designed to have an immensely positive impact on body, mind, and soul. It is best done early mornings on an empty stomach. It serves as an all-purpose yoga tool, that besides good health Surya Namaskar also provides us an opportunity to express gratitude to the mighty sun for sustaining life on this planet.
Steps:
- Tadasana – Stand on your mat keeping your feet slightly apart and parallel to each other. Bring your palms in front of your chest in ‘Prayer Position’.
- Hastauttanasana- Take a deep breath, slowly raise your arms up above your head, keeping the shoulders close to ears. In this pose, your goal is to stretch your whole body from heels to tips of fingers.
- Hastapadasana- As you breathe out, bend forward from your waist. Make sure your spine is erect. Place your hands down to the floor beside the feet.
- Ashwa Sanchalasama- Inhale and push your right leg back as far as you comfortably can. Bring the right knee to the floor and look up towards the sky.
- Dandasana- Now similarly take your left leg back and bring your body in a straight line.
- Ashtanga Namaskara- Gently bring your knees down to the floor as you exhale. Raise your hip back slightly, slide forward, rest your chest and chin on the floor. See that both your hands, feet, knees, chest, and chin are touching the floor.
- Bhujangasana- Now raise your upper body up into the cobra pose. Your elbows are bent in this pose and you are looking up at the sky. You want to stretch your spine in this posture.
- Adho Mukho Svanasana- Now slowly breathing out, lift the hips and tailbone up to bring the body in inverted ‘V’ shape.
- Ashwa Sanchalanasana- Bring your right foot forward between the two hands. The left knee goes down on the floor. Make sure to press your hips and lookup.
- Hastapadasana- Bring the left foot forward. Keep the palms on the floor. If necessary, you may bend your knees.
- Hastauttanasana- Same as the second pose, raise the hands up above your head, and slightly bend backward. See if you can stretch your spine.
- Tadasana- Back to the first position. Straighten your body, bring the arms down. Relax in this position and observe the sensations in your body.
Precautions:
- People suffering from arthritis, hernia, high blood pressure should practice this under expert supervision.
- Heart patients should consult a doctor before starting this yoga routine.
- If you are suffering from back pain, avoid this yoga routine.
2. Fish Pose | Matsyasana
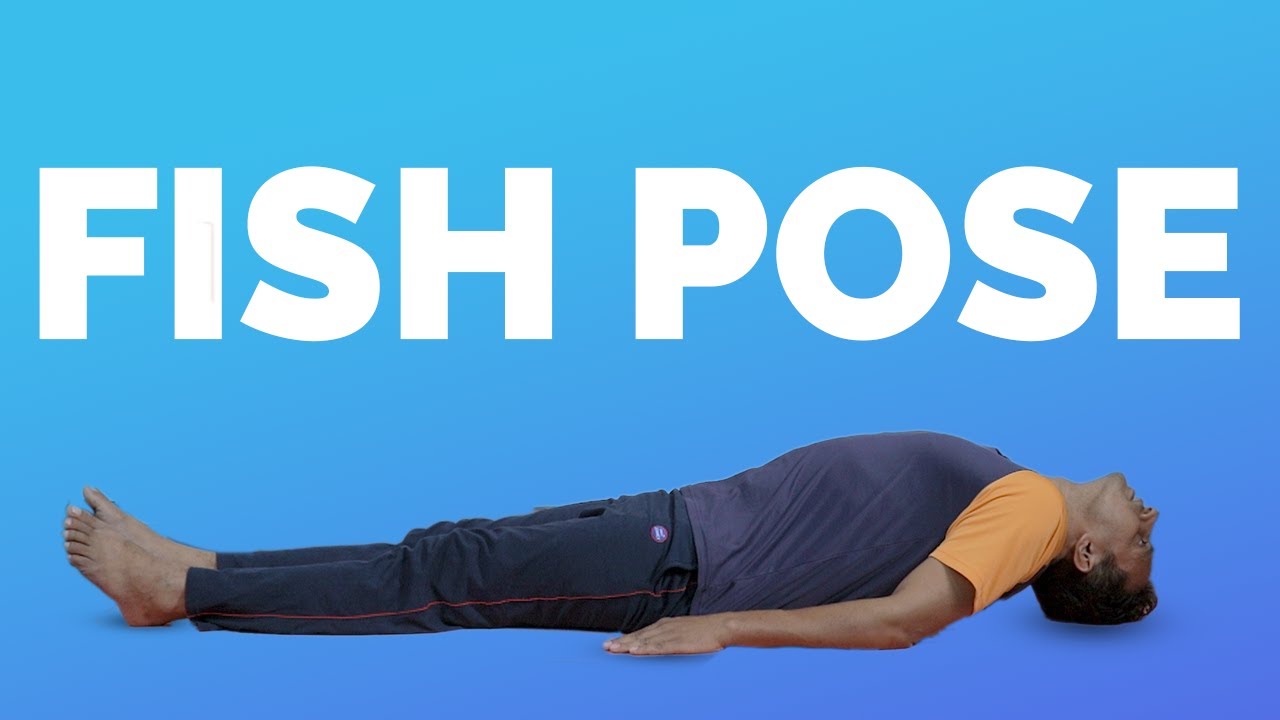
Steps:
- Roll up a blanket and then
- Lie down flat on the floor keeping the rolled blanket between your shoulders and hips
- Your head should be thrown back and it should touch the floor, hands by your side, palms up, legs straight.
- Breathe in and out gently. If you take 2 seconds to breathe in, take 4 seconds to exhale.
- Practice for 2 minutes to start with. Extend time as you go along.
Precautions:
- Avoid this asana if you are suffering from high blood pressure or low blood pressure.
- Avoid practicing this pose if you have any back or neck injury or hernia.
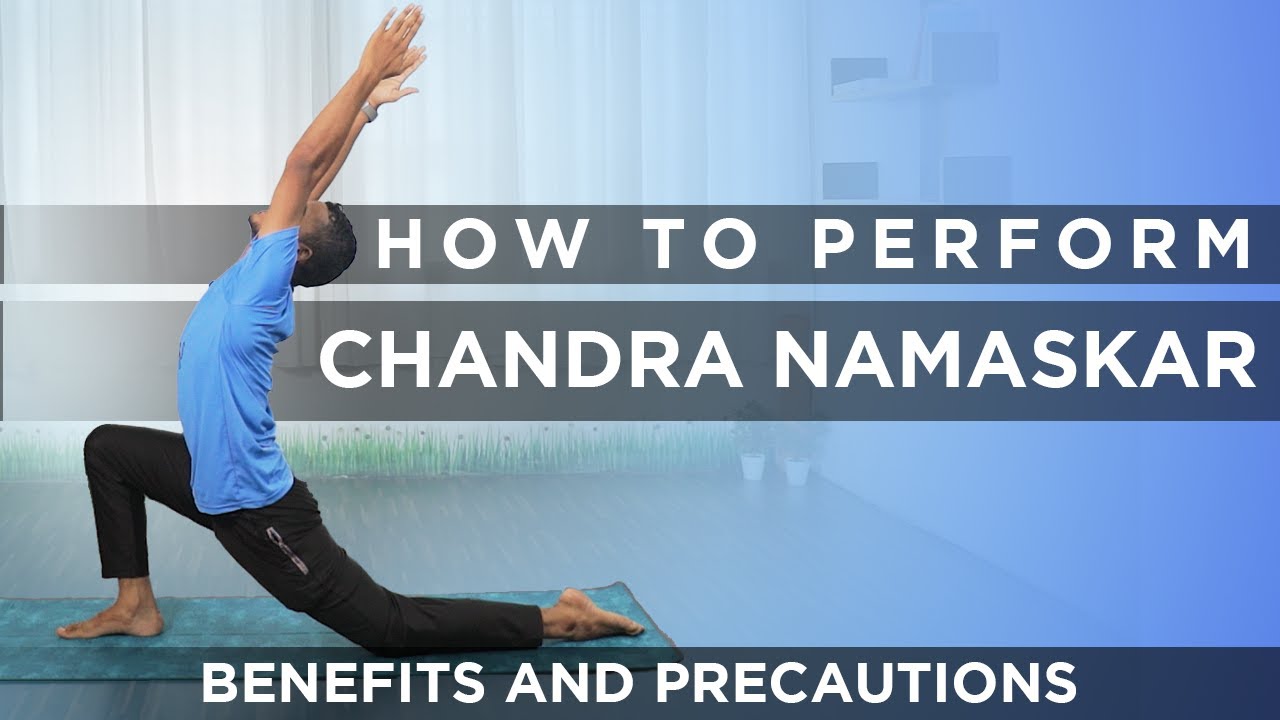
3. Moon Salutation | Chandra Namaskar
The practice of Chandra Namaskar or Moon Salutation is the reflection of Surya Namaskar or Sun Salutation. With 14 yoga poses, the sequence of asanas is the same except that Ardha Chandrasana is performed after Ashwa Sanchalanasana. Chandra Namaskar is best practiced at night in the sight of the moon. Just make sure you have an empty stomach while practicing this asana.
Steps:
- Pranamasana- Stand straight keeping your feet together and eyes closed. Bring your palms in front of your chest in the Namaste position.
- Hastauttanasana- As you inhale spread your hands shoulder-width apart and raise them up over the head. Slightly bend your back making an arc.
- Uttanasana- Exhale and slowly bend forward from your hip and try to touch your finger or palms on the floor. It’s okay if you are unable to touch the floor comfortably; do not strain.
- Ashwa Sanchalanasana- With an inhalation, stretch your right leg backward tucking your toes under. Simultaneously, bend the left knee and arch back and gaze up to the sky.
- Ardha Chandrasana- Raise the hands and stretch both arms over the head keeping them shoulder-width apart. Arch the back, look up and raise your chin.
- Parvatasana- Exhale and step your left foot beside the right one while you bring the palms of the floor. Lift the hips up and lengthen your spine.
- Ashtanga Namaskara- Gently bring your knees down to the floor as you exhale. Raise your hip back slightly, slide forward, rest your chest and chin on the floor. See that both your hands, feet, knees, chest, and chin are touching the floor.
- Bhujangasana- Now raise your upper body up into the cobra pose. Your elbows are bent in this pose and you are looking up at the sky. You want to stretch your spine in this posture.
- Parvatasana- Keeping the hands and feet in the same position, lift the hips up lengthening through the spine. Take a few breaths here. As you exhale try to lift the hips towards the ceiling and press the hands on the floor.
- Ashwa Sanchalanasana- Inhale and bring the left foot forward between the hands. As you push the pelvis forwards lift the torso and tilt the head backward arching the back and looking up to the sky.
- Ardha Chandrasana- Raise the hands over your head keeping them shoulder-width apart. Arch the back, look up and raise your chin.
- Uttanasana- Bring both your feet together and straighten the knees. Bring the crown of the head towards the floor.
- Hastauttanasana- Keeping the arms at shoulder width, raise your torso with spine straight. Raise your hands over the head, reaching back and bending slightly.
- Pranamasana- Bring your palms in front of your chest the same as the first step.
Precautions:
- People suffering from Hernia, high blood pressure, back problems should avoid the asana or practice it under supervision.
- It is recommended to perform the asana at night and with an empty stomach.
4. Bow Pose| Dhanurasana
Steps:
- Lie on your stomach down on the floor.
- Raise front torso, supporting weight on the stomach.
- Raise legs off the floor, fold at knees.
- Take hands back and take hold of your ankles, arching up and back as much as you can.
Precautions:
- One should not practice this right after having a meal or right before sleeping.
- Avoid this pose if you are suffering from high blood pressure or any heart problems.
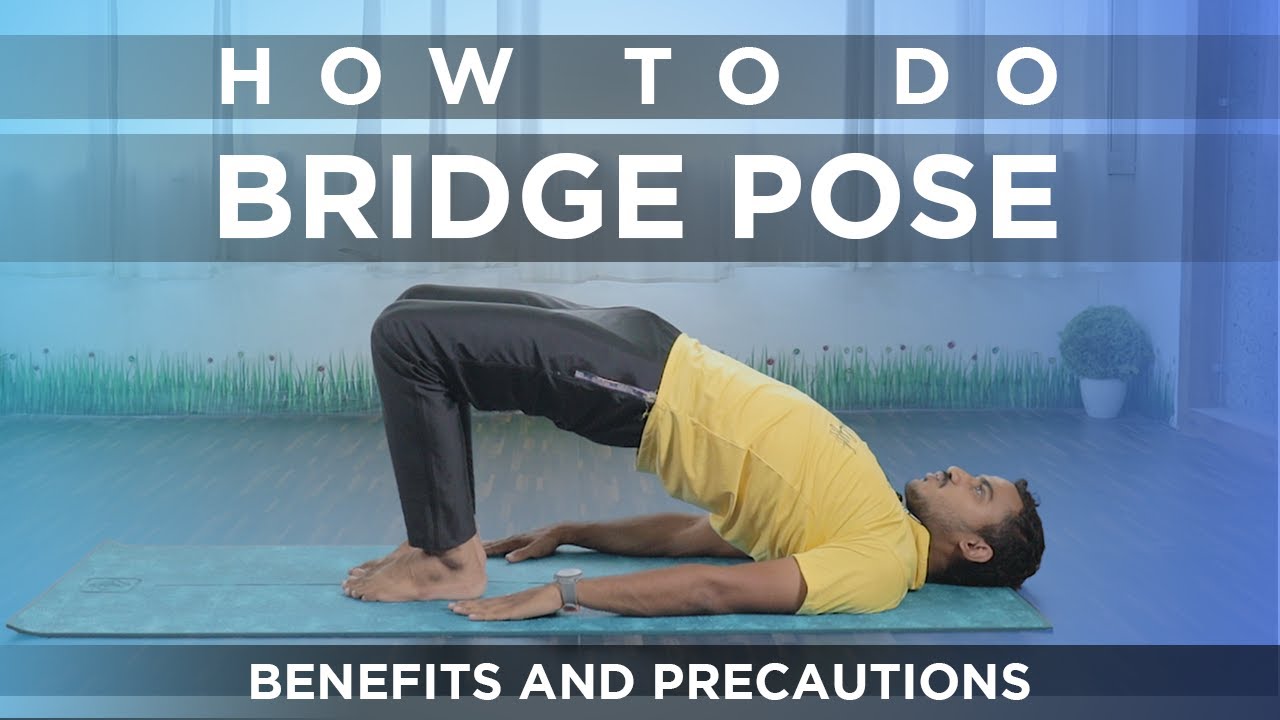
5. Bridge Pose |SetubandhAsana
Steps:
- Lying on your back, bend both knees and place the feet flat on the floor hip width apart.
- Place your arms alongside the body with the palms facing down.
- The fingertips should touch the heels.
- Inhale and lift the hips up, by giving a little pressure on the feet towards the floor.
- Lift your chest up with the support of your arms and shoulders.
- Please note that your shoulders and arms should be resting on the floor.
- Breathe and hold for 4-8 breaths.
- To release: exhale and gently place your spine back to the floor.
Precautions:
- Avoid practicing this pose if you are suffering from neck or back pain.
- Avoid the yoga pose if one is having any knee pain.
- Avoid it during a shoulder injury.
- Avoid moving your head left or right.
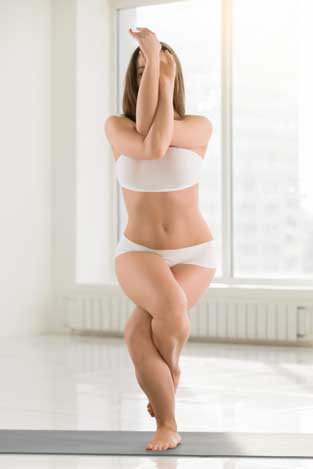
6. Eagle Pose | Garudasana
Steps:
- Begin this asana by standing in Tadasana.
- Slightly bend your knees, lift your left leg and cross it over the right thigh balancing your body.
- Now bring your arms forwards keeping them parallel to the floor. Palms should face the ceiling.
- Bend the elbows, wrap your left arm around the right arm. You can rest your left hand’s fingers firmly on the right hand.
- Make sure your spine is erect.
- Lift the elbows to the height of your shoulders.
- Gaze at a fixed point, deep breathe and hold on to this position for a couple of breaths.
- Slowly release your arms followed by your legs and come back in starting position.
- Take deep breaths and repeat on the other side.
Precautions:
- Third-trimester pregnancy shouldn’t practice this asana.
- Avoid this asana if you have a recent knee, ankle or shoulder injury.
- If you have frequent headaches, high or low blood pressure, asthma or obesity, choose to avoid Eagle pose.
7. Tree pose | Vriksasana
- Refer in ‘yoga poses for PMS and mood swings’
8. Low Lunge Pose | Anjaneyasana

Steps:
- Start this asana by Downward-facing dog pose (Adho Mukha Svanasana).
- Breathe out and bring your right foot forward beside your right hand.
- Make sure your right knee and ankle are parallel to each other.
- Gently lower down your left knee and place it on the floor right behind the hips. Your left foot should be resting on the floor completely.
- Breathe in and lift your torso up. Simultaneously raise your arms above your head in a way that your shoulders are touching your ears.
- Make a ‘Namaskar’ gesture by combining your arms.
- Look up and bend your head slightly backward.
- Exhale, relax your hips, and hold on to this pose for 15-20 seconds depending the feeling of stretch within the frontal region of your legs.
- To release this pose, place your hands back to the floor and get back into the Downward-facing dog pose.
- Repeat this with your left foot.
Precautions:
- Do not perform this asana if you have high blood pressure.
- If you have shoulder problems, practice it by keeping hands on your thighs.
- Avoid this asana in case of any knee or hip injury.
9. Camel Pose | Ushtrasana
Steps:
- First of all, kneel down on the floor.
- Keep your thighs and feet together.
- Toes should be pointing back and resting on the floor.
- Bring the knees and the feet about one foot apart and stand on the knees.
- Inhale, bend backward slowly.
Precautions:
- Avoid this pose if you are suffering from high or low blood pressure.
- Do not practice the camel pose if you have a Migraine, serious lower back or neck injury.
- Avoid it if you are suffering from Insomnia.
10. Standing Forward Bend | Uttanasana
Steps:
- Stand straight on the ground and maintain distance between your feet.
- Raise both your arms together towards the sky with a deeply focused inhalation.
- Exhale and bend forward, letting your palm touch the floor.
- Your hips would act as a common point between the upper body and lower body, maintain balance.
- Feel your back stretching in opposite directions as you pull the head down and in and press the hips up.
- Breathe and hold for 4-8 breaths, pressing the belly into the thighs on the inhalation.
Precautions:
- You need to refrain from practicing this pose if you face chronic problems or have a history of any injury in your knee joints, ankle joints, or back.
11. Dancer pose | Natrajasana

Steps:
- Stand straight on your mat keeping arms by your sides.
- With an inhalation, raise your right leg backward and hold your ankle with your right hand.
- Try to move your right leg upwards as much as you comfortably can.
- Now slowly, stretch your left arm out in front of you. Keep it straight.
- Hold this posture for a few breaths and come back to normal position.
- Repeat with another leg.
Precautions:
- You can take help from a friend in the beginning as you might find it a bit challenging to maintain balance.
- Refrain from performing this asana in case of low blood pressure.
12. Half Moon Pose | Ardha Chandrasana
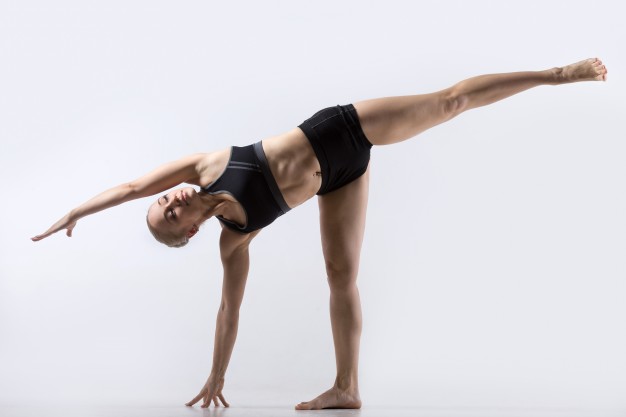
Steps:
- Begin this asana in Triangle pose with the right leg forward. Gently bend your right knee and bring your left hand to your buttock.
- Now place your right hand on the floor in front of your right foot as shown in the image.
- Begin to straighten your right leg while lifting your left foot off the floor. Make sure to keep your left leg as straight as possible.
- Open your hips, stacking up your left hip point on top of your right hip point.
- See that your left leg is straight and parallel to the floor.
- When you feel balanced on the right leg, reach the left arm up toward the ceiling, opening the chest and making a straight line with the right and left arms perpendicular to the floor.
- Now adjust the position of your head such that your gaze is lifted towards your left fingertips.
- Take a few breaths in this position before releasing the left leg on the floor and repeating the pose on the other side.
Precautions:
- Avoid this pose if you have an injury to your legs, hips, shoulders, or back.
Yoga is not just a set of physical exercises, it is a way of life. Include yoga poses in your daily chores and you will see magnificent changes in your life, be it physically or mentally. Stay healthy – stay fit.