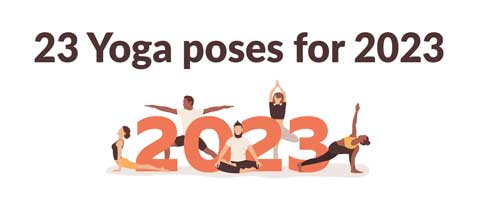
At the start of a fresh year, motivation is at its peak and is the ideal time to try something new (like these yoga poses 😉). If you were admiring yoga throughout 2022 but never took a step, 2023 is the year to begin moving your body in ways that make you feel great.
Whether you join a studio or prefer to practice in the convenience of your own home, easy yoga poses for the new year will help connect your body, mind, and spirit, setting you up for a fabulous 2023.
Respect the beginning of your yoga adventure, and keep in mind that the more often you practice on your mat, the more your practice will grow.
If you are just starting out as a yogi, incorporate these 23 yoga poses into your routine to give your body some much-needed attention this year.
1. Half Pigeon Pose
Athletes, in particular, can get a great deal of benefit from the half pigeon pose. This posture can help to maximize mobility and give the glutes and hips a thorough stretch.
If you’re always feeling constricted in the hips, this is a great exercise to incorporate into your routine.
How to do
- Starting in Downward Facing Dog, bring your right foot to your right wrist, then rest your knee and shin on the floor.
- Your legs will make the shape of the number 7. It may not be possible or necessary to have your shin parallel to the front edge of the mat; adjust to your own flexibility and place your heel at a comfortable distance from your groin.
- Put your right knee in line with your right hip and flex your right foot.
- Move your hands forward and lower your face to the mat, ensuring your hips are squared to the floor. To exit, back your hands up and straighten your arms.
- Return to Downward Facing Dog and repeat on the other side.

Benefits
It is one of the amazing yoga poses for beginners. If done right, it can help to extend the versatility of the muscles in the hip flexors and lower back, as well as aiding digestion.
It is also thought to reduce mental stress and apprehension, in accordance with the Ayurvedic viewpoint that these feelings are stored in the hips.
2. Mountain Pose
Tadasana, Mountain pose or Samasthiti is a standing asana in modern yoga as exercise; it is not described in medieval hatha yoga texts. It is the basis for several other standing asanas.
How to do
- Bring your feet close together or slightly apart with the toes pointed straight ahead. Feel the weight evenly distributed across the soles of your feet.
- Roll your shoulders down and away from the ears, draw the shoulder blades into the back, and let the top of your head be lifted up.
- Activate your thighs, tuck in your belly button, and elongate the spine.
- Keep the palms of your hands facing the front of the room. Unclench your jaw and ease the furrows on your forehead. Take some deep breaths.

Benefits
It may appear that you are only standing in one place, but please wait for a moment. This pose is the foundation for all other poses and it helps you to maintain balance while focusing your attention on the here and now.
3. Chair Pose
Chair Pose is a standing yoga posture that tones the entire body, particularly the thighs. It involves sitting back as if you’re about to fall seated into a chair, but holding the position so your muscles stabilize and strengthen. If you are starting out, we recommend you add this in your list of yoga poses.
How to do
- Flex your knees until your legs are almost parallel to the ground. Your feet should be side by side. If your feet are touching, make sure your knees are also together.
- If your feet are slightly apart, that’s alright, but make sure the distance between your knees is the same. Gently press your fingertips against the floor to make sure your posture is correct.
- Remain with your knees bent and your bum low while you lift your arms up. Stay in this position for 5 to 10 breaths. To get back to normal, breathe in and extend your legs, rising your torso with your arms.
- Exhale and return to Mountain Pose or proceed to the next posture in the sequence.
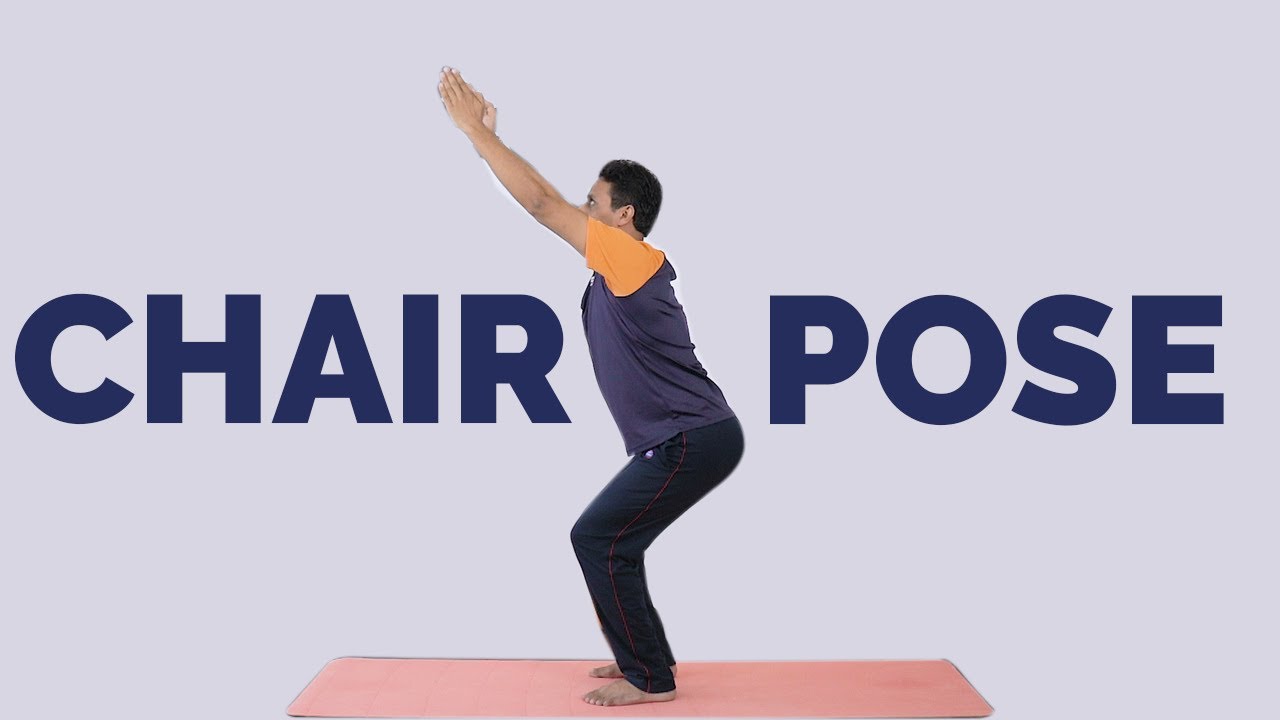
Benefits
Balance can be improved with Chair Pose, and it can also help to increase cardiovascular fitness and strength. Specifically, it targets the core, legs, and ankles. If you are starting out, it must be in your list of yoga poses.
4. Ustrasana (Camel Pose)
Ustrasana, otherwise known as Camel Pose, is an intermediate yoga pose that can help open up your chest, shoulders, and hips. This pose is also great for improving flexibility in the spine and strengthening the core. We are sure you are going to add this in your yoga poses list.
How to do
- To do this pose, start by kneeling on the floor with your hands on your hips.
- Then, arch your back and reach your hands backward to hold onto your heels.
- Make sure to keep your chest and shoulders open, and hold the pose for 30-60 seconds.
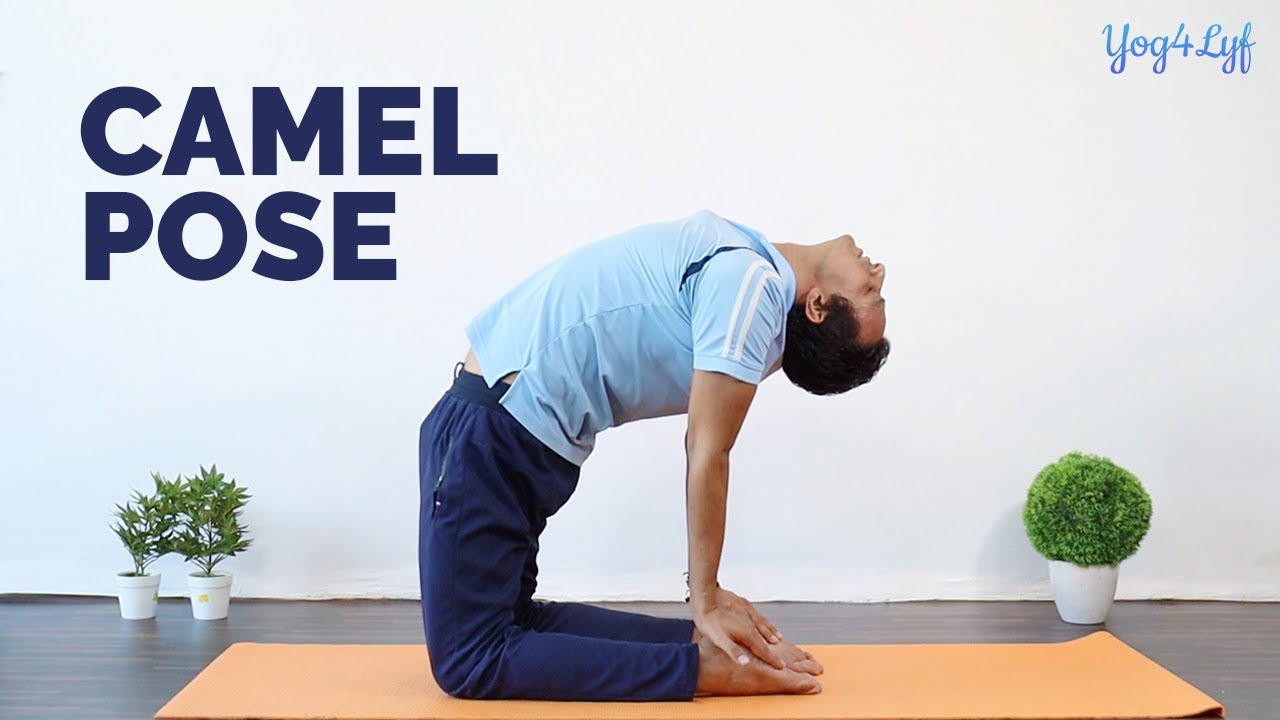
Benefits
This pose is great for relieving stress and improving posture. It can also help to improve breathing, as it opens up the chest and encourages deeper breaths. It is also known to help with lower back pain and fatigue.
5. Adho Mukha Svanasana (Downward Facing Dog)
Adho Mukha Svanasana, or Downward Facing Dog, is a classic yoga pose that can help to stretch and strengthen the body.
How to do
- To do this pose, start by coming onto your hands and knees.
- Then, tuck your toes under and lift your hips up to create an inverted V shape with your body.
- Make sure to keep your arms and legs straight and your neck relaxed.
- Hold the pose for 30-60 seconds, and then release.

Benefits
This is one of the amazing yoga poses and is great for stretching the entire body, from the palms of your feet to the tips of your fingers. It can also help to improve circulation and is known to relieve stress and fatigue. It is also a great way to strengthen the arms and legs.
6. Setu Bandhasana (Bridge Pose)
Setu Bandhasana, or Bridge Pose, is a great way to open up the chest and improve posture. How can we not include this pose in our list of yoga poses for 2023.
How to do
- To do this pose, start by lying on your back with your knees bent and your feet flat on the floor.
- Then, press your feet into the ground and lift your hips up.
- Hold the pose for 30-60 seconds, and then release.
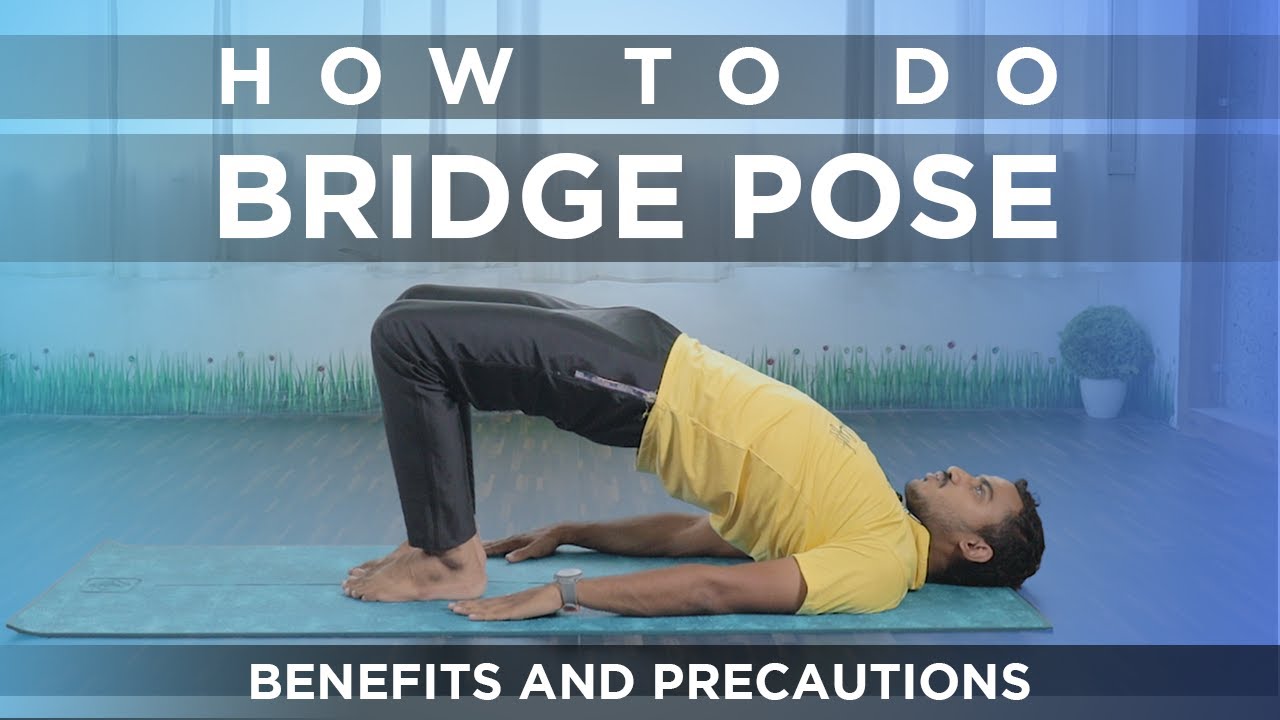
Benefits
This pose can help to improve digestion, reduce stress, and strengthen the core. It is also known to help with fatigue, insomnia, and back pain. It is a great way to open up the chest and shoulders, and can help to improve posture and balance.
7. Bhujangasana (Cobra Pose)
Bhujangasana, or Cobra Pose, is a great way to stretch and strengthen the back and core.
How to do
- To do this pose, start by lying on your stomach with your feet together and your hands placed near your shoulders.
- Then, press your palms into the ground and lift your chest up.
- Make sure to keep your hips and legs on the ground. Hold the pose for 30-60 seconds, and then release.

Benefits
This pose is great for improving flexibility in the spine and strengthening the core. It can also help to improve posture and reduce back pain. It is also known to help with fatigue and anxiety, and can help to increase energy levels.
8. Ardha Matsyendrasana (Half Lord of the Fishes Pose)
Ardha Matsyendrasana, or Half Lord of the Fishes Pose, is an intermediate yoga pose that can help to stretch and strengthen the spine.
How to do
- To do this pose, start by sitting on the ground with your legs straight.
- Then, cross your right leg over your left leg and hook the right foot around your left thigh. Place
- your left hand on the ground behind you and twist your torso to the right.
- Hold the pose for 30-60 seconds, and then release.
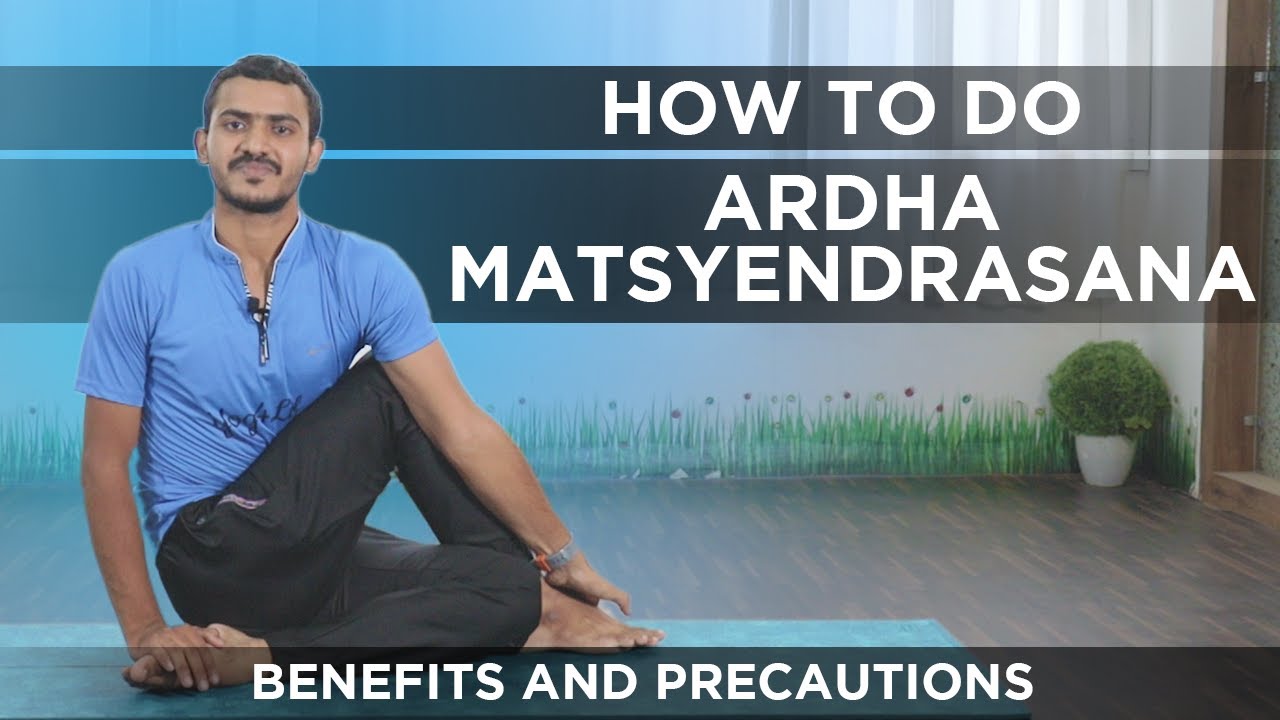
Benefits
This pose is great for improving flexibility in the spine and strengthening the core. It can also help to reduce stress and fatigue, and is known to help with lower back pain. It is also a great way to improve digestion and increase energy levels.
9. Halasana (Plough Pose)
Halasana, or Plough Pose, is an advanced yoga pose that can help to stretch and strengthen the back and core.
How to do
- To do this pose, start by lying on your back with your legs straight and your arms at your sides.
- Then, slowly lift your legs up over your head, keeping your hips and lower back on the ground.
- Hold the pose for 30-60 seconds, and then release.
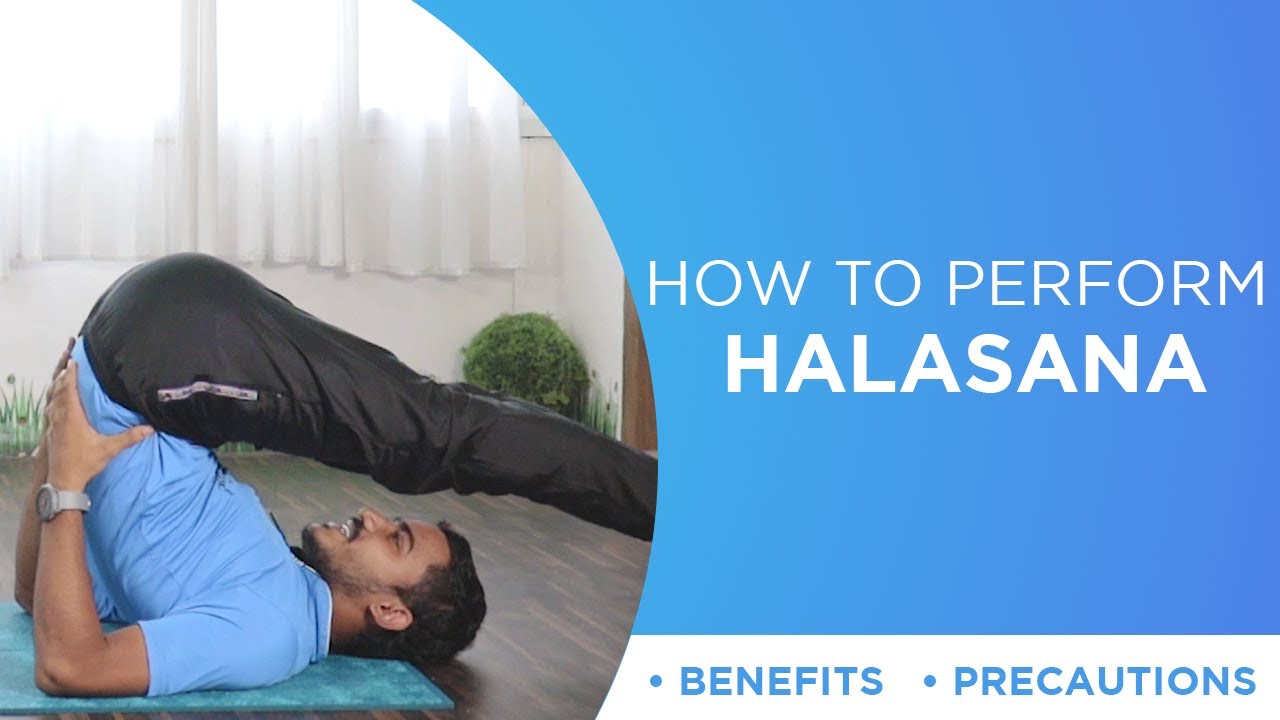
Benefits
This pose is great for strengthening the core and improving flexibility in the spine. It can also help to reduce fatigue and stress, and is known to help with lower back pain. It is also a great way to improve digestion and increase energy levels.
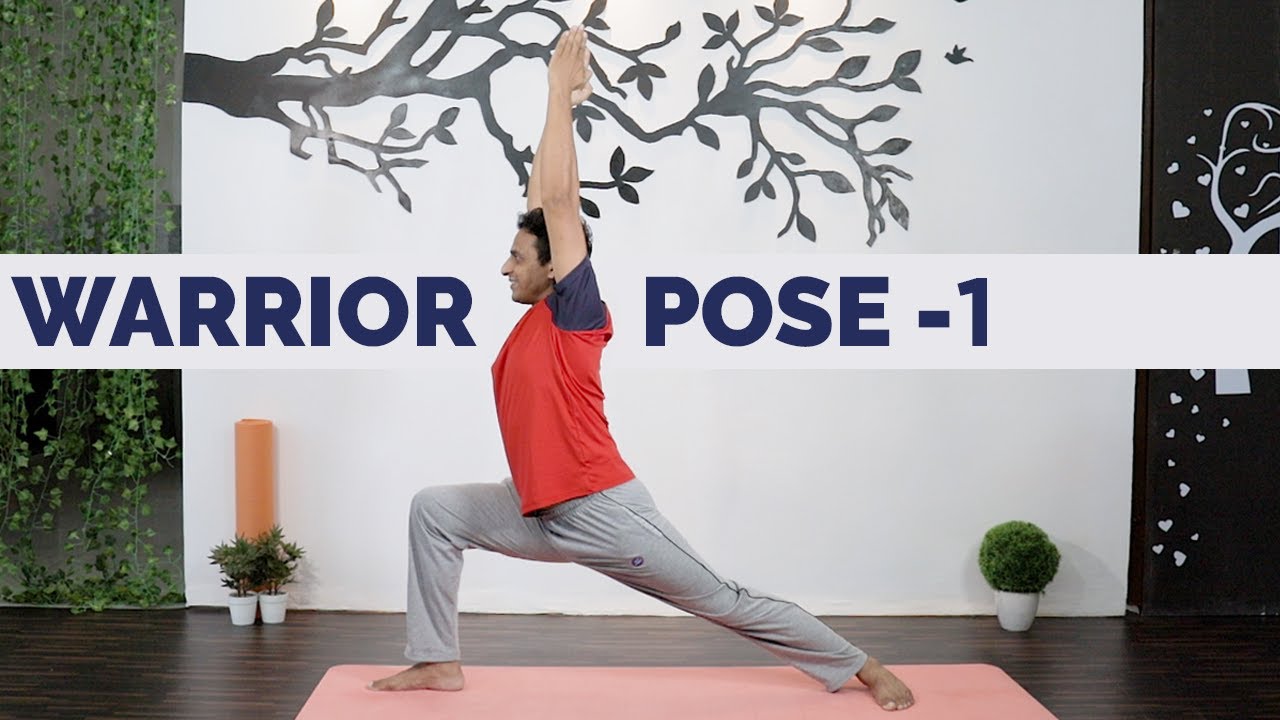
10. Virabhadrasana (Warrior Pose)
Virabhadrasana, or Warrior Pose, is an intermediate yoga pose that can help to stretch and strengthen the legs and core.
How to do
- To do this pose, start by standing with your feet three to four feet apart.
- Then, turn your right foot out and bend your right knee.
- Raise your arms over your head and hold the pose for 30-60 seconds.
- Then, switch sides and repeat.
Benefits
This pose is great for strengthening the legs and improving balance. It is also known to help with fatigue, stress, and anxiety. It can also help to improve posture and reduce lower back pain.
11. Trikonasana (Triangle Pose)
Trikonasana, or Triangle Pose, is a great way to stretch and strengthen the core, legs, and arms. Let’s find out what this pose is doing in this list of yoga poses.
How to do
- To do this pose, start by standing with your feet three to four feet apart.
- Then, turn your right foot out and bend your right knee.
- Reach your left hand to the ceiling and your right hand to the ground.
- Hold the pose for 30-60 seconds, and then switch sides and repeat.

Benefits
This pose is great for stretching and strengthening the core, legs, and arms. It can also help to improve flexibility and balance, and is known to help with fatigue, stress, and anxiety. It can also help to improve posture and reduce lower back pain.
12. Vrikshasana (Tree Pose)
Vrikshasana, or Tree Pose, is a great way to improve balance and posture.
How to do
- To do this pose, start by standing with your feet together.
- Then, raise your arms up and place your right foot on the inside of your left thigh.
- Make sure to keep your arms and torso upright, and hold the pose for 30-60 seconds.
- Then, switch sides and repeat.
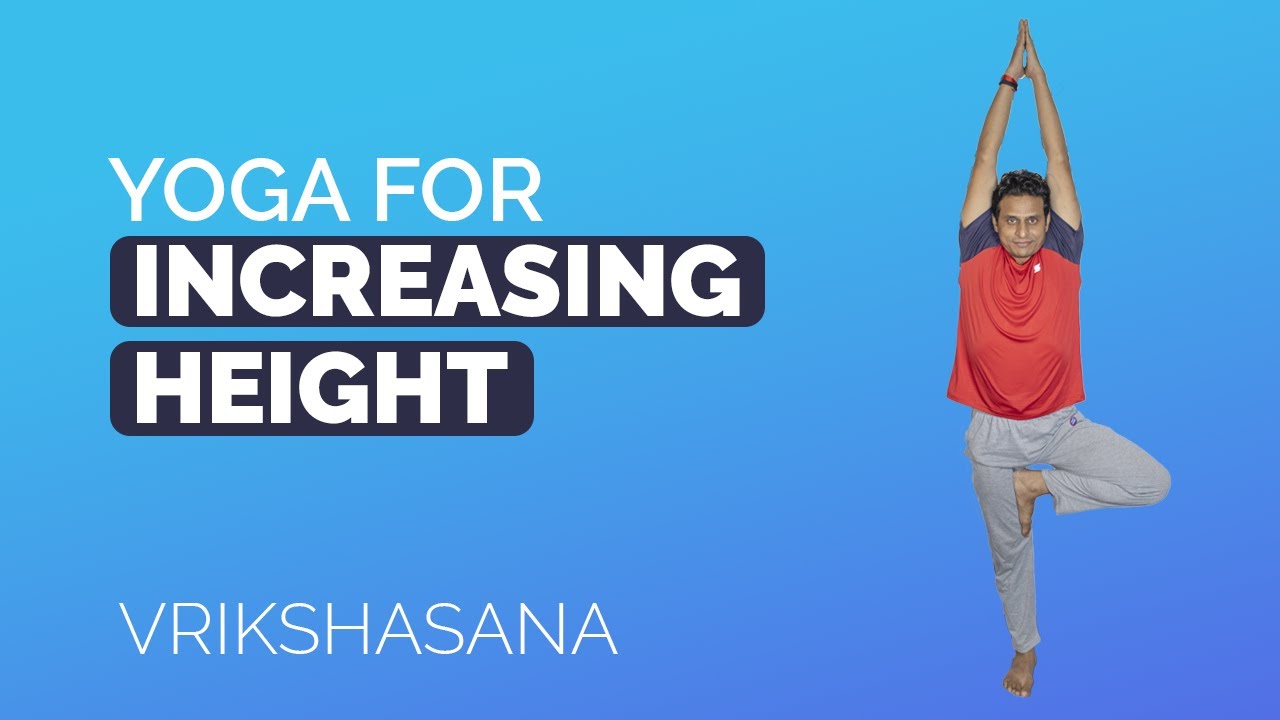
Benefits
This pose is great for strengthening the core and improving balance.
13. Paschimottanasana (Seated Forward Bend Pose)
Paschimottanasana, or Seated Forward Bend Pose, is a great way to stretch and strengthen the back and legs.
How to do
- To do this pose, start by sitting on the ground with your legs straight and your feet together.
- Then, slowly bend forward and try to reach your toes.
- Make sure to keep your back straight, and hold the pose for 30-60 seconds.
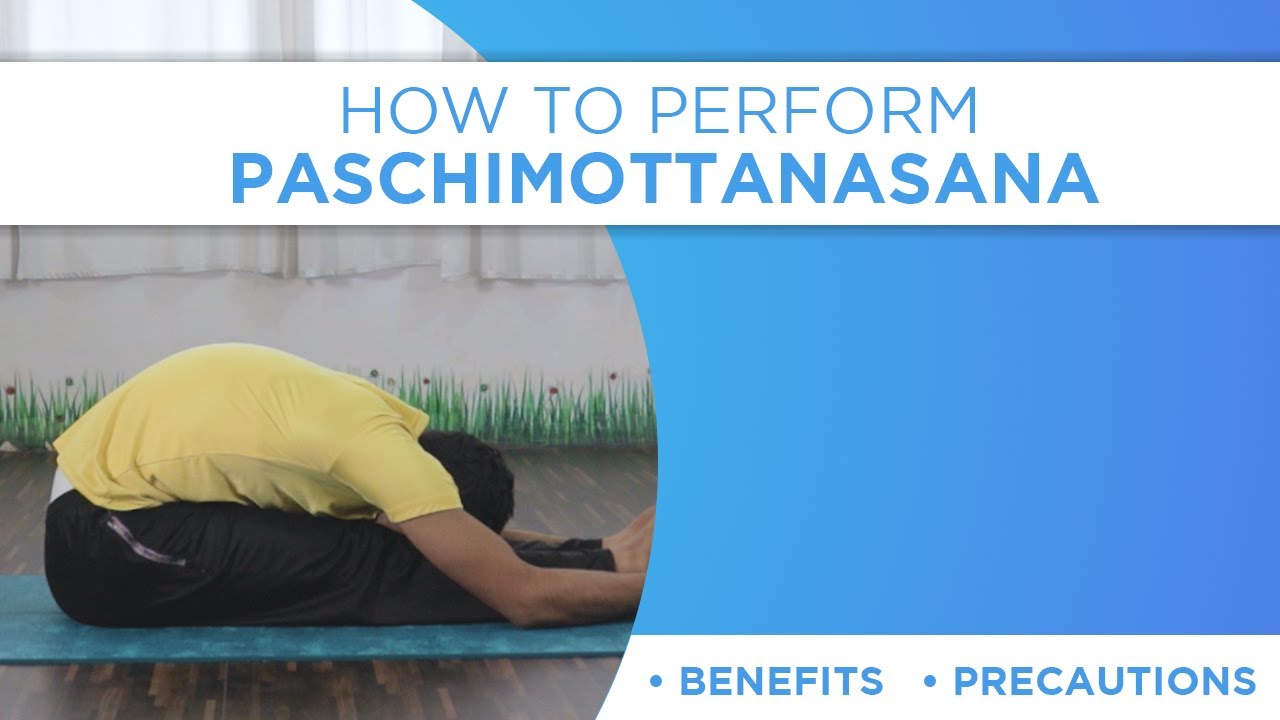
Benefits
This pose is great for stretching and strengthening the back and legs. It is also known to help with fatigue, stress, and anxiety. It can also help to improve digestion and increase energy levels.
14. Crescent Moon
It is an amazing hip opener. Here is how you can do it.
How to do
- Starting in runner’s lunge and placing the back knee on the ground.
- The back foot can be pointed or flexed, whichever feels more comfortable. Stay here if there’s already a good stretch in the hip flexor.
- To deepen the pose, bring the hands to the knees or overhead.
- Don’t forget to practice on the other side, too.

Benefits
Crescent Moon pose deeply stretches and opens the sides of the body and improves core body strength, balance and concentration. Half moon strengthens the ankles and knees, improves circulation and energizes the entire body.
15. Headstand
This inverted pose offers tons of benefits. Here is how you can do it.
How to do
- Begin by getting down on your hands and knees. Interlock your fingers and position your elbows about a foot apart.
- Place your head on the floor, comfortably supported by your hands. If you are new to this posture, just straighten your knees. Get used to the feeling of being upside down.
- With continued practice, you can move your feet closer to your face, then lift them, while still keeping a bend in your knees.
- Finally, you can extend your legs into a full headstand.
- With regular practice, your progress should become evident within a few weeks.
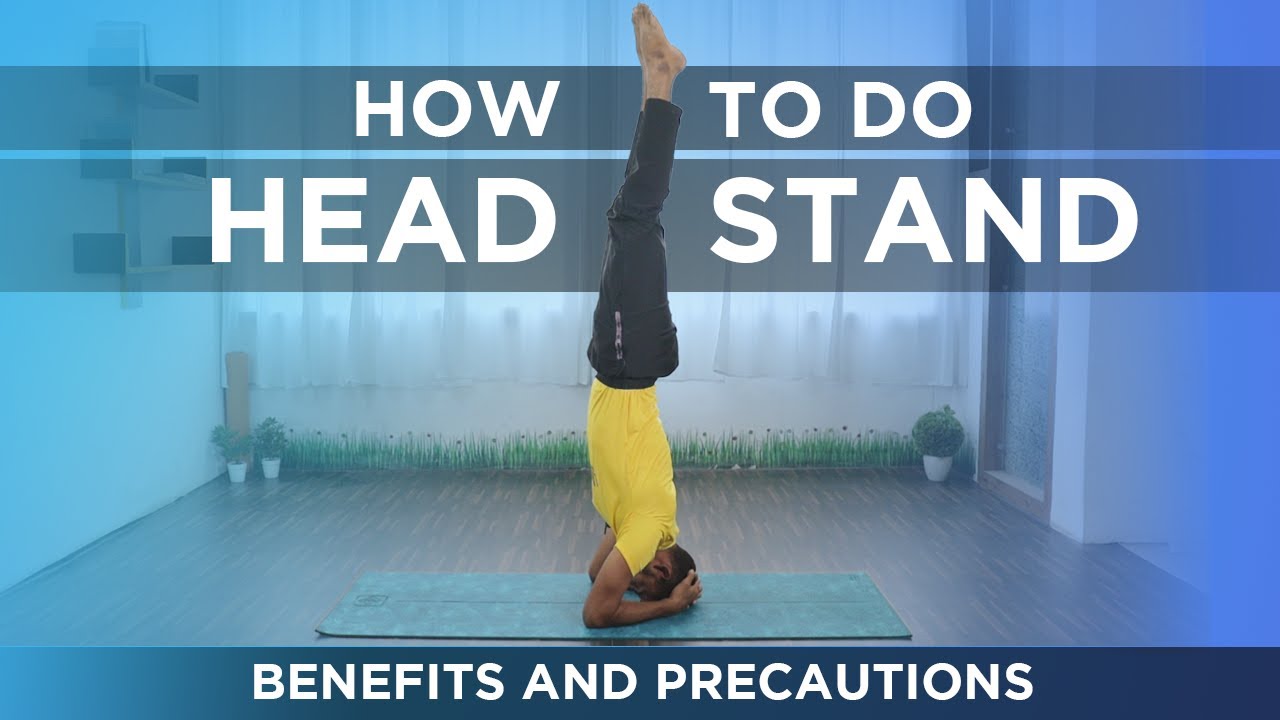
Benefits
A headstand is a terrific posture to increase the nutrient blood flow to your head and scalp. You can help your body deliver extra nutrients and oxygen to your scalp and hair follicles by simply turning yourself upside down.
16. Cow Face/Gomukhasana
When it comes to Cow Face Pose, there are two options: Half Cow Face and Full Cow Face. The full version is an
intense stretch for the shoulders and hips, so if it feels like too much, it is best to start with the Half Cow Face.
How to do
- Get into a comfy cross-legged pose and stretch your right arm towards the ceiling, while leaving your left arm alongside your left side.
- Lower your right arm behind your back and raise your left arm behind you.
- If your shoulders are very flexible, your hands might be able to meet. Otherwise, use a yoga strap, towel, or shirt to connect your right and left hands.
- Afterward, do the same stretch with your other side.
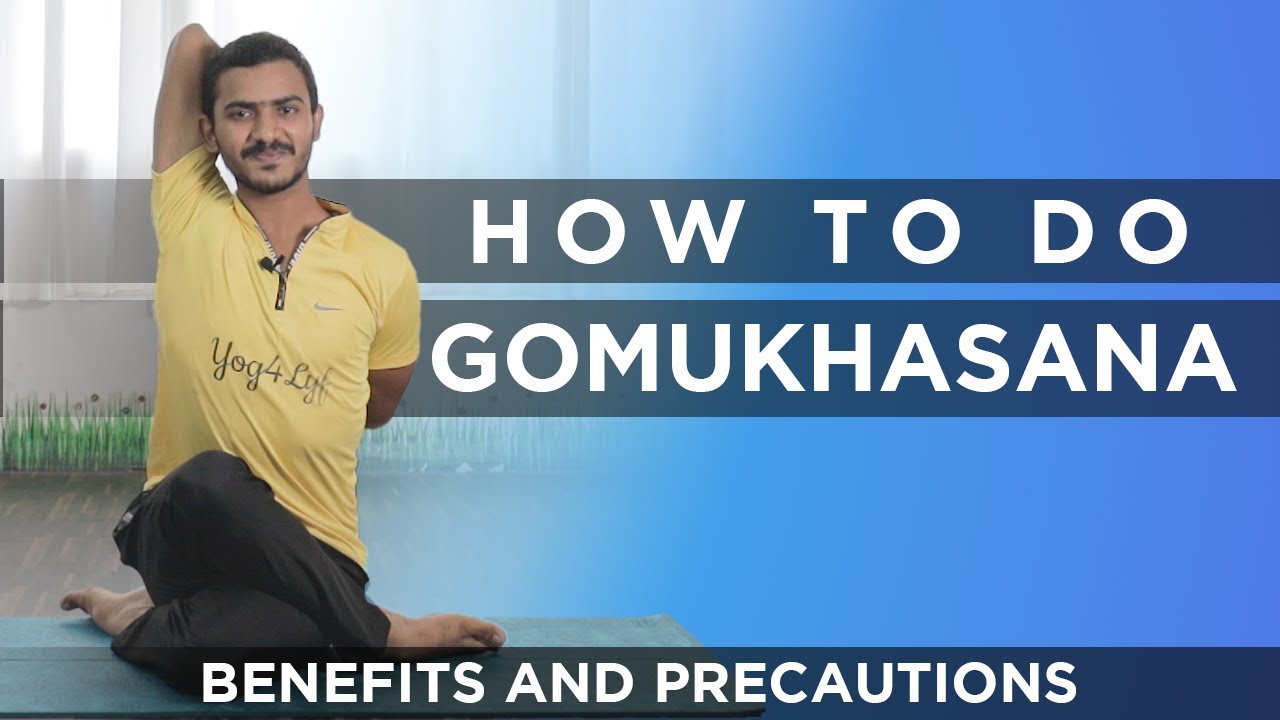
Benefits
Cow pose is a great way to help ease the tension in your upper body, particularly in the back, shoulders, and neck. It also provides a gentle massage to the spine, helping to improve its mobility. This simple posture allows for a powerful stretching sensation from the chin to the pubic bone.
17. Hero/Virasana
Hero Pose is generally employed for meditating, but it may be quite uncomfortable for those with delicate knees.
Therefore, it is advised to utilize props in order to make it more comfortable.
How to do
- Begin by taking a seat on the floor with your knees close together. If it makes you more comfortable, place a blanket underneath your knees. Subsequently, shift your feet outward until your bottom is touching the ground instead of the soles of your feet.
- You should feel a stretch in your thighs, knees, and ankles. If the stretch is too uncomfortable, take a break or set a blanket or yoga block beneath you.
- If you can stay in this position without strain, put your hands on your knees with your palms either facing up or down.
- It is said that when the palms are facing down, you are being introspective, while when they are facing up, you are open to receiving from your environment. Follow what is more natural to you.
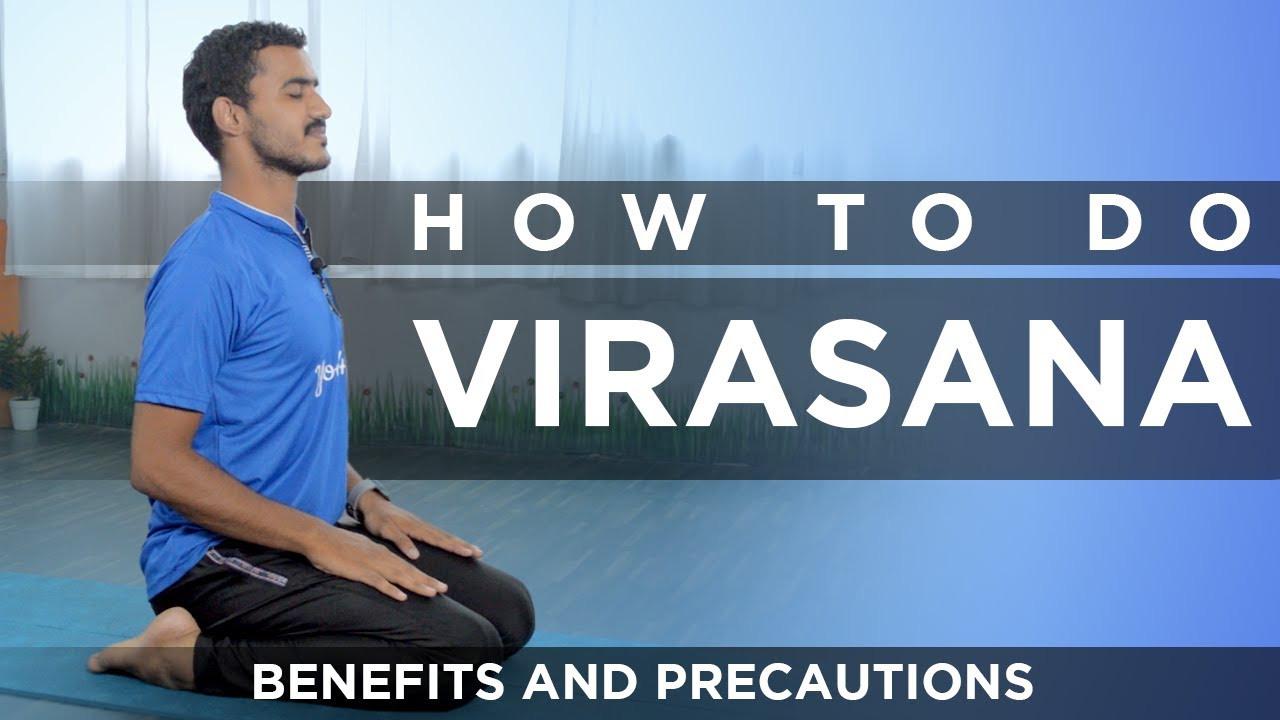
Benefits
Virasana gives a good stretch to your ankles, knees and thighs, makes the muscles strong and flexible.
18. Firelog/Agnistambhasana
Firelog posture is an excellent exercise for the outer hips. If you are beginning out with this pose, we recommend use of probs.
How to do
- Begin by sitting upright with your legs stretched out, then bend the right leg to create a 90° angle with your shin parallel to the short side of your mat and your right foot flexed.
- After that, cross your left leg over the right one, and your left foot should be slightly hanging over the right knee.
- You should feel a deep stretch in your hips in this position, and if your upper leg is not able to reach your right ankle due to your hips not being open enough, then you can put a yoga block or a blanket in the gap.
- Remain in this posture for five breaths, then switch to the other side (it is normal to find one side more difficult or easier to stretch than the other).
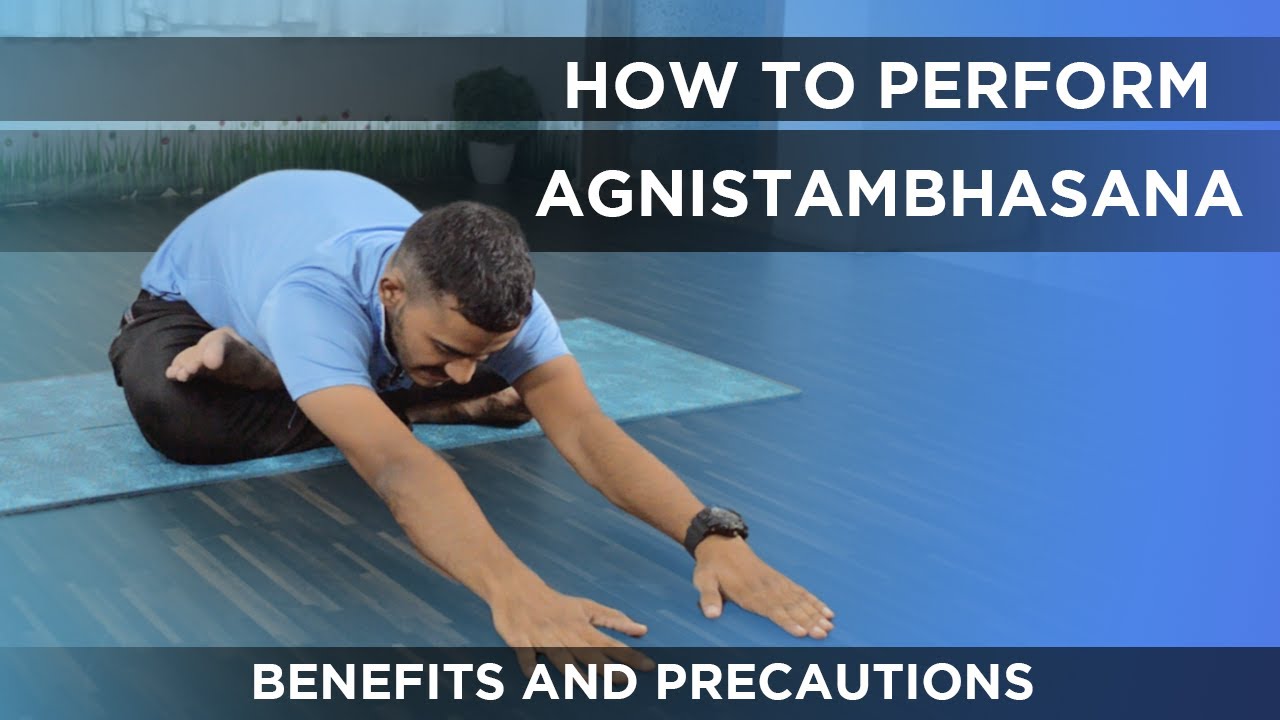
Benefits
Agnistambhasana, as with many asanas, is all about feeling the burn. It helps in opening the hips and strengthening the calves and legs.
19. Phalakasana
This plank pose, which appears elementary, is a foundational element of classic Sun Salutations. It readies the yogi to perform Chaturunga Dandasana, arm balances, and inversions. Plank position develops the strength and accuracy required for more complicated postures.
How to do
- Begin in Tabletop Pose, with your fingers spread out and your shoulders positioned over your wrists.
- Extend your right leg out behind you, and angle your toes under.
- Then, push your left leg out and back to meet your right.
- Your body should be in a tall push-up position, and aligned in a straight line from the crown of your head to your heels.
- Press away from the ground, draw your shoulder blades down your back, and draw your abs in to meet your back body.
- Firm up your core and thighs, and tuck your tailbone.
- Gaze softly at the floor a short distance in front of you, and hold for five breaths or for as long as you can.
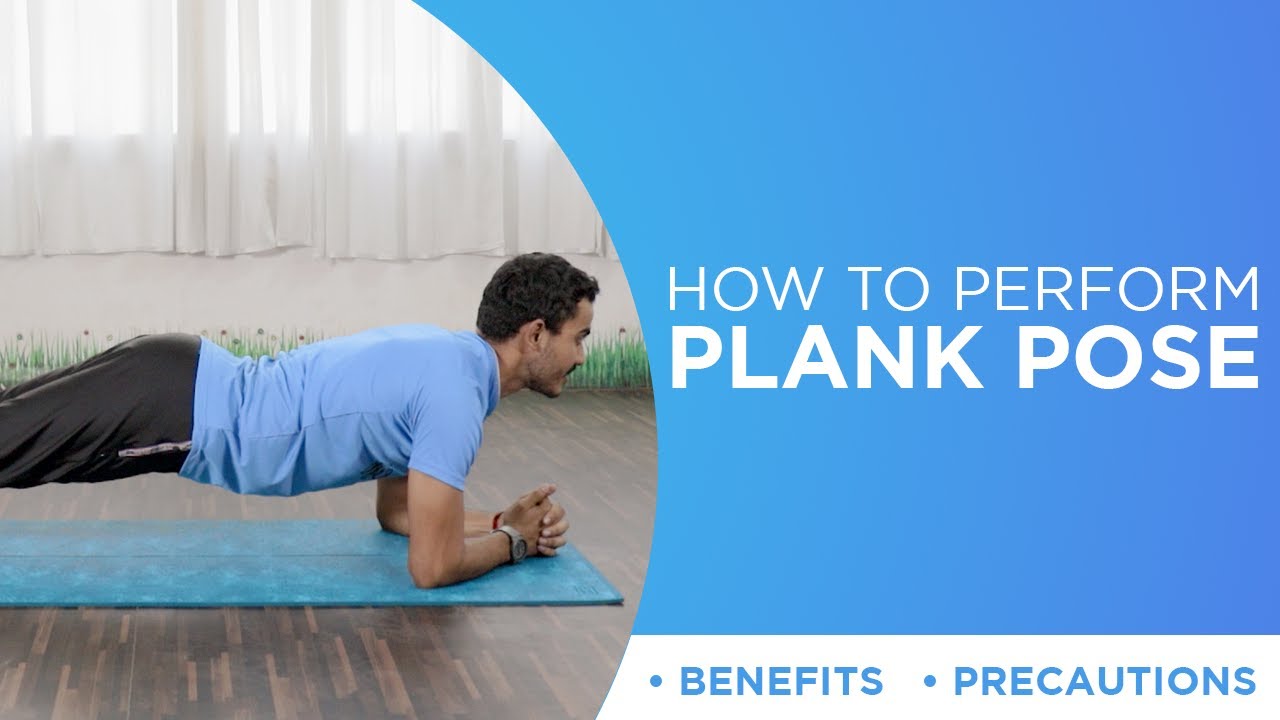
Benefits
The plank strengthens your spine, your rhomboids and trapezius, and your abdominal muscles, which naturally result in a strong posture as they grow in strength. Though this pose is a bit difficult amongst other yoga poses in this list, but really beneficial!
20. Lotus Pose
Lotus is a hip-opener that encourages spinal extension, abdominal strength, and meditation. When using this for meditation, be sure to cross your legs differently now and then to avoid injuring the hips.
How to do
- Begin by sitting on the ground with your back upright and the legs outstretched.
- Then, fold the right leg and place it close to your torso.
- Gently pull your right ankle in the direction of your left hip. Afterwards, repeat the same action with your left leg and stop when it is close to your chest.
- Put your hands on your knees with palms facing upwards.
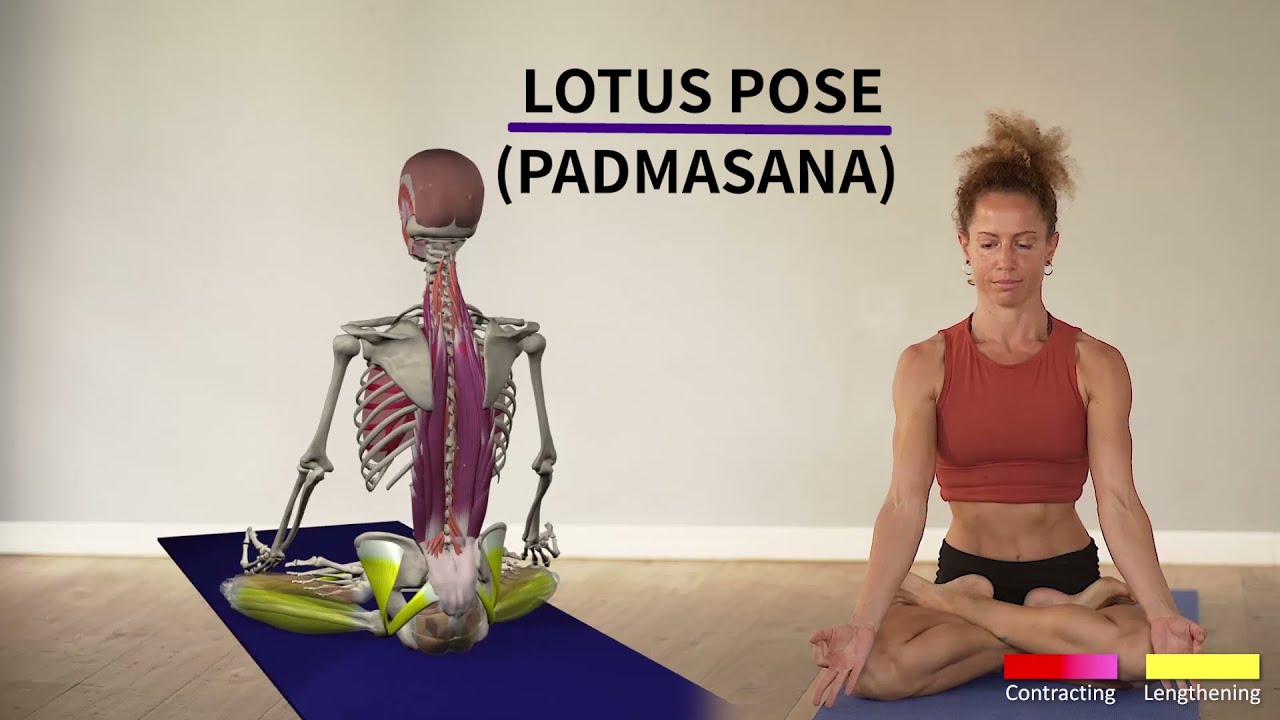
Benefits
This amazing pose helps in relaxation and offer flexibility. Apart from that, it is a great pose for a good leg stretch.
21. Malasana
It is also known as Garland Pose, or the Squat Pose. Malasana stretches the hamstrings and provides a great stretch for your entire body. It is not only beneficial because of its numerous benefits but also because of its simplicity.
How to do
- You should be sitting in a cross-legged position with your feet underneath you and your knees gently pressing towards the floor.
- Your legs may be straight or bent at the knee. Make sure that you’re sitting with a straight back and that your spine is long and relaxed.
- First, raise your arms out to your sides, palms facing the floor. As you inhale, begin to lean forward from your hips and lower your upper body towards the ground. You should be aiming to bring your chest and thighs to the same level.
- Once you’ve lowered yourself fully, keep your arms outstretched while you take a few deep breaths. Your back should remain straight while you do this.
- When you’re ready to come out of the pose, simply bend your knees and return to a sitting position.
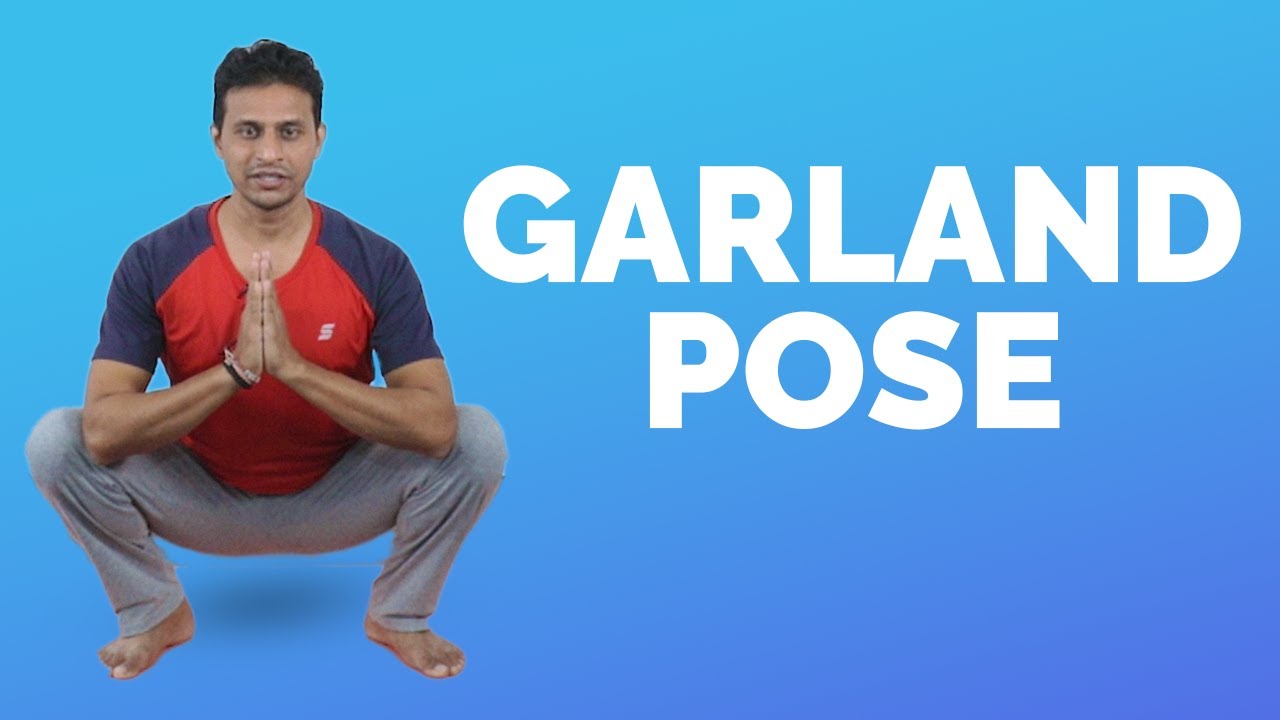
Benefits
It improves digestion by massaging the intestinal organs, particularly the colon. This pose also stimulates the liver and pancreas, which aid in digestion.
22. Apanasana
Apanasana is a relaxing supine asana performed at the end of the yoga poses. As the name suggests, it aids in moving toxins downward, through, and out of the body. There is a reason that this pose is in this list of yoga poses for 2023. You will find out soon.
How to do
- Lay comfortably on your back your feet a little over hip-width apart.
- Lengthen the tailbone down towards your feet.
- Now, exhale and slowly draw both knees towards your chest.
- Lock your knees with your hands.
- Keeping the neck and shoulders relaxed tuck your chin to your chest.
- Hold the pose for a few minutes as long as it’s comfortable.
- With an exhalation, release and extend both legs along the floor and rest.

Benefits
It benefits your lower back and pelvis through a nice stretch; also helps in reducing back pain.
23. Viparita Karani
It is also known as legs up the wall. Although this pose has the word ‘wall’ in it, you can perform it anywhere that you can prop up your legs.
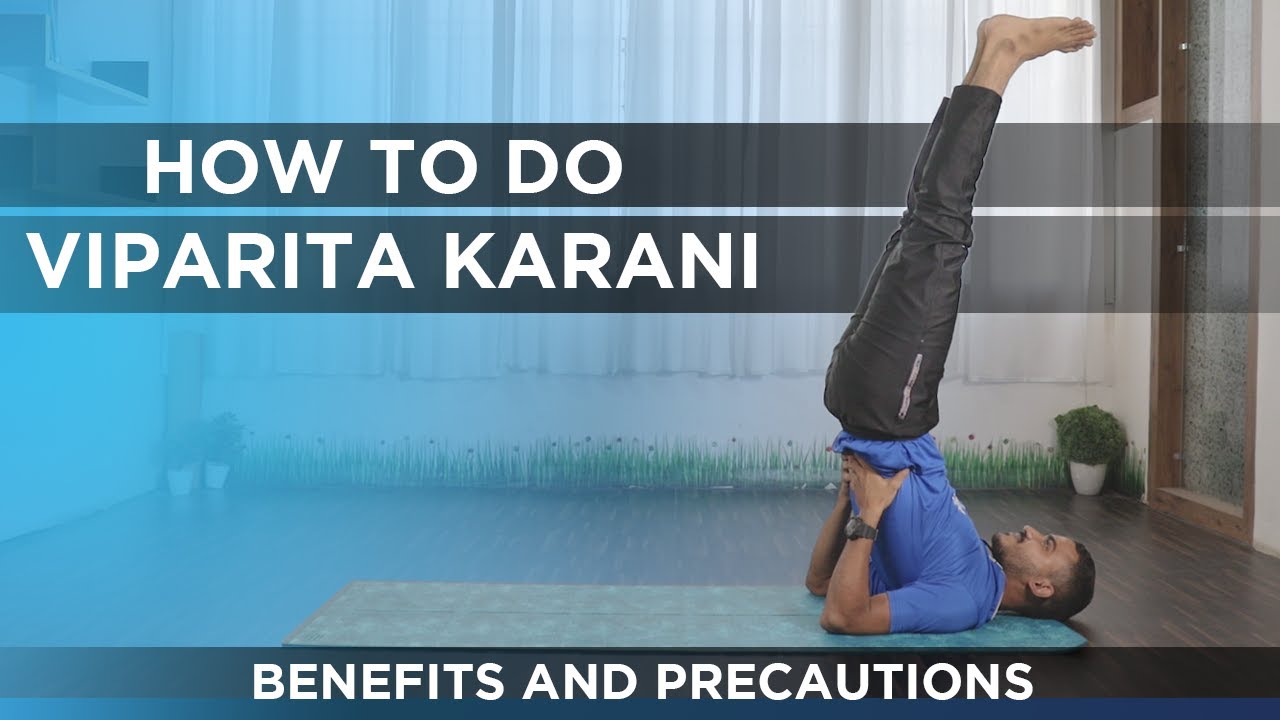
How to do
- Sit on the floor facing a wall. Lower your shoulders and head to the floor, lying on your side.
- Now, simply roll onto your back and stretch your legs up the wall.
- Without touching the wall, adjust your position by scooting the tailbone towards it.
- Pick a comfortable position for your arms. Relax your legs against the wall.
It’s time to release all the effort. Settle into the pose and breathe for 10 minutes or more. - To release, bend your knees and roll to your side.
Benefits
It relieves a mild backache and helps to promote balance throughout the systems of the entire body. It is good for people suffering from metabolic syndrome, restless leg syndrome, venous disease (varicose vein), fibromyalgia such as chronic pain, hot flashes, etc.
Conclusion
Yoga is a great way to refresh your mind and body. These 23 amazing yoga poses can help to improve flexibility, strength, and balance.
Give your new year a healthy start 😉😉
Share with your loved ones to encourage them too to incorporate these yoga poses in their daily routine.