Suffering from Knee-pain is one of the most excruciating experiences humans go through. What was considered as a problem for people above the age of 50, is now striking to people of all ages? There are several reasons leading to this at an early age, some of which include a sedentary lifestyle, lack of exercise, and body weight. In this article, we will dissect the causes and symptoms of Knee pain and how the practice of Yoga can help you eliminate knee pain.
What is Knee Pain?
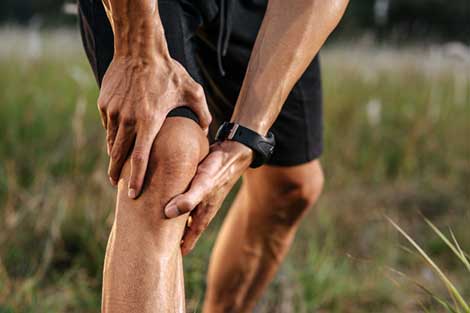
Knee pain is a common musculoskeletal problem and its prevalence increases with age. The unsettling pain caused due to the constant pounding of your body weight on the knees that leads to intense strain and undue wear and tear of the cartilage, ligaments, and muscles around your knee joints can be referred to as Knee Pain.
It can be caused due to several reasons such as injury, joint pain, arthritis, obesity, and high uric acid.
What is the root cause of Knee Pain?
The knee is the largest joint in the body. The upper (femur) and lower (fibula) bones of the knee are separated by two discs and connected by ligaments and muscles. The inner part of the knee joint is covered by articular cartilage which absorbs shock and provides a smooth, gliding surface for joint movement. Knee pain is caused by injury in one or more of these structures, and it may have another cause.
What are the Symptoms of Knee Pain?
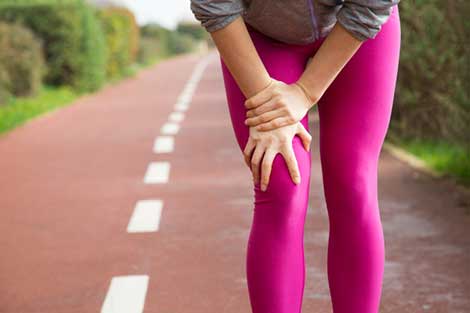
Knee Pain leads to physical disability and decreased quality of life. When you are unable to bear any weight on your knees, you are likely to be prone to knee-related problems. Some of the major symptoms of knee pain include:
- Weakness or instability
- Unable to straighten the knee
- Swelling around the knee
- Stiffness
- Popping or crunching noises
- Redness and warmth to the touch
Let’s take a look at some staggering statistics related to Knee Pain:
- Knee Pain is the second most common cause of chronic pain.
- It is a common problem affecting around 20% of the World Population.
- One-third of all Americans report experiencing knee pain at some time or the other.
- The overall prevalence of knee pain experienced by women is roughly 20% more than that of men.
- Between 15 and 20% of all men are afflicted with Knee pain.
How can Yoga offer relief from Knee pain?
Yoga is considered an ideal therapy for knee pain as it eases out pain and suffering in a smooth manner. Knee pain is a complicated issue caused by rupture of muscles and ligaments in the knee area and vigorous exercises and physical movements may only aggravate the pain in the stiffed joints. Here instead of physical movements, it is important to follow a slow and controlled movement to gain control over pain. Yoga does this with gentle stretching, keeping the knees healthy and flexible. It also strengthens the muscles surrounding the knees. With the help of regular yoga, not only the knee pain is eradicated from its root, but also it makes your knees stronger to avoid any displacements in the future.
Before we proceed with the yoga poses that will help you eliminate knee pain, please check out this complete tutorial on Yoga for knee pain relief for beginners and the elderly. This video beautifully explains the necessary exercises one needs to follow and the best part is that all these exercises can be easily done by anyone and everyone and are proven to be highly effective in the fight against knee pain.
Yoga Poses for Knee Pain
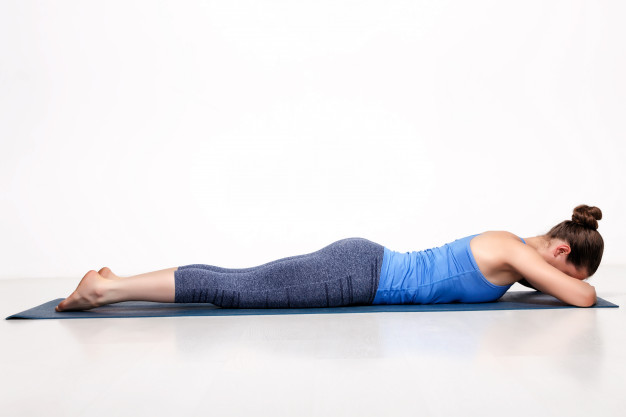
1. Crocodile Pose | Makarasana
Steps:
- To begin with, lie down on your stomach. Use a mat if possible.
- Stretch your hands forward.
- Inhale and raise your upper body. Place your chin on your palms. Elbows should be on the floor with a little gap between them.
- Close your eyes & keep breathing deeply.
- Hold on to this posture for a few minutes as per your convenience.
- Open your eyes while exhaling.
- To release the pose, ease out your palms and bring your shoulders and chin on the ground.
Precautions:
- Although this is an easy asana, if you are suffering from serious back pain, neck pain or back injuries, avoid practicing this asana.
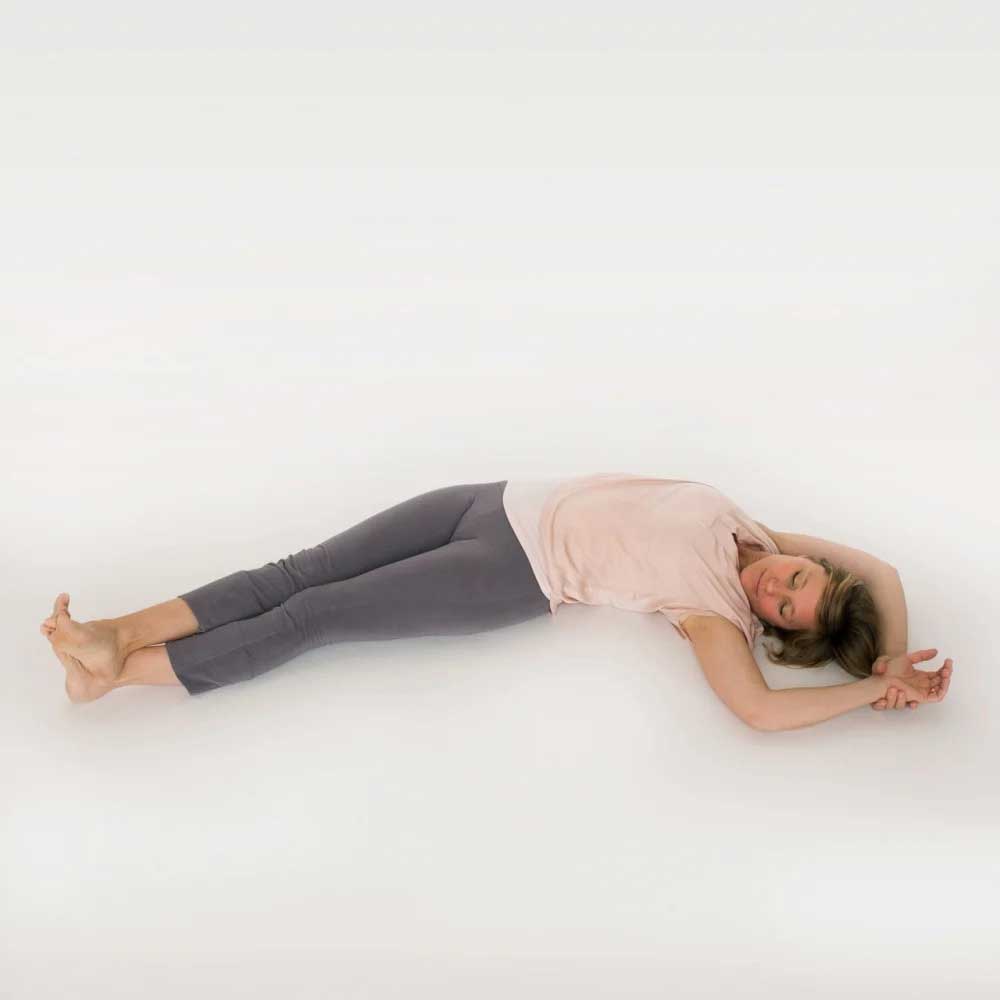
2. Banana Pose | Bananasana
Steps:
- Lie straight on your back with legs joined together.
- Reach your arms overhead and clasp your hands.
- Inhale and keeping your hips firm, move your upper body and legs to your right side. Form an arch like a banana.
- You can spiral your right ankle to the left ankle to deepen the strength of your stretch.
- Be careful not to twist your hips. Stretch according to your comfort.
- Hold this pose and take a few deep breaths.
- Slowly return back to the center while inhaling.
- Repeat this asana for another side.
Precautions:
- Avoid this Asana if you have back injuries.
- If you face tingling sensations in your arms, you can place a bolster under your arm or try holding your elbows instead of your wrists.
3. Locust Pose | Salabhasana

Steps:
- To begin with, lie down on your mat on your belly and place your hands on the inside.
- Breathe in and lift your head away from the floor.
- Keeping your lower belly and pelvis on the floor, raise your leg upwards using your inner thighs. Do not bend your knees.
- Now, raise your arms parallel to the floor and stretch back a little.
- Make sure all your body weight is on your abdomen and lower knees.
- Keep breathing slowly. Stay in this position for 45-60 seconds and then release while exhaling.
- Repeat this asana 2-3 times.
Precautions:
- Do not practice this asana if you have a headache or migraine.
- If you are a patient with High or Low blood pressure, please do not practice this asana.
- Do not push your body; only continue if you are completely comfortable.
4. Bridge Pose | SetubandhAsana

Steps:
- Lying on your back, bend both knees and place the feet flat on the floor hip-width apart.
- Place your arms alongside the body with the palms facing down.
- The fingertips should touch the heels.
- Inhale and lift the hips up, by giving a little pressure on the feet towards the floor.
- Lift your chest up with the support of your arms and shoulders.
- Please note that your shoulders and arms should be resting on the floor.
- Breathe and hold for 4-8 breaths.
- To release: exhale and gently place your spine back to the floor.
Precautions:
- Avoid practicing this pose if you are suffering from neck or back pain.
- Avoid it during a shoulder injury.
- Avoid moving your head left or right.
5. Butterfly pose | Baddha Konasana

Steps:
- Sit straight on your mat with your spine erect and legs stretched out in front of you.
- Now, bend your knees and bring your feet towards your pelvis. See that the soles of the feet are touching each other.
- Now hold your feet tightly with your hands.
- Now inhale deeply and as you exhale, press your thighs and knees down towards the floor.
- Keep breathing normally and start flapping both your legs up and down like a butterfly.
- Increase the speed slowly and gradually as much as you comfortably can.
- Slow down and stop. Take a deep breath and as you exhale, bend forward keeping the spine erect and chin up.
- Press your elbows on your thighs or knees, pushing the knees and thighs closer to the floor.
- As you take long deep breaths, you will feel stretch in your inner thighs. Your muscles will feel relaxed.
- To release the posture, slowly bring the torso up, straighten your legs out in front and relax.
Precautions:
- If you are suffering from groin or knee injury, avoid this asana or place a blanket under your thighs for support.
- Do not speed up immediately. Take your time and gradually increase the speed of flapping.
- Sciatica patients should either completely avoid or practice this asana under expert guidance.
- Should be avoided by ladies if menstruating.
6. Warrior pose 1 | Virabhadrasana 1

Steps:
- Stand straight and keep a 3ft distance between your legs.
- Turn your right leg to a 90-degree angle and the left leg be kept at a comfortable angle
- Then turn your upper body to your right side and bend a little, folding your right leg and left leg straight.
- Raise your hands above your head and hold the pose for 30 seconds
- Repeat the same on the other side too
- You can gradually increase the time of holding the pose can repeat the same after taking some rest.
Precautions:
- Avoid this pose if you are suffering from high blood pressure and any heart problems.
- Avoid this pose if you recently suffered from Diarrhoea.
- Use some support if you have any knee-related issues, like any kind of injury or arthritis.
7. Warrior pose 2 | Virabhadrasana 2

Steps:
- Stand straight and keep a 3ft distance between your legs.
- Turn your right leg to a 90-degree angle and the left leg be kept in a comfortable angle
- Then turn your upper body to your right side and bend a little, folding your right leg and left leg straight.
- Raise your hands by your side and hold the pose for 30 seconds
- Repeat the same on the other side too
- You can gradually increase the time of holding the pose can repeat the same after taking some rest.
Precautions:
- Avoid this pose if you are suffering from high blood pressure and any heart problems.
- Avoid this pose if you recently suffered from Diarrhoea.
- Use some support if you have any knee-related issues, like any kind of injury or arthritis.
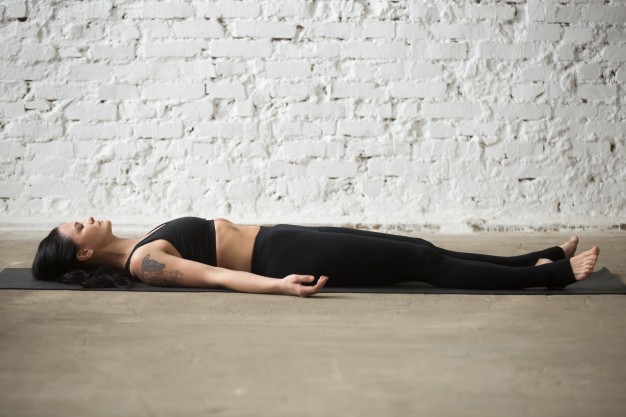
8. Corpse Pose | Shavasana
Steps:
- Lie flat on the floor keeping your back straight.
- Your palms, facing upwards, must be placed slightly apart from your body.
- Close your eyes and place your legs comfortably apart from each other. Make sure your toes are facing sidewards.
- Keeping your head and spine in a straight line, lay peacefully.
- Take a deep breath, draw attention to every part of your body.
- Breathe slowly, setting your body in a state of deep relaxation. Let it soothe your body, mind, and soul.
- Forget everything and try to focus on your body while breathing. Feel each and every breath going in and out.
- Remain in this position for a few minutes (make sure you don’t fall asleep) and slowly come back to your normal position.
Precautions:
- Avoid doing this Asana in a noisy/disturbing environment.
- Make sure not to move your body while performing this asana. You need to remain completely still as even the slightest movement may disturb your practice.
It is highly like to develop knee pain with growing age and it’s only natural given the lifestyle we lead nowadays. However, with the regular practice of yoga, you can avoid the pain and suffering that comes along and lead a healthy life. All you need to do is follow a regular practice of yoga in your daily schedule and you will find yourself in a much better physical as well as mental state.
Also, check out our post on ‘Slow and gentle yoga for seniors’: https://www.yog4lyf.com/post/slow-and-gentle-yoga-for-seniors-old-age
