You must be wondering, “How can someone gain weight from yoga”, right? Well, you’ve come to the right place and in the next few minutes, you will have a completely different understanding of how yoga can help you with weight gain, and trust me, you will be amazed by it!
We all have come across people with incredible body transformations. While most of the people are crazy about getting rid of those few inches around the belly, there is a set of people having issues with putting on weight. No matter what they eat, how much they eat, they just can’t seem to gain any weight. People with obesity might see this as some sort of ‘superpower’, but you and I know it is more of a curse than a boon, and being skinny is no fun at all! People with underweight have their own set of dangers as those who are overweight.
Result of various studies
- Studies have found out that 8.8% of men and 9.7% of women worldwide are found to be underweight.
- In India, around 22% of the population is underweight.
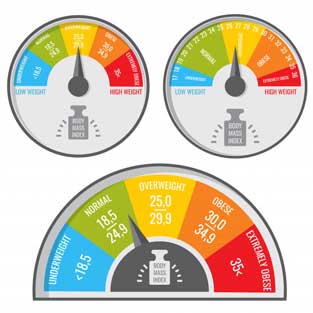
A person having a BMI below 18.5 is considered to be underweight. And being underweight, you are prone to several health-related issues leading to weakened immunity. In most cases, people are found to be underweight genetically. However, in others, it is due to improper or lack of consumption of necessary nutrients required by the body. When the body doesn’t get the necessary nutrients, the immune system takes a hit and one finds it difficult to fight infections and illness. Men experience receding hairline and women experience irregular periods, unstable production of hormones, and lesser estrogen to help support healthy bone mass.
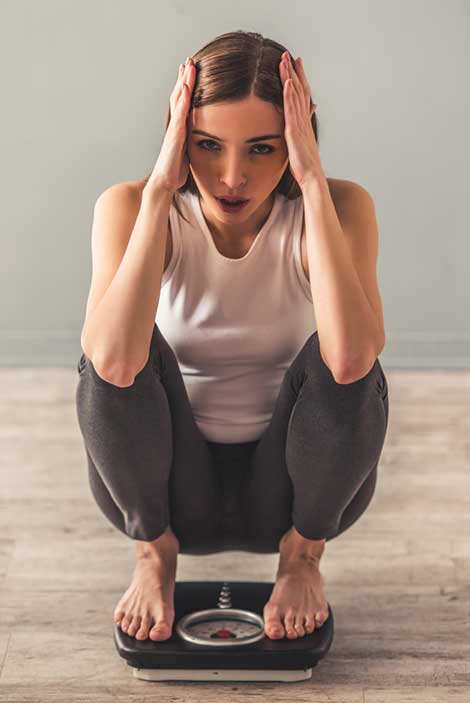
Along with physical issues, underweight people also go through several mental issues such as lack of confidence, social isolation, prone to bullying, and ultimately leading to anxiety and depression. It is equally important to address these issues and find a way to come out of it stronger than ever. Being underweight is not something people ask for, it is a by-product of several reasons discussed above. We, as a society should always look out for such people and come forward to help in every possible way we can.
Follow a Healthy Diet
A healthy diet holds the utmost importance in this process. Your body requires a proper diet that contains all the nutrients for smooth blood flow; if you fail to do that, the internal mechanism gets disturbed and you start feeling tired all the time. The most important thing you can do is create a calorie surplus, meaning consume more calories than your body burns. You can count the calories you consume in a day and gradually increase that number. Calorie calculation plays a significant role in this process of weight gaining. Also adding certain foods in your diet can make this process smooth and effective.

Nutrient-rich foods at help
- Milk – Milk is a good source of Calcium and other vitamins and minerals. It also provides a good balance of proteins, carbs, and fats.
- Protein shakes – Homemade Protein smoothies are easy to make and a highly nutritious way to gain weight.
- Rice – Rice is a good source of Carbohydrates that contribute effectively to gaining weight. It is cost-effective as well as you can simply add proteins and vegetables to your rice and you have a perfectly balanced meal.
- Nuts and Nut butter – Nuts can be consumed raw or dry roasted. NUts can be added in various meals, including salad. Consuming nuts regularly can help a person gain weight safely.
- Potatoes and Starches – Starch plays a vital role in boosting muscle growth. Besides adding calories, Starches also provide glucose that improves performance and exercise during a workout. Potatoes are the most common and cost-effective source of starch. Salmon
- Dried Fruit – Dried fruits are filled with nutrients, calories, fiber, and antioxidants. It’s an easy way to add nutrients and calories to your diet.
- Whole grain bread – Whole grain bread contains complex carbohydrates that promote weight gain.
- Avocados – Avocados are packed with healthy fats, also high in Vitamins, minerals and various beneficial plant compounds. And they are therefore a great food to help you gain weight.
- Cheese – Cheese is a great source of fat, protein, calcium, and calories?
- Dark Chocolate – Dark chocolate is filled with antioxidants and plenty of calories to help you gain weight.
- Healthy Cereals – An excellent source of carbs, calories, and nutrients. Oatmeal can be a great carb source for your body.
- Yogurt – Full-fat yogurt is another ingredient that can help you add healthy fats and protein to your diet. It’s great on its own or as an ingredient that works in many dishes.
How can Yoga help you gain weight?
You must be wondering how can yoga help in this process, right? Yoga is more than just a set of physical exercises; it is a way of life! It is an incredible workout that goes beyond stretching and relaxing; that has a solution to all health-related problems. Yoga helps you combat problems like poor metabolism, stress, lack of appetite, and digestive issues.
What happens to your body when you perform yoga is that it enhances the circulation of oxygen and blood in your body helping you improve the nutrient absorption, resulting in improved stamina, strengthening of muscles and regulates your metabolism. It balances your bodily and mental function which acts as triggers to increase your body weight.
Yoga acts as a booster
While it is very important to note than no asana will automatically make you gain weight. Yoga will act as a booster in this process. Along with a balanced diet, you need to follow a regular yoga regime in order to witness the optimum functioning of your metabolism, improving your digestion, increasing your appetite, and boosting your stamina.
We have listed below the best-suited yoga poses for weight gain, followed by the best-suited yoga poses for strengthening arms, legs, abdomen, and hips.
Yoga poses for Weight Gain
1. Thunderbolt pose | Vajrasan
Steps:
- Sit in a position where the soles of your feet are on your buttocks.
- Place the thighs on the legs one over the other and soles on your buttocks.
- Your whole body weight should fall on your knees and ankles. Make sure your calves are touching the thighs.
- Sit straight with an erect spine and close your eyes.
- Take a deep breath and place your palms on the respective knees while you inhale and exhale.
- Hold on to this position for 3-5 minutes initially. Gradually increase the time up to 15 minutes.
Precautions:
- People suffering from joint pain should avoid this asana.
- Also, people having lower back problems and spinal problems should avoid this asana.
- Those having a hernia, intestinal ulcers, and other diseases related to small and large intestines should practice this yoga under expert guidance.
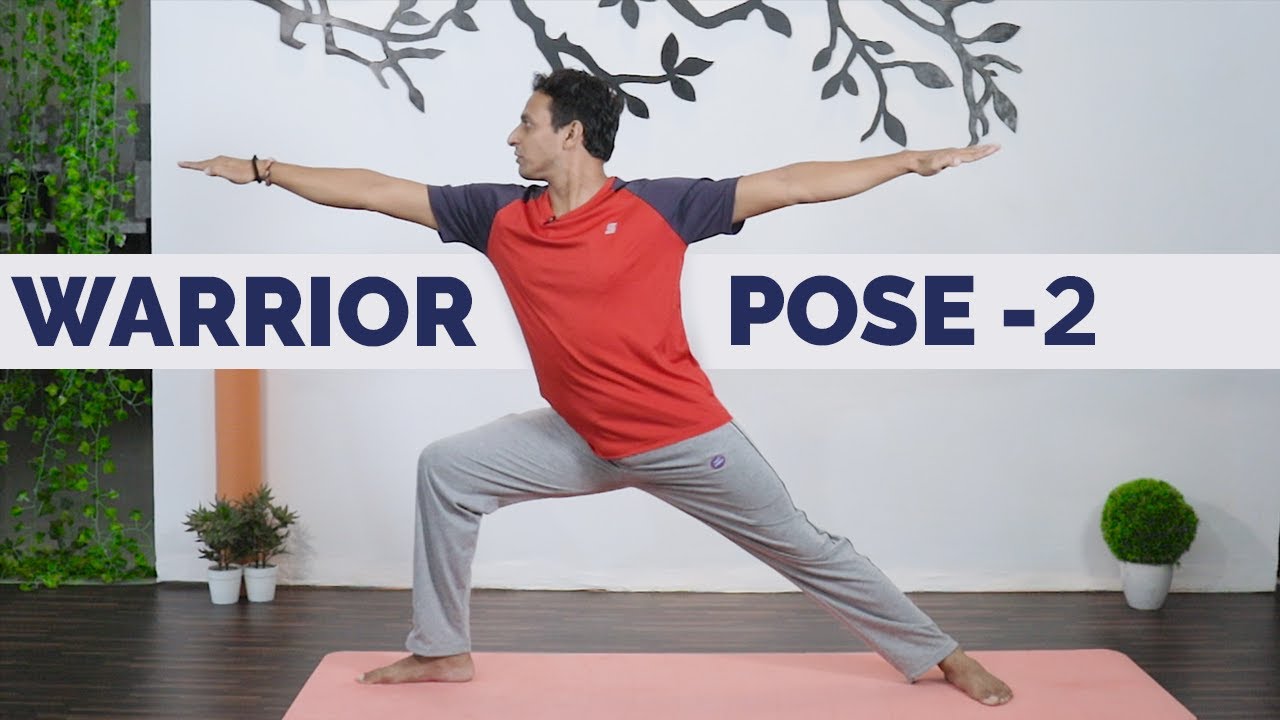
2. Warrior pose 2 | Virabhadrasana 2
Steps:
- Stand straight and keep a 3ft distance between your legs.
- Turn your right leg to a 90-degree angle and the left leg be kept in a comfortable angle
- Then turn your upper body to your right side and bend a little, folding your right leg and left leg straight.
- Raise your hands by your side and hold the pose for 30 seconds
- Repeat the same on the other side too
- You can gradually increase the time of holding the pose can repeat the same after taking some rest.
Precautions:
- Avoid this pose if you are suffering from high blood pressure and any heart problems.
- Avoid this pose if you recently suffered from Diarrhoea.
- Use some support if you have any knee-related issues, like any kind of injury or arthritis.
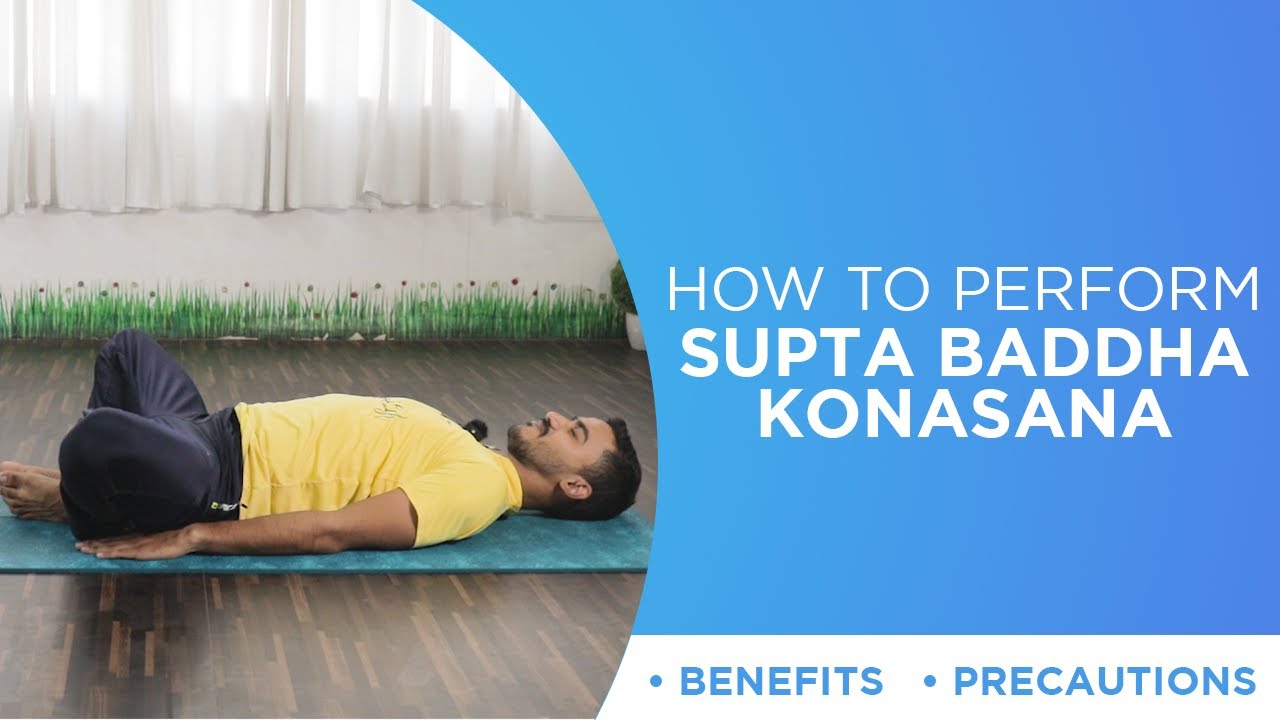
3. Reclining bound angle pose | Supta baddha konasana
Steps:
- To begin with, get into ‘Staff pose | Dandasana’ with your legs stretched in front of you. Use a mat or blanket if possible.
- Bend your knees and bring the heels towards your pelvis. Press the soles of your feet together and allow your knees to drop open on respective sides. This is the Bound Angle pose or Cobbler’s Pose or Baddha Konasana.
- Now gently lean backward and place your elbows on the floor. Then slowly lower your back all the way to the floor.
- Now adjust your position by gently pushing your buttocks from side to side so that your spine lengthens along the floor maintaining the natural curve of the lower back.
- Let your arms relax with palms facing up and draw your shoulder blades gently inwards.
- Lengthen your tailbone towards the heels and relax your buttocks.
- Close your eyes. Take a few deep breaths. Allow your body to feel heavy.
- Stay in this position for one minute and gradually extend your stay anywhere from five to ten minutes at your convenience.
- To come out, draw your knees together, roll to your right side, and use your hands to press yourself up to a comfortable position.
Precautions:
- Avoid this Asana if you have an injury in the knee, hip, groin, lower back, or shoulder.
- Always work with your own range of limits and abilities. Do not push your body.
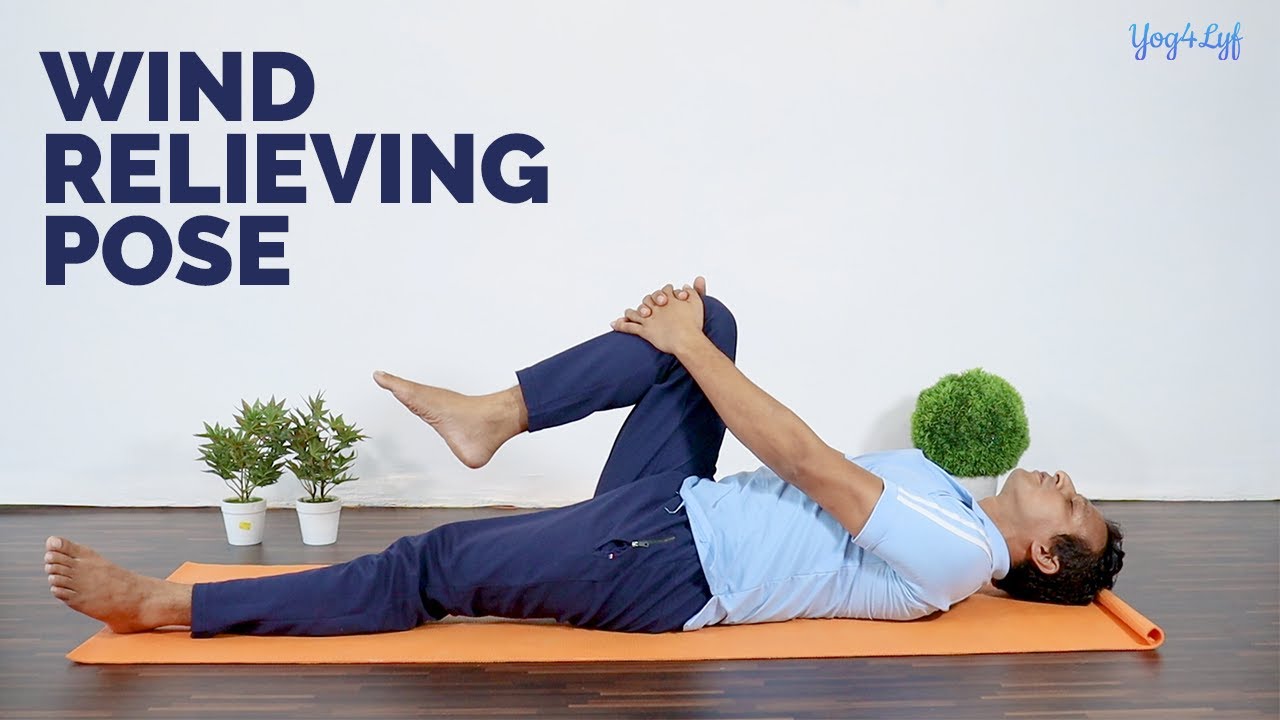
4. Wind Relieving Pose | Pawanmuktasana
Steps:
- Lie down on your back keeping your feet together and arms placed beside your body.
- Inhale slowly and as you exhale, bring your knees towards your chest, and press your thighs on your abdomen.
- Now, clasp your hands around your legs as if you are hugging your knees.
- Bend the neck and place the chin on the knees. Hold for a few moments as you continue breathing.
- See that you tighten your grip and increase pressure on your chest every time you exhale; loosen the grip while you inhale.
- To come out, exhale and straighten your neck and lower the head back on to the ground. While you exhale, lower the legs and come back to the starting position.
Precautions:
- Avoid this asana if you’ve gone through recent abdominal surgery.
- Anyone suffering from Hernia, Piles should avoid this asana.
- Pregnant women should avoid this asana.
- If you have a neck injury, practice this asana under expert supervision.
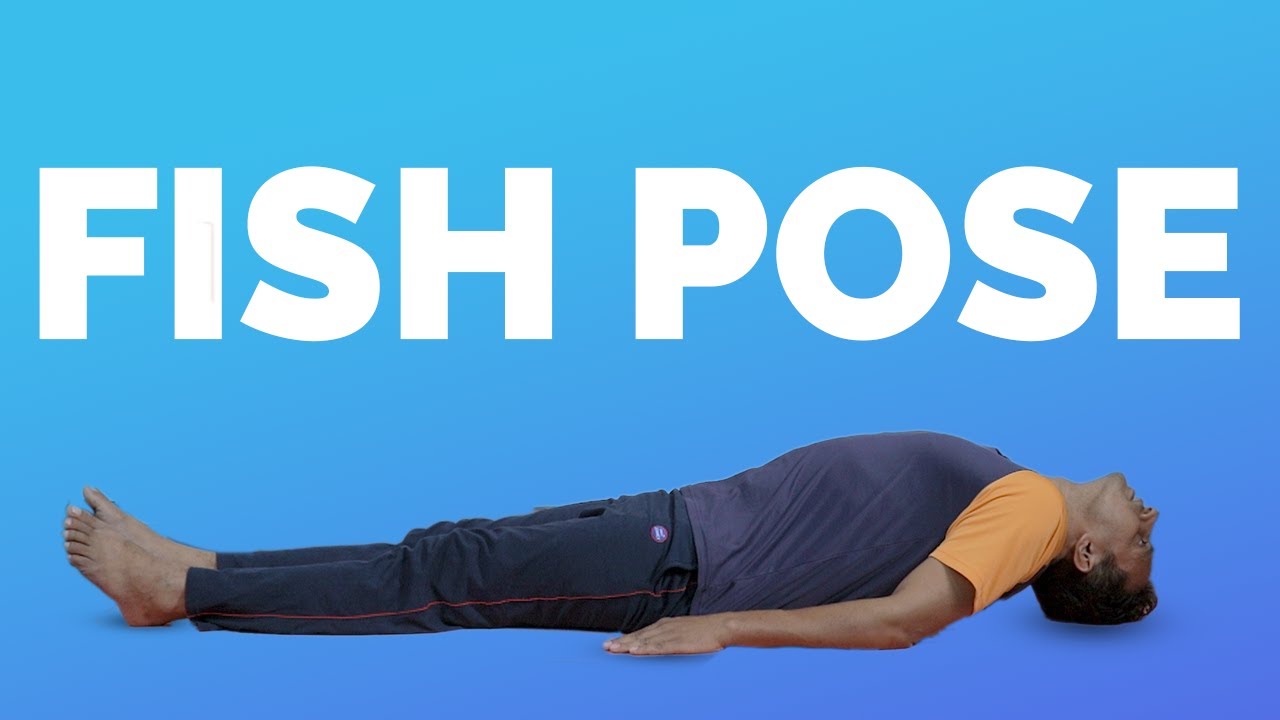
5. Fish Pose | Matsyasana
Steps:
- Roll up a blanket and then Lie down flat on the floor keeping the rolled blanket between your shoulders and hips
- Your head should be placed back and it should touch the floor, hands by your side, palms up, legs straight.
- Breathe in and out gently. If you take 2 seconds to breathe in, take 4 seconds to exhale.
- Practice for 2 minutes to start with. Extend time as you go along.
Precautions:
- Avoid this asana if you are suffering from high blood pressure or low blood pressure.
- Avoid practicing this pose if you have any back or neck injury or hernia.
6. Wheel Pose | Chakrasana
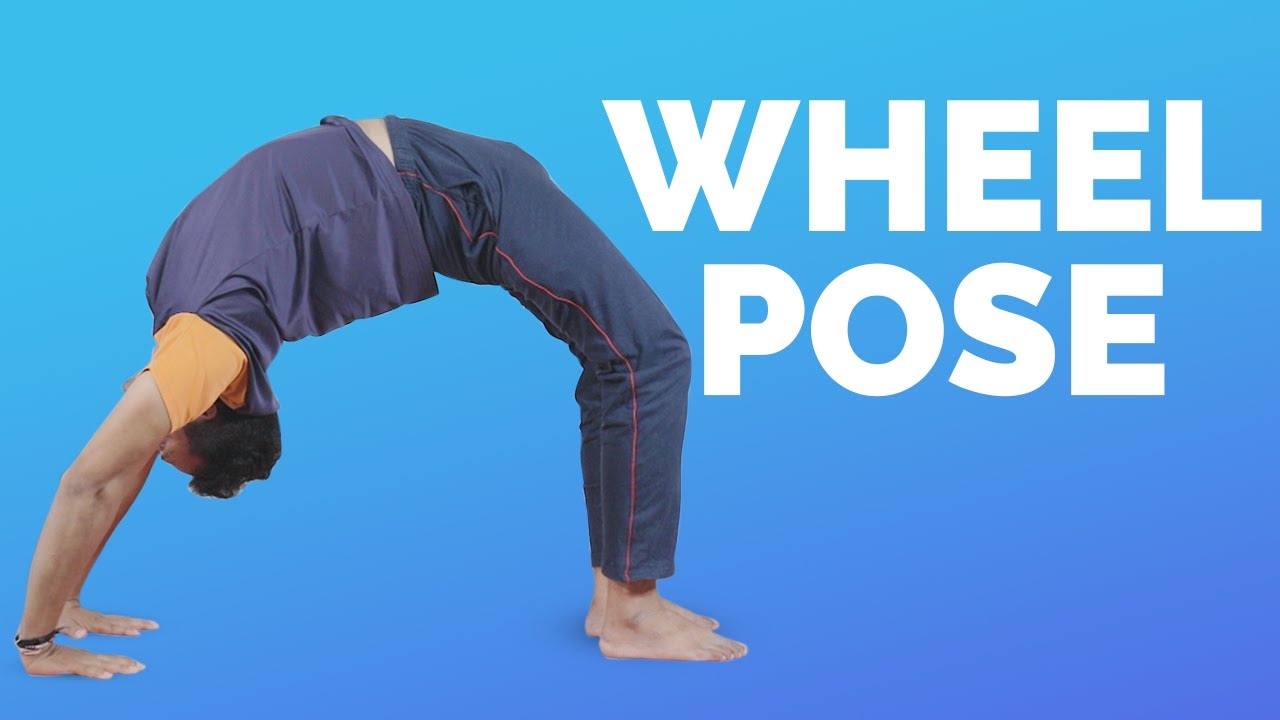
Steps:
- To begin with, lie down on your back. You can refer to Shavasana.
- While maintaining some distance between the feet, bend your heels closer to your hips.
- Now slowly raise your arms and bring your palms under your shoulders.
- With inhalation lift your body up while pressing your palms and feet on the ground.
- Try to raise your body as much as you can.
- Hold onto this position for a few seconds and breathe normally.
- Now release your pose to come to the starting position.
- Repeat 2-3 times.
Precautions:
- You should not practice this asana directly. Start with simple bending asanas and gradually start practicing Wheel pose.
- Avoid this pose if you are suffering from heart problems, low-high blood pressure.
- If you have spine-related problems, kindly avoid this asana.
7. Shoulder Stand Pose | Sarvangasana
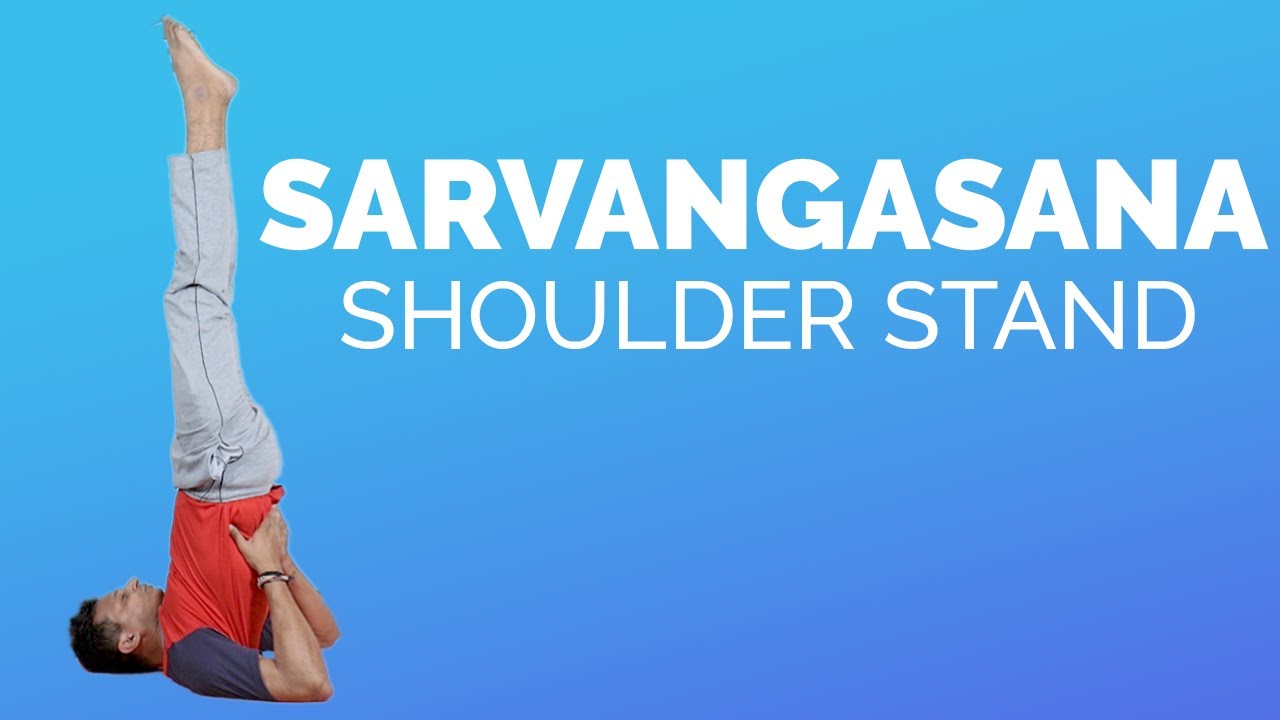
Steps:
- To begin with, lie down on your back with hands on the side.
- Gently lift your legs, buttocks, and back such that you come up high on your shoulders. You can use your hands to support your back.
- Inhale and raise the back and legs up into a vertical position. Your chin should rest against the chest, creating a chin lock.
- Keep your legs firm and fix your eyesight on the toes as you maintain balance.
- Continue normal breathing and remain in this position for about 30-60 seconds.
- To come out, inhale and while exhaling, bend the waist and lower the legs over the head. Bring your hands to the floor.
- Inhale and lower your back on the floor keeping your legs at 90 degrees. Be very gentle while your lower your back. Then slowly lower your legs back to the starting position.
Precautions:
- You will have to be extra careful while performing this asana. Perform each pose very slowly and gently to avoid any mishaps.
- People suffering from high blood pressure, heart diseases, and brain conditions should avoid this asana.
- Avoid if you are suffering from slip disc, enlarged thyroid, headache, or cervical spondylitis.
| Yoga Pose For Strengthening Arms |
1. Side Plank
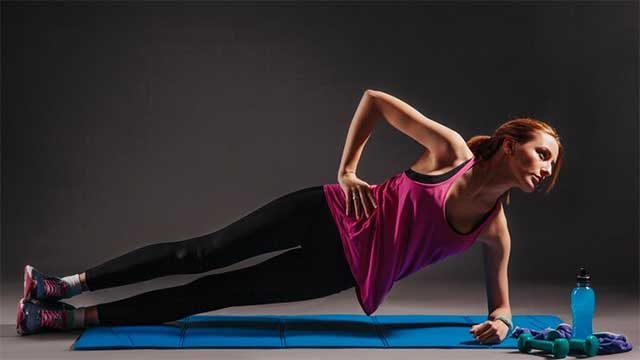
Steps:
- To begin with, lie on your right side keeping the elbow of the right arms directly under the shoulder.
- See that your spine is straight and your head is directly in line with your spine.
- With an inhalation, engage your abdominal muscles, drawing your navel toward the spine.
- Now slowly lift your hips and knees as you exhale. Your torso must be straight in line. The pressure will be on your right hand. See that your body is not bending or sagging.
- Hold this position for about 30-60 seconds at your convenience.
- To come out, inhale and return back to the starting position.
- Change sides and repeat.
Precautions:
- Avoid this asana if you have an injury in your shoulders, arms, elbows, or ankles.
- Do not exceed your limit while performing this asana. Stop if you feel pain at any time.
2. Upward Facing Dog Pose | Urdhva Mukha Svanasana

Steps:
- Stand straight on your legs then bend forward.
- Place your palms on the floor, note that your fingers are widely spread and balanced.
- There should be enough space between your knees and palm.
- Now, take note that your wrists are exactly aligned with your shoulder, and knees aligned with hips.
- Stretch your elbows and let your upper back relax.
- Lift both your knees from the floor and raise your pelvis too.
- Straighten your legs gradually, as straight as possible.
- Bring your body into the shape of the alphabet ‘A’.
- Stay stable and do not change the distance between your palms and feet.
- Draw your shoulder blades into your upper back ribs and toward your tailbone.
- Hold this position for 30 seconds and later you can increase your time limit.
- To relax from that position, relax your knees and bend down.
Precautions:
- If the person practicing this pose has stiff or weak back muscles, tight hamstrings, sciatica, or knee problems should practice this pose gently and gradually easing in and out of the pose while keeping the knees bent and back straight.
- Those with Carpal Tunnel Syndrome should press down into the base of their fingers.
4. Upward Plank Pose | Purvottanasana

Steps:
- Sit on the floor with your legs extended in front of you and your arms resting on the sides, refer Dandasana.
- Bring your hands behind your hips and rotate your palms such that your fingertips are pointed towards your toes.
- With an inhalation, lift your hips as up as you can, keep your chest lifting and spine in one straight line.
- Firm your shoulder blades on your back to help lift your chest up. Try pressing the soles of your feet into the floor while keeping your legs straight and firm.
- Slowly release your head and allow it to drop back opening your throat.
- Hold onto this position for about 30 seconds and to come out, lower your hips back to the floor and come back to Dandasana with an exhalation.
Precautions:
- Do not practice this asana if you have Carpal Tunnel Syndrome, a shoulder injury, or a wrist injury.
- See that your wrists are directly under your shoulders in this pose.
5. Extended Hand-To-Big-Toe Pose | Utthita Hasta Padangustasana
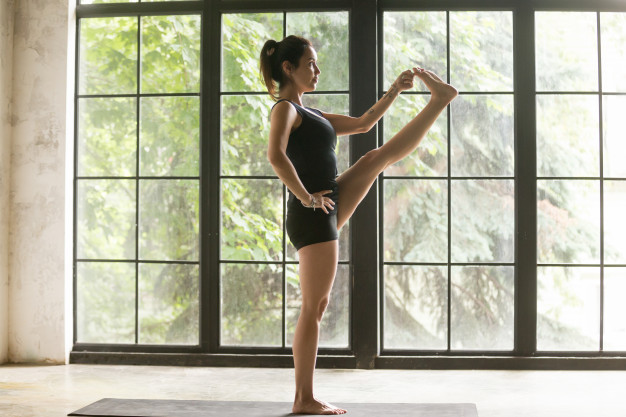
Steps:
- First of all, get into Tadasana/Mountain Pose.
- With an exhalation, lift your right knee up and bring it toward your belly. Try to grab your big toe with your right hand.
- Firm the thigh muscles and lengthen your spine. Keep your shoulder blades firmly on the back, and your chest open.
- Gaze at a point at your eye level and stay in this position for about 5-7 breaths.
- To come out, bring your leg back to the center. With an exhalation, lower your foot back to the floor.
- Repeat on the other side.
Precautions:
- Avoid this asana if you are suffering from ankle or low back injuries.
| Yoga For Strengthening Legs |
1. Chair pose | Utkatasana
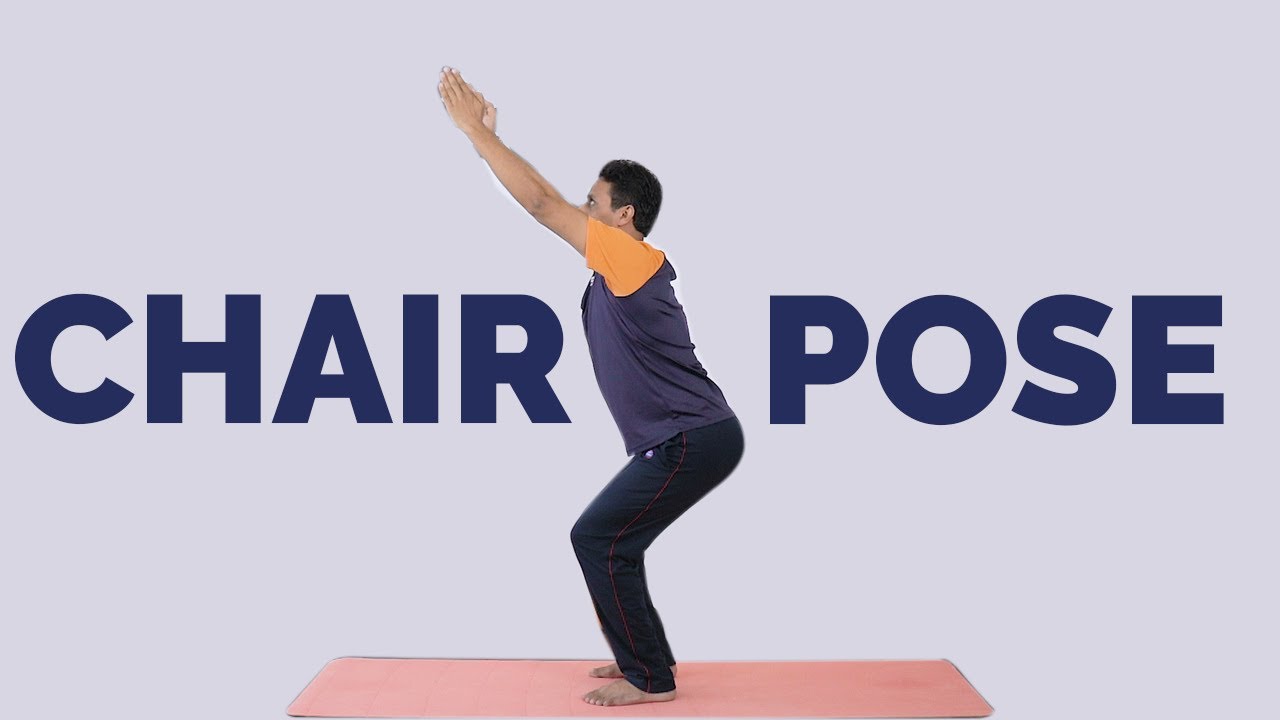
Steps:
- Stand straight with the spine erect and arms at your side.
- Maintain one hand distance between the feet.
- Stretch your hands forward keeping them parallel to the floor. See that your hands are straight and palm faced downwards.
- Now gently bend your knees and bring your pelvis down as if sitting on a chair. Try to bring your thighs parallel to the ground.
- Hold onto this position for a few breaths.
- Release this position to come back to the starting position.
- Repeat this pose 3-5 times.
Precautions:
- Avoid this pose if you have knee problems or Arthritis.
- Also avoid in case of low blood pressure, insomnia, or headache.
2. Goddess Pose
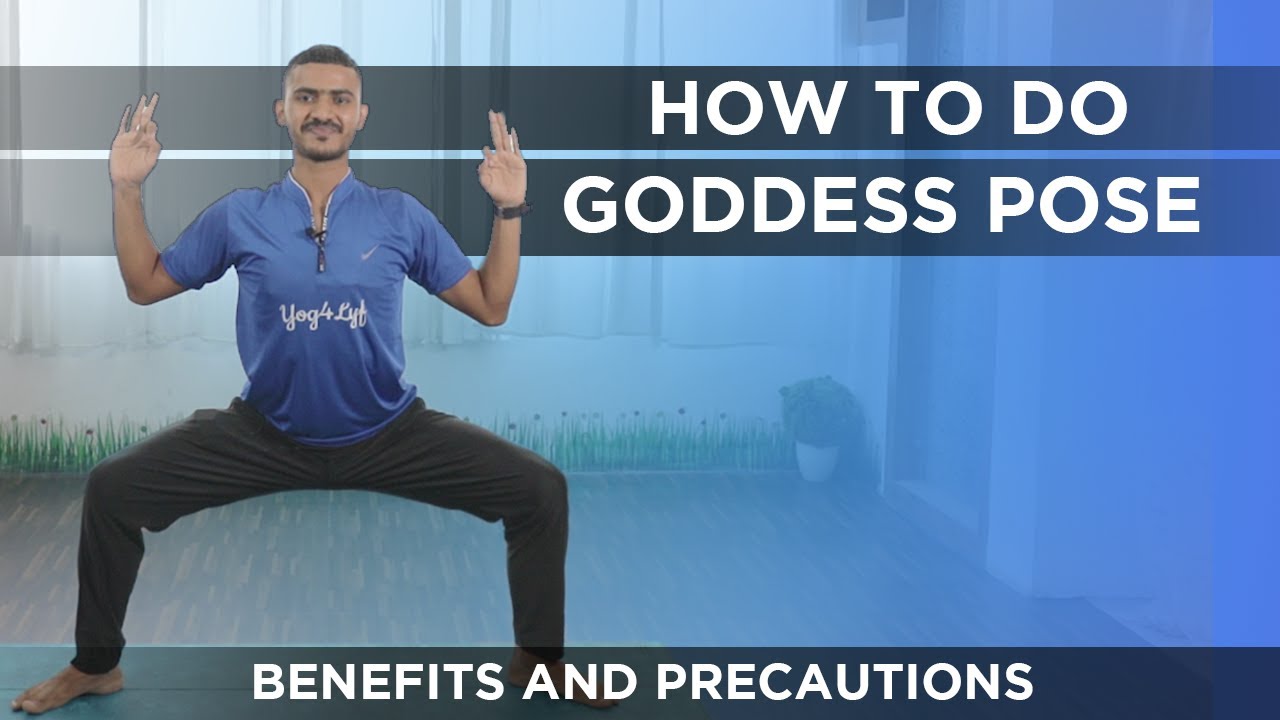
Steps:
- Place your feet so they’re about 6-8 inches wider than the shoulder width.
- Rotate your feet out at a 45-degree angle.
- Now bend your knees making a 90-degree angle, just right above your ankles, and not further.
- With an inhalation, contract your abdominal muscles and slightly tuck down your tail bone.
- Bring your hands in front of your chest in ‘Namaste Position’ while you lean forward slightly to put pressure on your abdomen.
- Hold on to this position for 6-8 breaths.
- To come out, inhale and release your position to come back to normal position.
Precautions:
- Do not put too much pressure on your stomach while performing this asana.
- After the first trimester, a pregnant woman should avoid this asana.
3. Dancer pose | Natrajasana

Steps:
- Stand straight on your mat keeping arms by your sides.
- With an inhalation, raise your right leg backward and hold your ankle with your right hand.
- Try to move your right leg upwards as much as you comfortably can.
- Now slowly, stretch your left arm out in front of you. Keep it straight.
- Hold this posture for a few breaths and come back to normal position.
- Repeat with another leg.
Precautions:
- You can take help from a friend in the beginning as you might find it a bit challenging to maintain balance.
- Refrain from performing this asana in case of low blood pressure.
4. Warrior pose 1 | Virabhadrasana 1
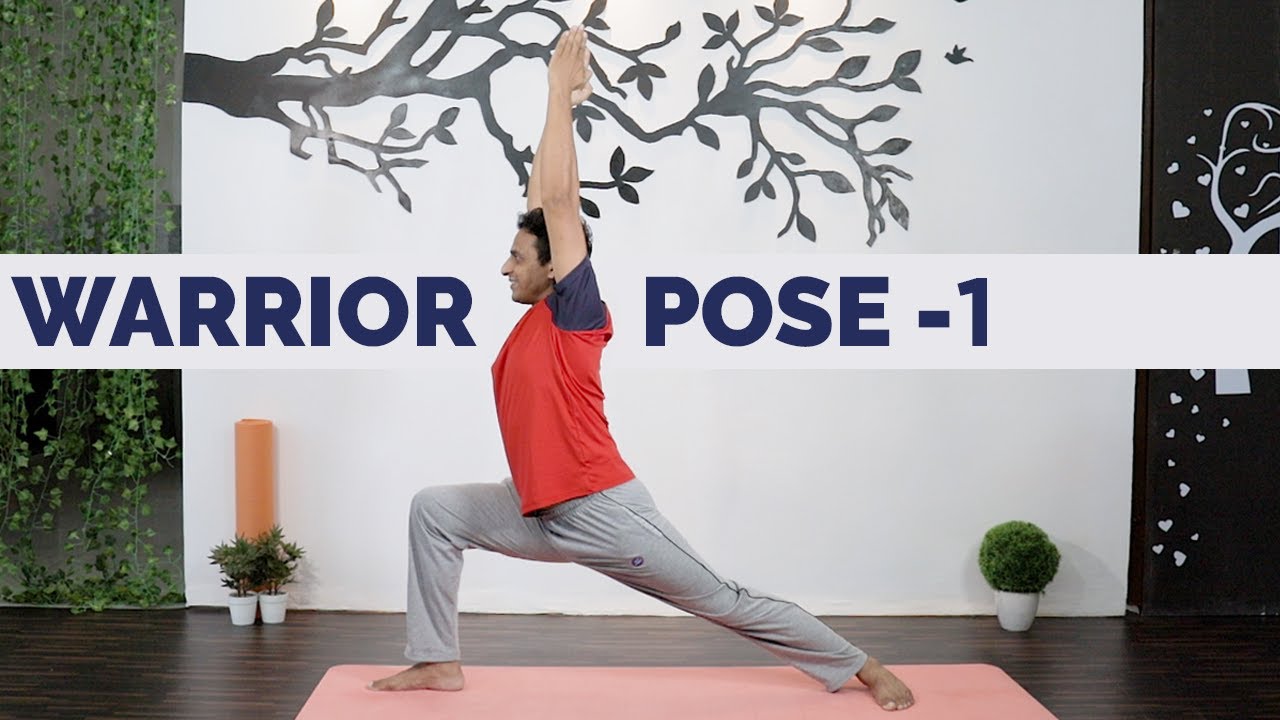
Steps:
- Stand straight and keep a 3ft distance between your legs.
- Turn your right leg to a 90-degree angle and the left leg be kept in a comfortable angle
- Then turn your upper body to your right side and bend a little, folding your right leg and left leg straight.
- Raise your hands above your head and hold the pose for 30 seconds
- Repeat the same on the other side too
- You can gradually increase the time of holding the pose can repeat the same after taking some rest.
Precautions:
- Avoid this pose if you are suffering from high blood pressure and any heart problems.
- Avoid this pose if you recently suffered from Diarrhoea.
- Use some support if you have any knee-related issues, like any kind of injury or arthritis.
5. Camel Pose | Ushtrasana
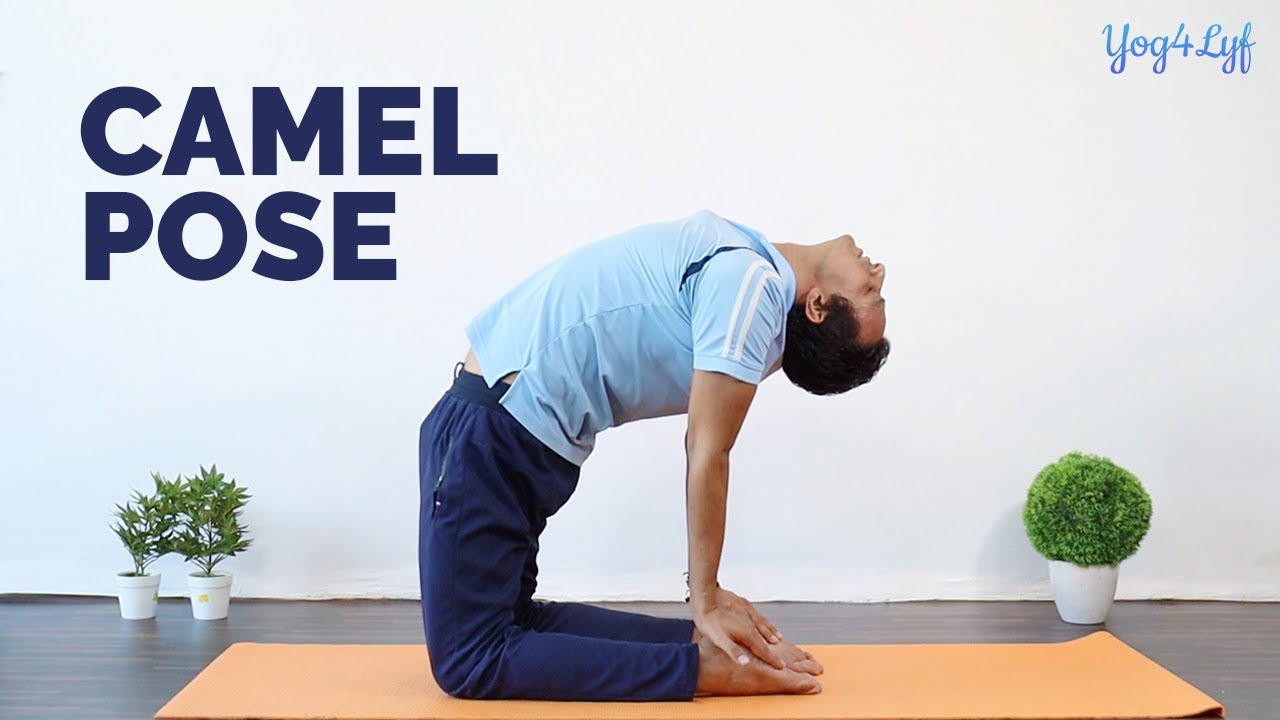
Steps:
- First of all, kneel on the floor.
- Keep your thighs and feet together.
- Toes should be pointing back and resting on the floor.
- Bring the knees and the feet about one foot apart and stand on the knees.
- Inhale, bend backward slowly.
Precautions:
- Avoid this pose if you are suffering from high or low blood pressure.
- Do not practice the camel pose if you have a migraine, serious lower back or neck injury.
- Avoid it if you are suffering from Insomnia.
| Yoga For Strengthening Abdomen |
1. Cobra Pose | Bhujangasana

Steps:
- To begin with, first, lie down flat on your stomach.
- Place your legs comfortably and toes touching the floor and sole facing the roof.
- Then place your palm near your chest,
- Keep your elbows closely tucked inside.
- Then without moving your lower body, raise our upper body supported by your hands.
- Keep breathing normally and stay in the same position for 30 second
- Withdraw from that position, take rest, and try again for more than 30 seconds.
Precaution:
- Do not practice Cobra pose, if you have any recent back or wrist injury.
- Avoid if you are pregnant.
2. Wheel Pose | Chakrasana
Steps:
- To begin with, lie down on your back. You can refer to Shavasana.
- While maintaining some distance between the feet, bend your heels closer to your hips.
- Now slowly raise your arms and bring your palms under your shoulders.
- With inhalation lift your body up while pressing your palms and feet on the ground.
- Try to raise your body as much as you can.
- Hold onto this position for a few seconds and breathe normally.
- Now release your pose to come to the starting position.
- Repeat 2-3 times.
Precautions:
- You should not practice this asana directly. Start with simple bending asanas and gradually start practicing Wheel pose.
- Avoid this pose if you are suffering from heart problems, low-high blood pressure.
- If you have spine-related problems, kindly avoid this asana.
3. Plank pose | Phalakasana
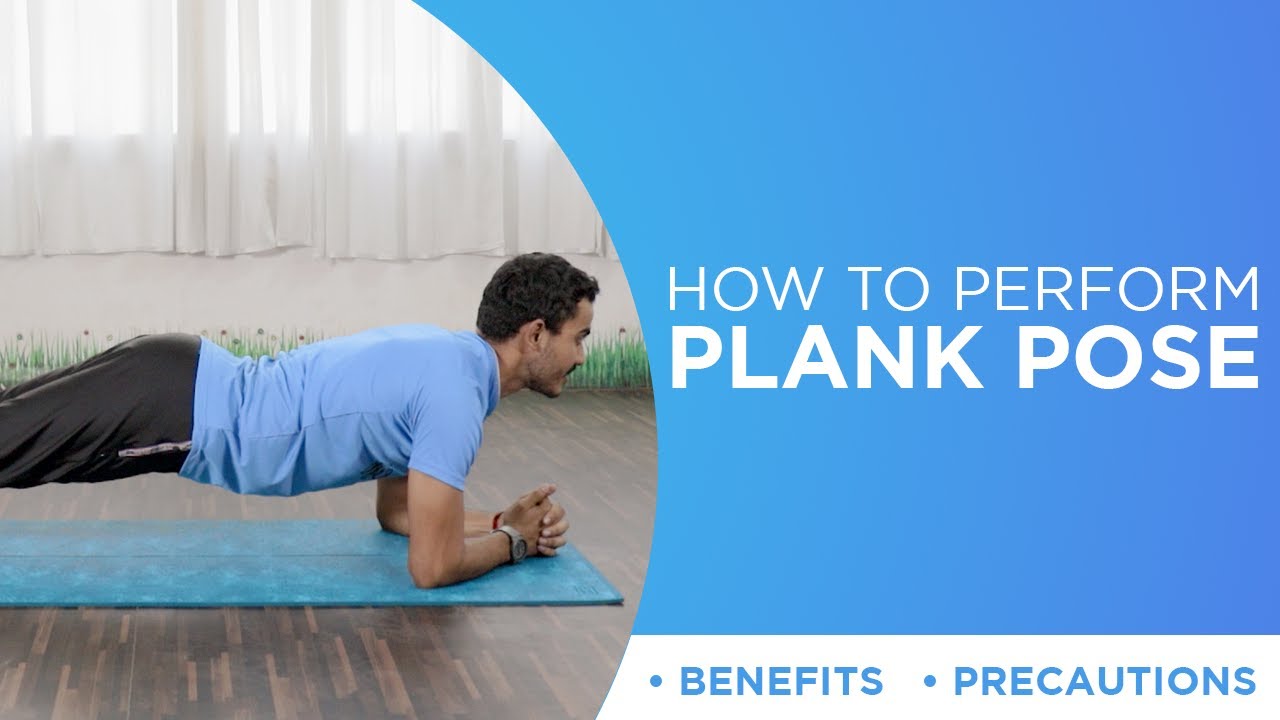
Steps:
- Calm yourself and lie down on the mat on your stomach.
- Bring your palm near your shoulders and raise your torso towards the ceiling.
- Make sure that your shoulders are parallel to your palms.
- Allow your buttocks to be near the shoulder level.
- You should be on your toes while doing so that the pose is properly done.
- Hold this pose for as long as you can and with practice aim it to hold it at least for 30 seconds and gradually increase the time.
Precautions:
- Avoid practicing this pose if you are suffering from carpal tunnel syndrome.
- Those with osteoporosis should also avoid Plank Pose due to the risk of fractures.
4. Bridge Pose | SetuBandhasana
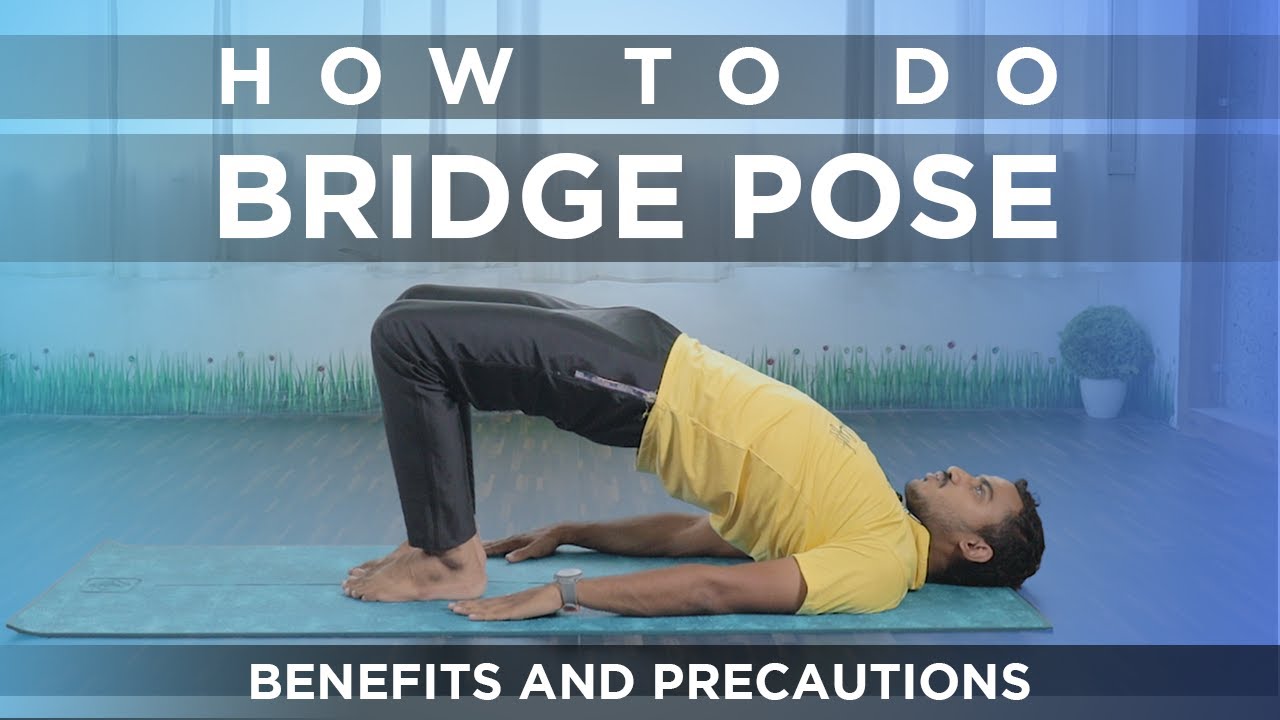
Steps:
- Lying on your back, bend both knees and place the feet flat on the floor hip-width apart.
- Place your arms alongside the body with the palms facing down.
- The fingertips should touch the heels.
- Inhale and lift the hips up, by giving a little pressure on the feet towards the floor.
- Lift your chest up with the support of your arms and shoulders.
- Please note that your shoulders and arms should be resting on the floor.
- Breathe and hold for 4-8 breaths.
- To release: exhale and gently place your spine back to the floor.
Precautions:
- Avoid practicing this pose if you are suffering from neck or back pain.
- Avoid the yoga pose if one is having any knee pain.
- Avoid it during a shoulder injury.
- Avoid moving your head left or right.
- Do not put more pressure on the neck.
5. Bow Pose | Dhanurasana
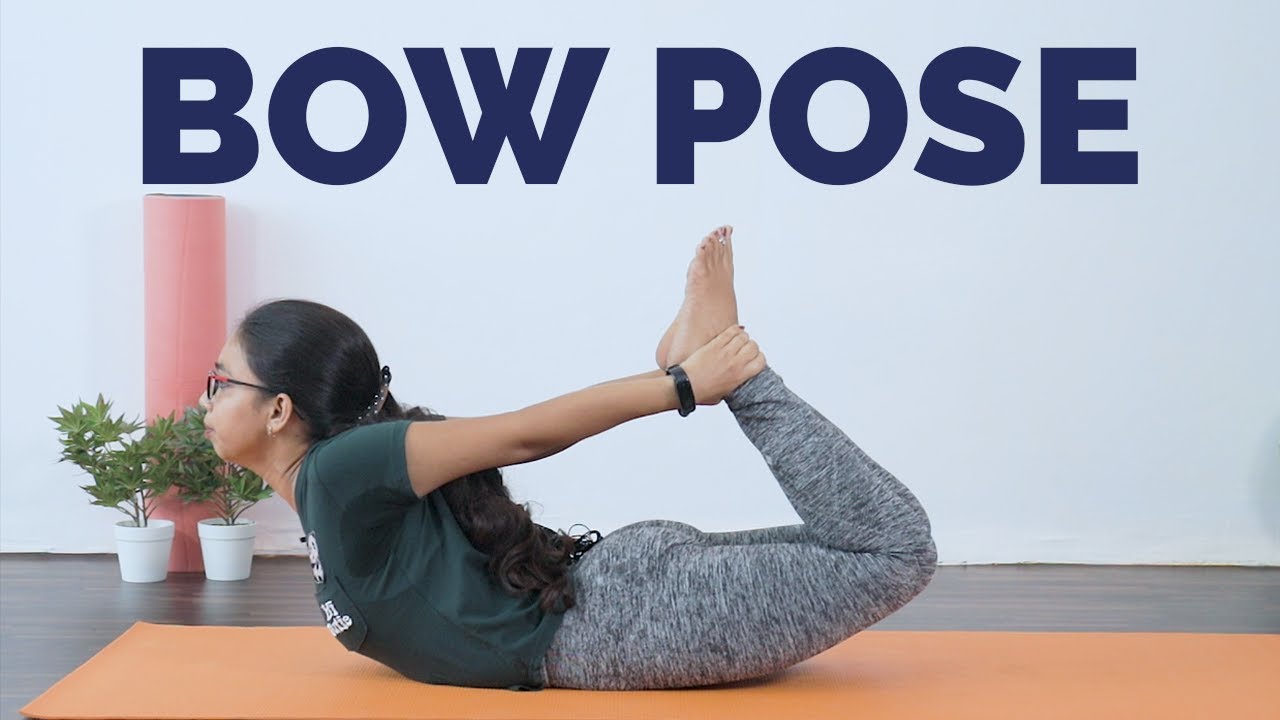
Steps:
- Lie stomach-down on the floor.
- Raise front torso, supporting weight on the stomach.
- Raise legs off the floor, fold at knees.
- Take hands back and take hold of your ankles, arching up and back as much as you can.
Precautions:
- One should not practice this right after having a meal or right before sleeping.
- Avoid this pose if you are suffering from high blood pressure or any heart problems
6. Boat Pose | Paripurna Navasana
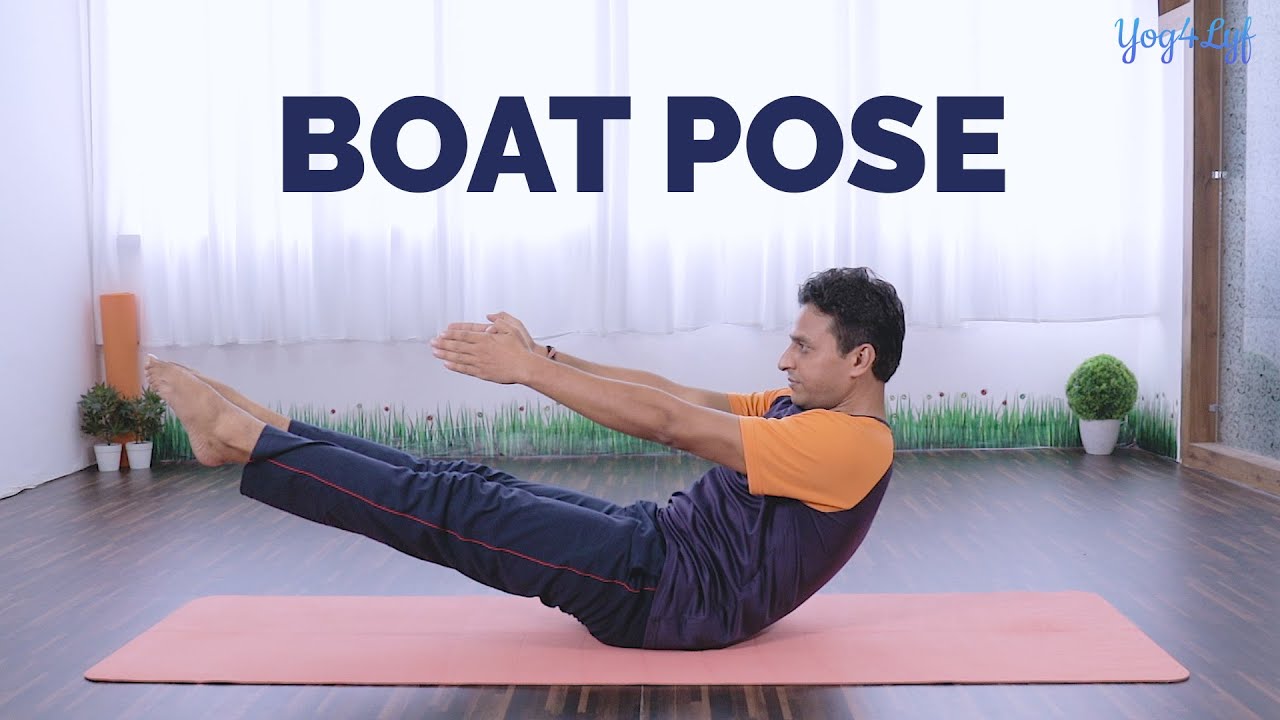
Steps:
- Begin in a seated position with your knees bent and feet flat on the floor.
- Inhale and raise your feet off the floor. Keep your knees bent and bring your sheens parallel to the floor.
- Your torso will naturally fall back but see that your spine is erect.
- Now, straighten your legs to a 45-degree angle. You want to keep your torso as upright as possible so that it makes a ‘V’ shape with the legs.
- Rollback your shoulders and try to straighten your arms parallel to the floor keeping your palms turned up.
- Try to balance your tailbone; it’s normal if you are leaning slightly. Focus on lifting your chest to support the balance.
- Hold on to this position for 3-5 breaths.
- With an exhalation, release your legs to come out of this pose. Then inhale and sit up.
Precautions:
- Avoid practicing this pose if you have headaches, Asthma, Insomnia, Diarrhoea, Heart problems, or Low Blood Pressure.
- Do not practice this asana while pregnancy or menstruation.
| Yoga For Strengthening Hips |
1. Garland Pose | Malasana
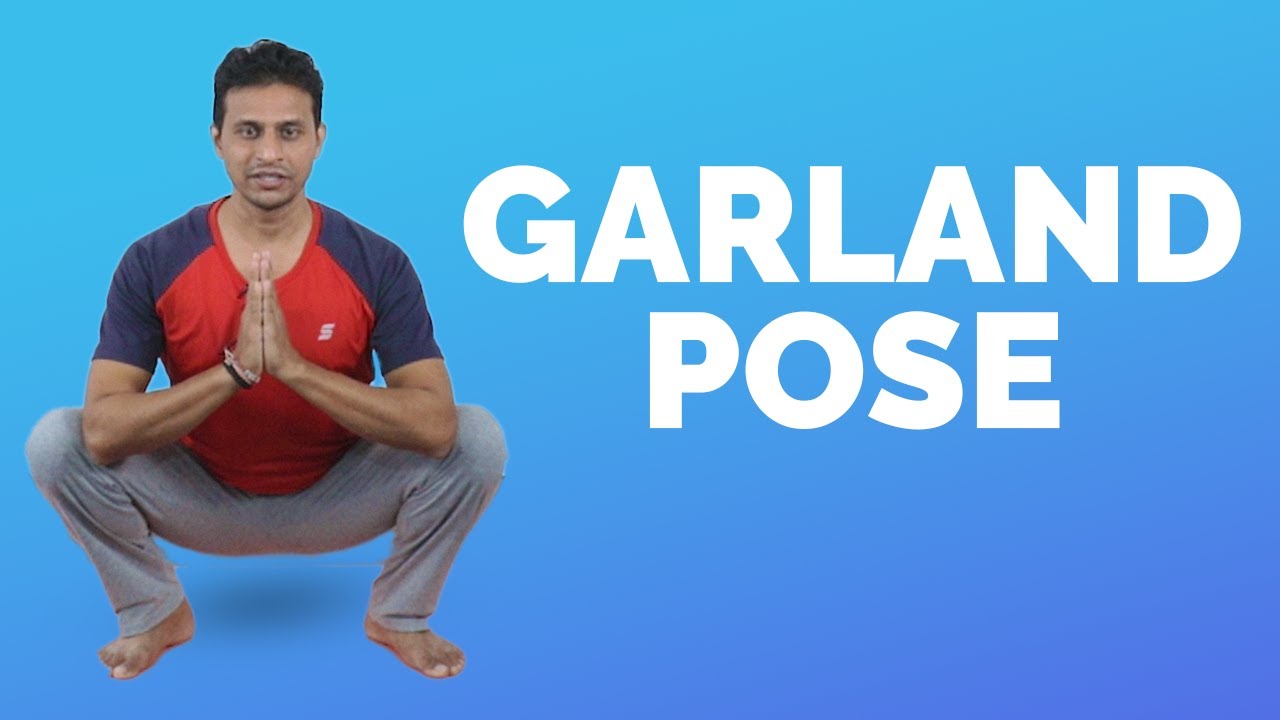
Steps:
- Stand straight in Tadasana. Spread your feet slightly wider than the width of your hip.
- Exhale and lower your hips. Keep lowering your hips until they are few inches above the floor.
- Take a deep breath. Spread out your knees and thighs.
- Lean your torso forwards, a little between your thighs and knees.
- Bring your hands in front of your chest and form “Namaste pose (Anjali Mudra)”.
- While you are at it, try to press your triceps against your inner thighs.
- Close your eyes. Hold this pose for 30 seconds to one minute at your convenience.
- To get back, inhale and stand slowly to your normal position.
Precautions:
- Avoid this asana if you have an injury in the knee, back, or ankle.
- It is essential to perform this asana in an empty stomach. Try doing it in the early morning or 4 hours after a meal.
- Instead of putting your whole weight on your heels, try spreading the whole body weight evenly throughout the whole feet.
- Do not perform this asana immediately after running.
2. Happy baby pose | Anandasana
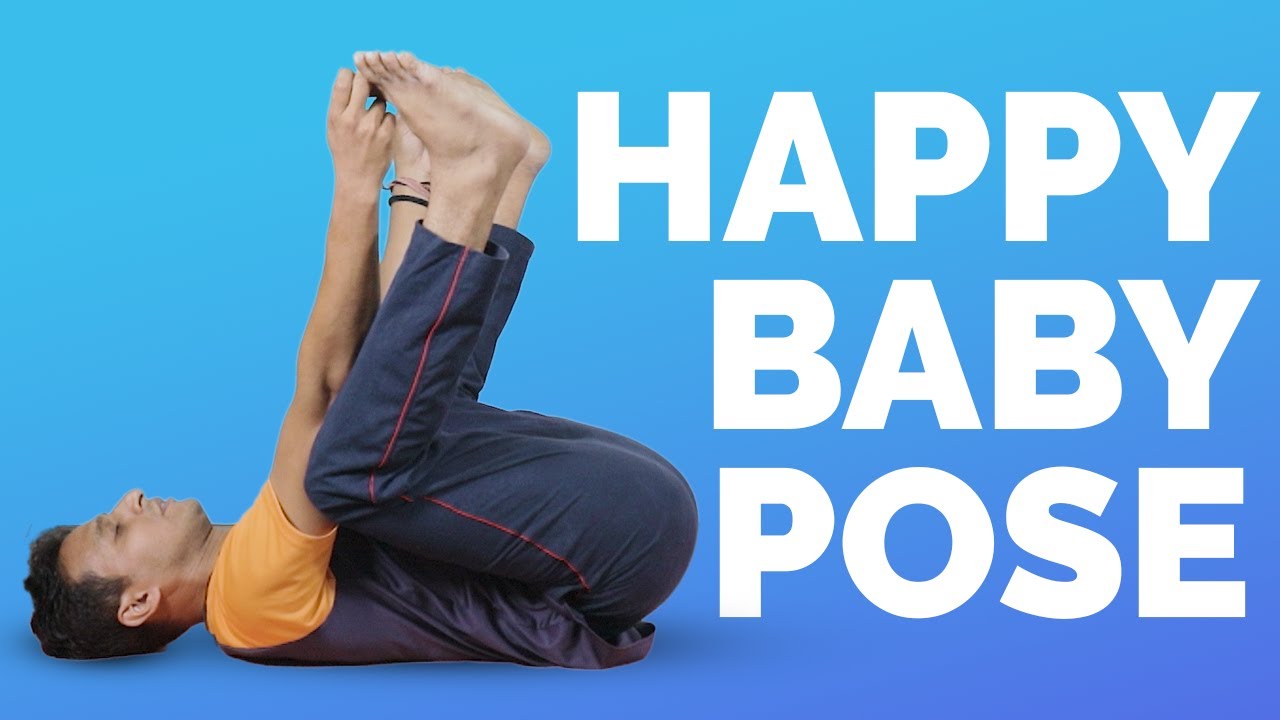
Steps:
- Lie on your back.
- Bend your knees into your belly after exhaling.
- Then inhale deeply and hold your feet with your hands.
- Open your knees slightly wider than your torso and bring them up toward your armpits.
- Keep pulling your hands down gently to create resistance.
Precaution:
- Pregnant women should avoid this pose.
- Avoid this pose if you are suffering from any kind of knee injury or neck injury.
3. Cow Face Pose | Gomukhasana
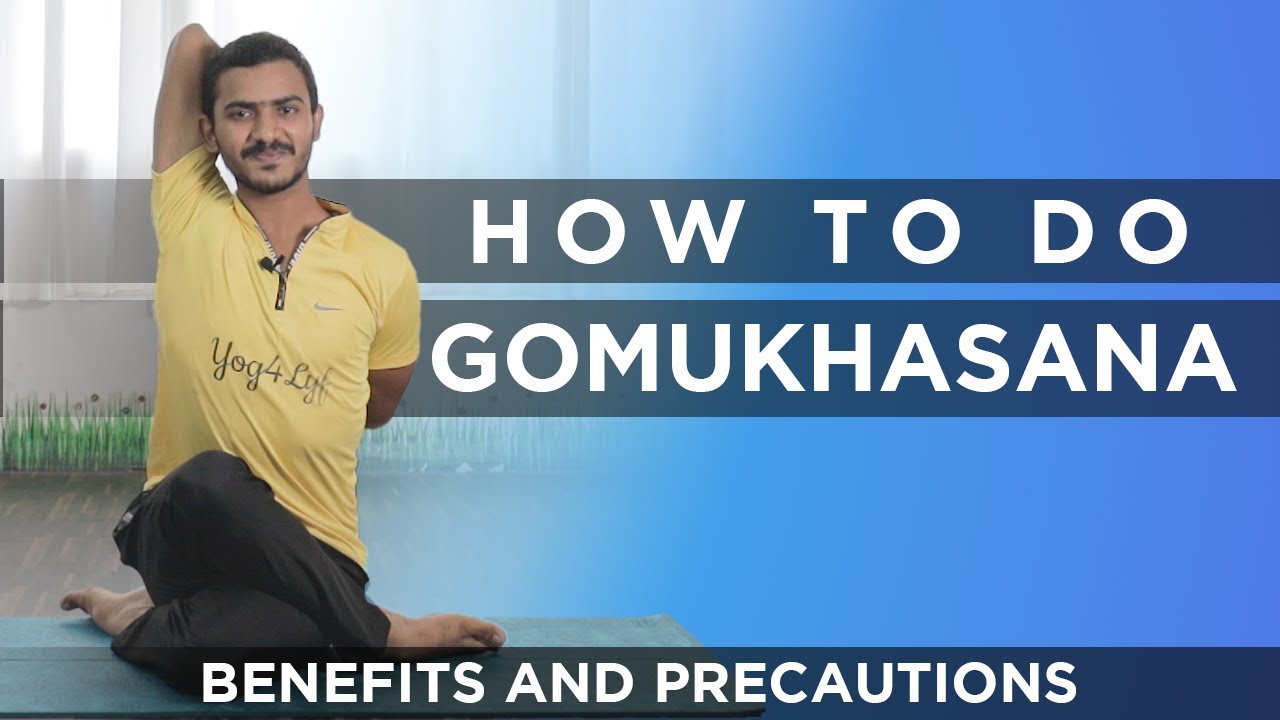
Steps:
- Sit straight on the yoga mat with your legs stretched forwards. Keep your feet together and place your palms next to your hips.
- Now gently bend your right leg and place your right foot under your left buttock.
- Fold your left leg and place it over your right thigh.
- Now raise your left arm above your head and bend the elbow. Bring your right arm behind your back and interlock your hands. Use a piece of cloth if you are unable to get hold of your hands.
- Keep your trunk erect; expand your chest and slightly lean back.
- Take deep breaths and hold onto this pose for as long as you comfortably can.
- To come out of this pose, release your arms and uncross your legs slowly.
- Repeat on the other side.
Precautions:
- Avoid this asana if you are experiencing excessive shoulder pain. And if your pan is bearable, perform this asana under supervision.
- Refrain from doing this asana if you have severe back pain or muscular pain in any key part of your body.
4. Locust Pose | Salabhasana
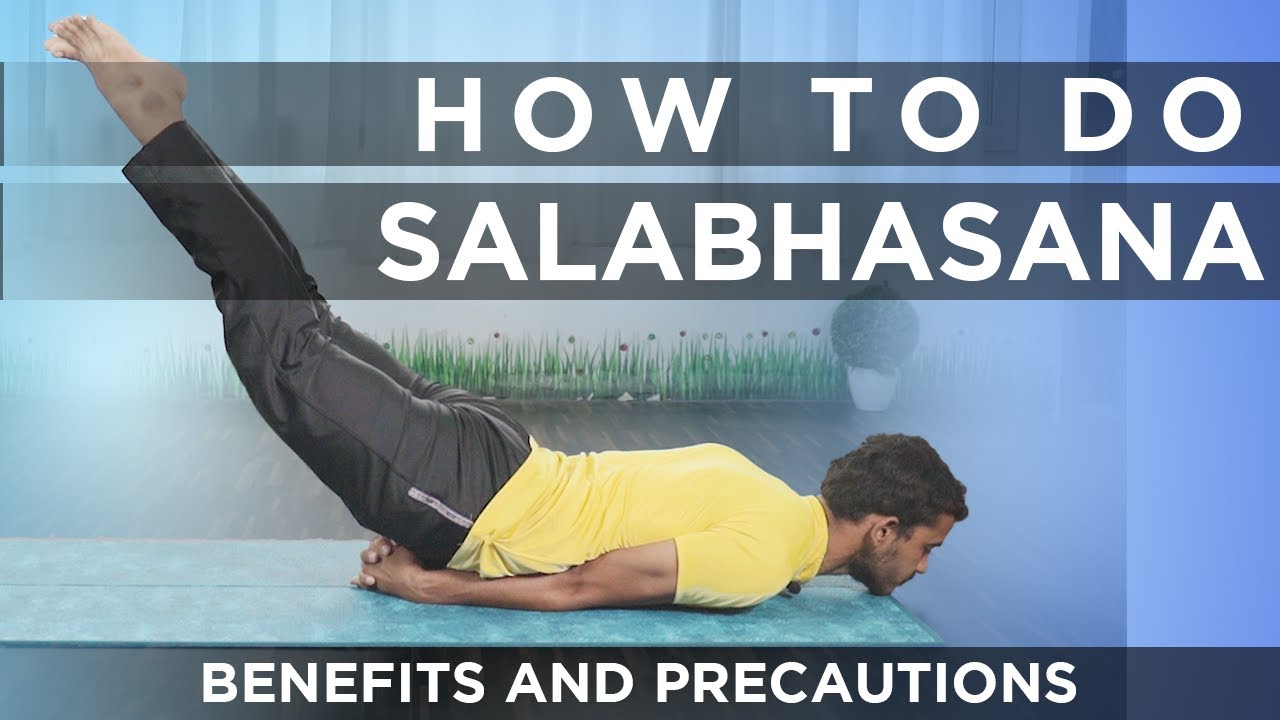
Steps:
- To begin with, lie down on your mat on your belly and place your hands on the inside.
- Breathe in and lift your head away from the floor.
- Keeping your lower belly and pelvis on the floor, raise your leg upwards using your inner thighs. Do not bend your knees.
- Now, raise your arms parallel to the floor and stretch back a little.
- Make sure all your body weight is on your abdomen and lower knees.
- Keep breathing slowly. Stay in this position for 45-60 seconds and then release while exhaling.
- Repeat this asana 2-3 times.
Precautions:
- Refrain from this asana if you have severe back problems or issues with knees or hips.
- Do not practice this asana if you have a headache or Migraine.
- If you are a patient of High or Low blood pressure, please do not practice this asana.
- Do not push your body; only continue if you are completely comfortable.
5. Wide-Angle Seated Forward Bend | Upavistha Konasana

Steps:
- Sit on the floor with your legs stretched wide apart until you can feel a good stretch. See that your knees and toes are pointing towards the ceiling.
- Keeping the spine straight, bend from the hips. Place your hands on the floor between your legs, and slowly exhale as your start walk your hands forwards.
- Maintain length along the front of your body as you come further into the forward bend. Do not lower any further if your backaches.
- Walk your hands forward as far as you can, and hold for 5-10 deep breaths, keeping your quad muscles engaged.
- Now slowly return back to the upright position, using your hands under the back of your knees to bring your legs together.
Precautions:
- Avoid if you have any lower back injuries.
- You can sit on a folded blanket to keep your torso relatively upright.
6. High Crescent Lunge | Utthita Ashwa Sanchalanasana
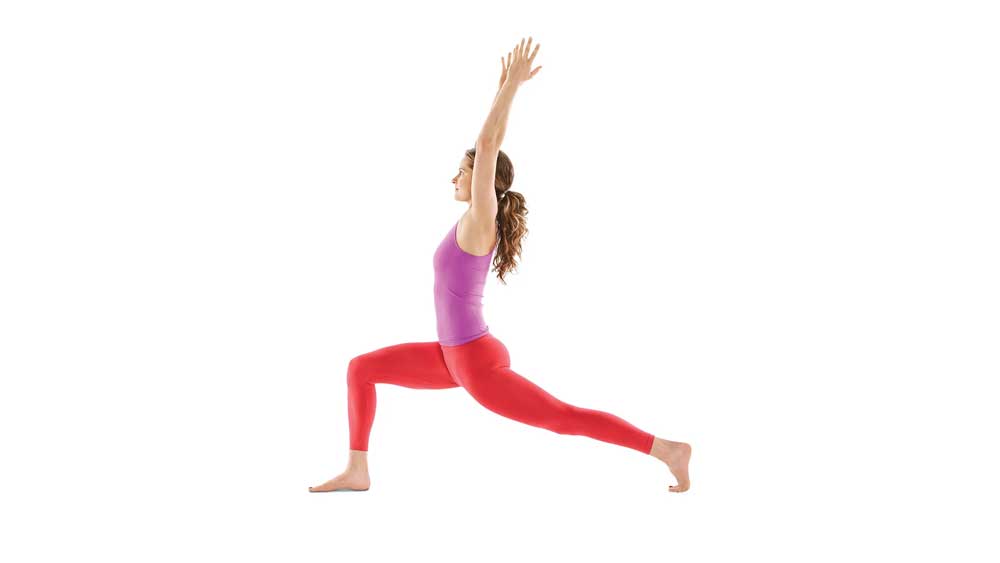
Steps:
- Stand straight keeping your feet at a hip-width distance apart and arms by your side. Step your left foot back about 3-4 feet.
- Now, bend your right knee such that your right thigh bone is parallel to the floor. Keep your left leg firm.
- Raise your palms above your head with your palms facing inwards. Keep your lower ribs drawn as you lift your chest and strengthen your spine.
- As you lunge into your front knee, continue to reach up towards the ceiling.
- You can gaze up towards your hands or look at a point in front of your eyes.
- Hold on to this position for several breaths.
- To come out of this pose, lower your arms and step your back foot forward.
- Repeat on the other side.
Precautions:
- This pose is not recommended if you have a knee or back injury.
- Avoid this asana if you are suffering from High Blood Pressure or Heart-related problem.
All the above-mentioned routines have been specially customized concentrating on all major body parts to strengthen your body and to keep yourself fit. Being underweight or overweight is not something to be felt bad for, everyone has their own beautiful body shapes, but having a better lifestyle and diet which makes you fit will always be advised. Stay fit and longer to enjoy time with your loved ones. Following a proper healthy diet is highly recommended and practicing yoga poses regularly will surely bring out the best results.