Suryanamaskar is an ancient Indian practice of physical and spiritual exercise that has been around for thousands of years.
In this article, we will explore the history of Suryanamaskar, the steps, its various benefits, tips for performing it, precautions to take, the best time to perform it, and more. Let’s get started!
Introduction to Suryanamaskar
Suryanamaskar, also known as Sun Salutation, is believed to have originated in India. It is based on yoga postures and breathing techniques.
Sun salutation is a set of 12 postures that are performed in a specific order and accompanied by chanting of mantras. It is believed to be an excellent way to stay healthy and fit. It can greatly benefit those who practice it regularly.
Suryanamaskar is not only a physical exercise, but also a spiritual practice. The postures of Suryanamaskar are believed to be a representation of the sun and its energy. It is believed that by performing Suryanamaskar, one can tap into the energy of the sun. You can use it to heal the body and mind.
History of Suryanamaskar
Suryanamaskar has been around for thousands of years. It is believed to have originated in India in the time of the Vedic era. The practice is mentioned in ancient scriptures such as the Vedas and the Upanishads. It is said to have been practiced by ancient sages and yogis to stay healthy and fit.
In modern times, Suryanamaskar has become a popular form of exercise. It has been popularized by several yogis, including B.K.S. Iyengar and T.K.V. Desikachar. It has been adapted into many different styles, such as Hatha Yoga, Ashtanga Yoga, and Vinyasa Yoga.
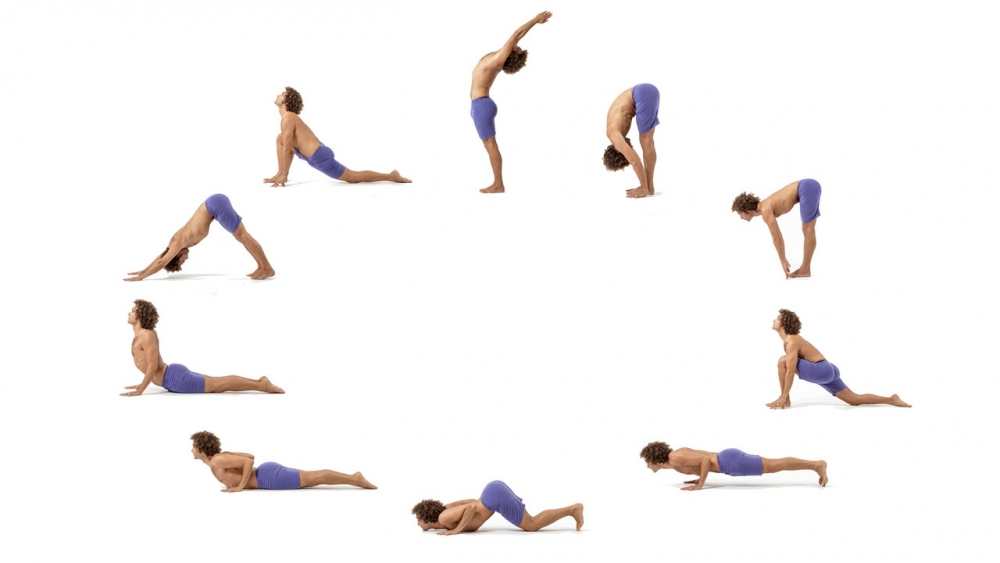
12 poses of Surya Namaskar
The 12 Poses of Surya Namaskar:
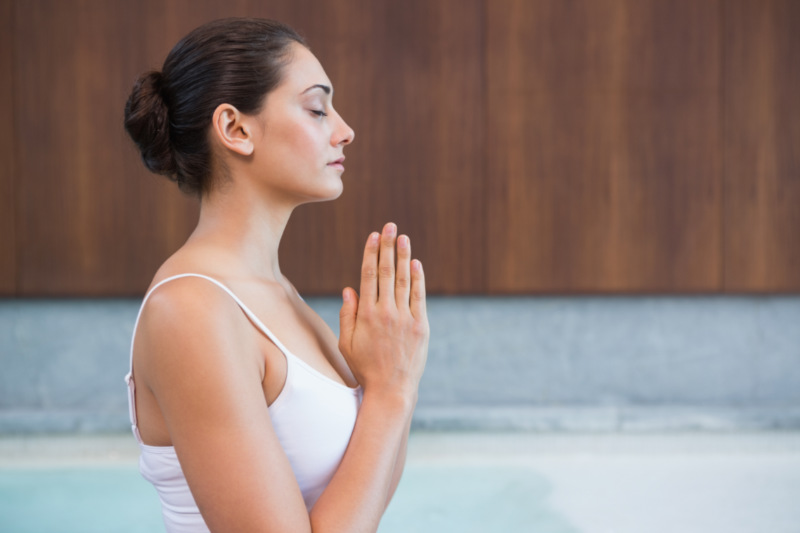
1. Pranamasana (Prayer Pose)
To perform Pranamasana (Prayer Pose), follow these steps:
- Stand at the front of your mat with your feet together and your arms by your sides.
- Bring your palms together in front of your chest in a prayer position.
- Gently close your eyes and focus on your breath.
- Take a few deep breaths and release any tension in your body.
- Hold the pose for a few breaths, then release your hands and return to the starting position.
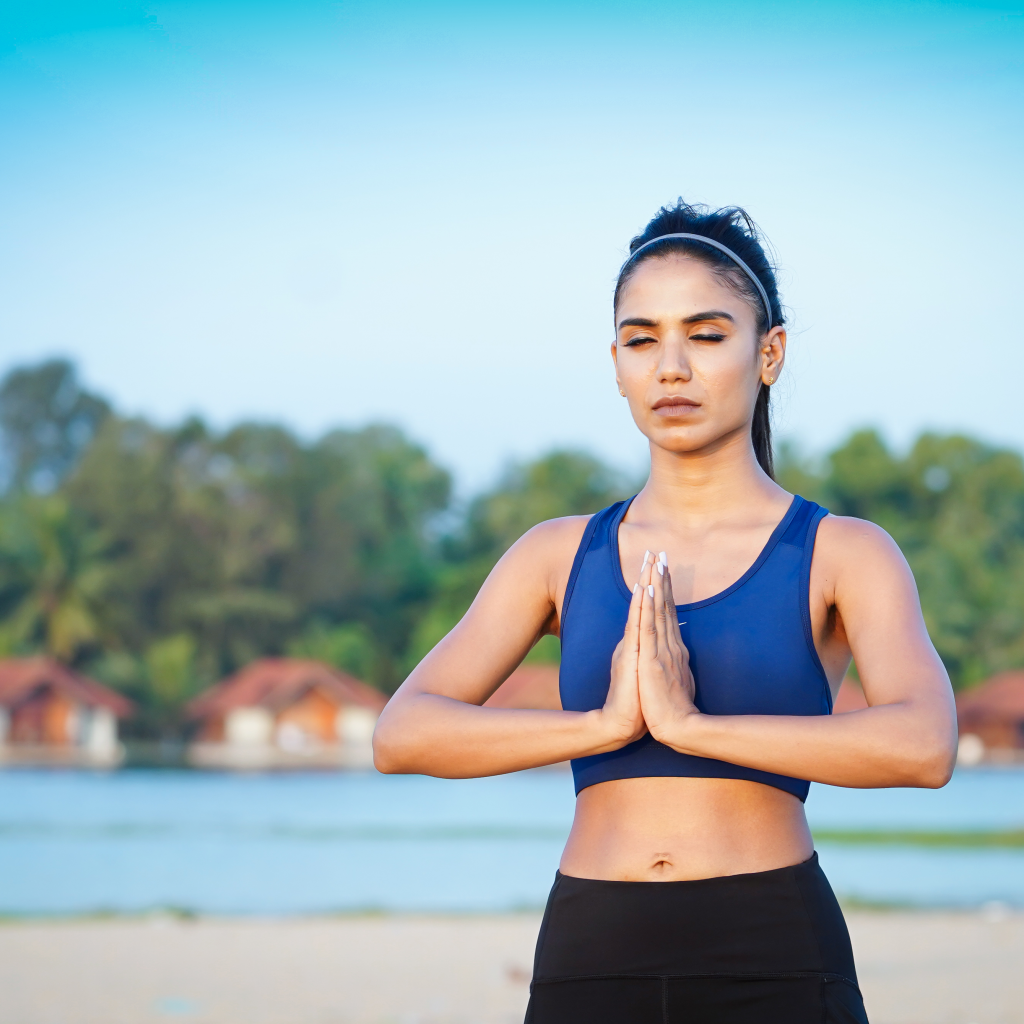
Note: This is a gentle, standing pose that is a great way to start your Surya Namaskar practice. Make sure to keep your neck relaxed and your shoulders down while holding the pose.
2. Hasta Uttanasana (Raised Arms Pose)
To perform Hasta Uttanasana (Raised Arms Pose), follow these steps:
- Stand at the front of your mat with your feet together and your arms by your sides.
- Inhale and raise your arms overhead, keeping your shoulders down and your palms facing each other.
- Reach up towards the sky with your fingertips.
- Keep your gaze forward and take a few deep breaths.
- Exhale and release your arms back to your sides.
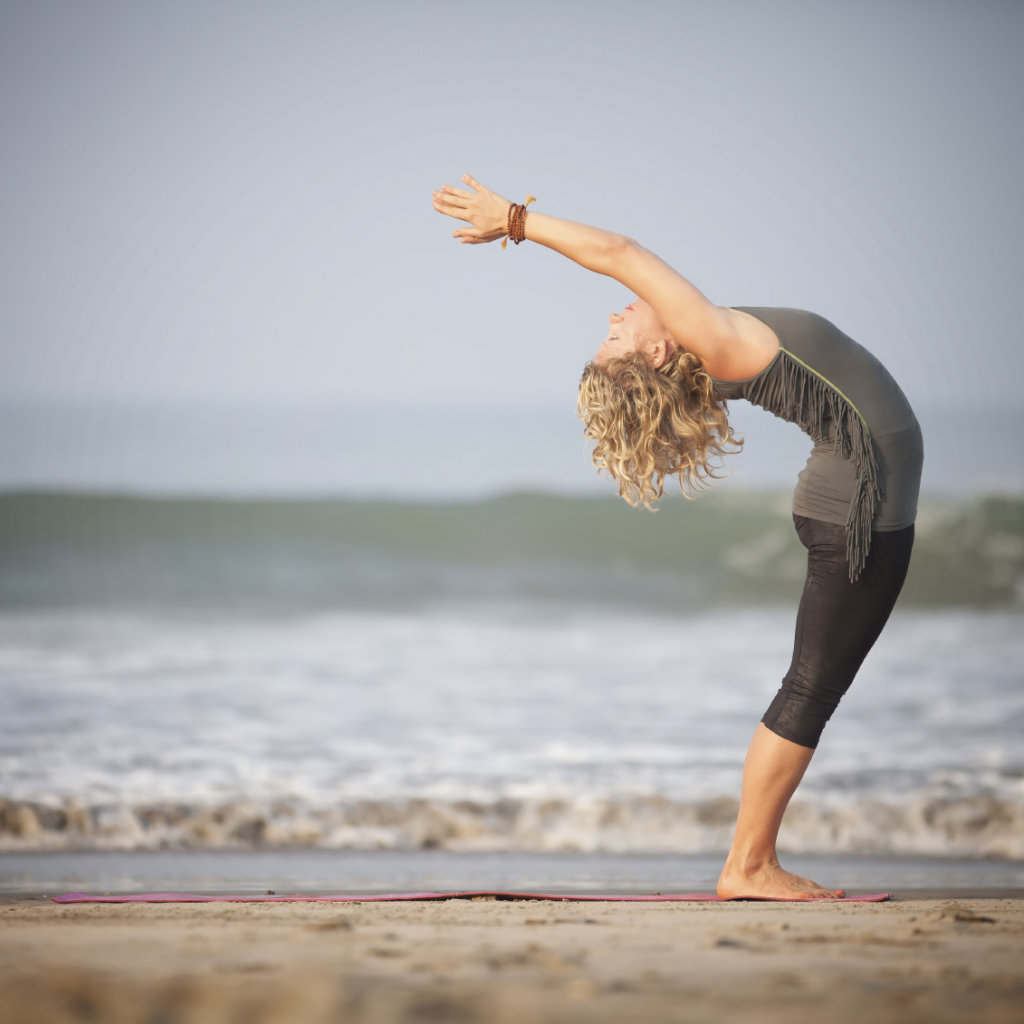
Note: This pose helps to stretch the arms, shoulders, and spine. Make sure to keep your legs straight and your core engaged while performing the pose. If you have any back pain or injuries, you may want to avoid this pose or perform it with caution.
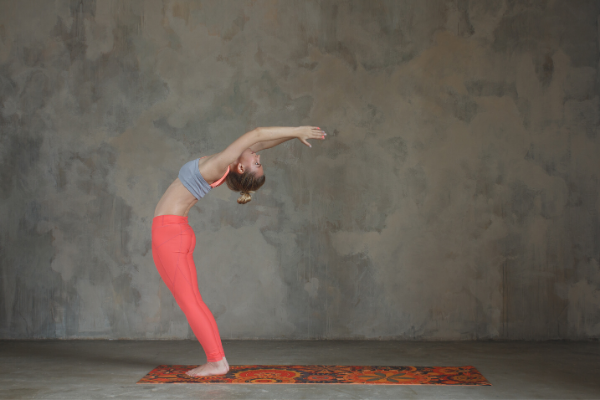
3. Padahastasana (Hand-to-Foot Pose)
To perform Padahastasana (Hand-to-Foot Pose), follow these steps:
- Stand at the front of your mat with your feet together and your arms by your sides.
- Inhale and raise your arms overhead, keeping your shoulders down and your palms facing each other.
- Exhale and bend forward from your hips, reaching towards the floor.
- Place your hands on the floor next to your feet. If you can’t reach the floor, rest your hands on your shins or on blocks.
- Keep your knees slightly bent and your back flat.
- Take a few deep breaths and hold the pose for several breaths.
- Inhale and slowly come back to the standing position.
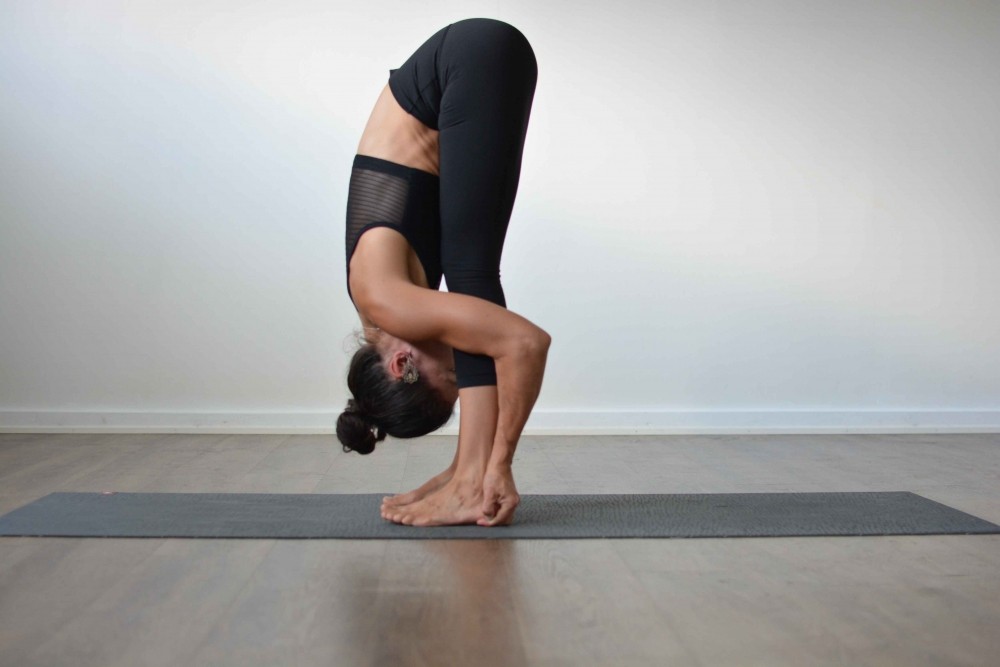
Note: This pose helps to stretch the hamstrings, back, and spine. Make sure to keep your core engaged and your neck relaxed while performing the pose. If you have any back pain or injuries, you may want to avoid this pose or perform it with caution.
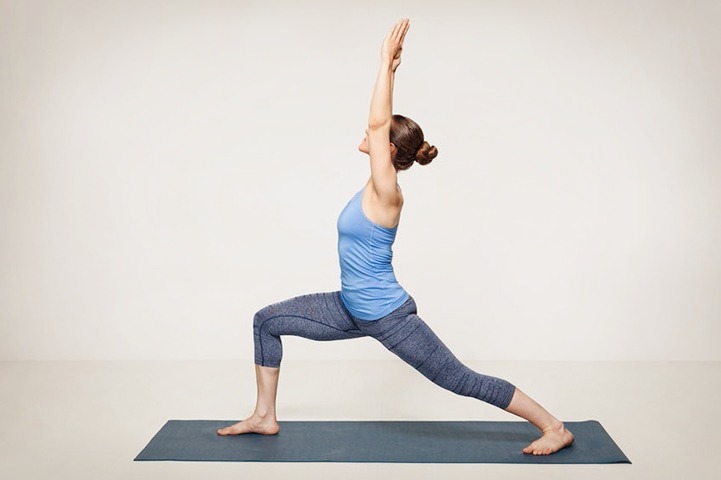
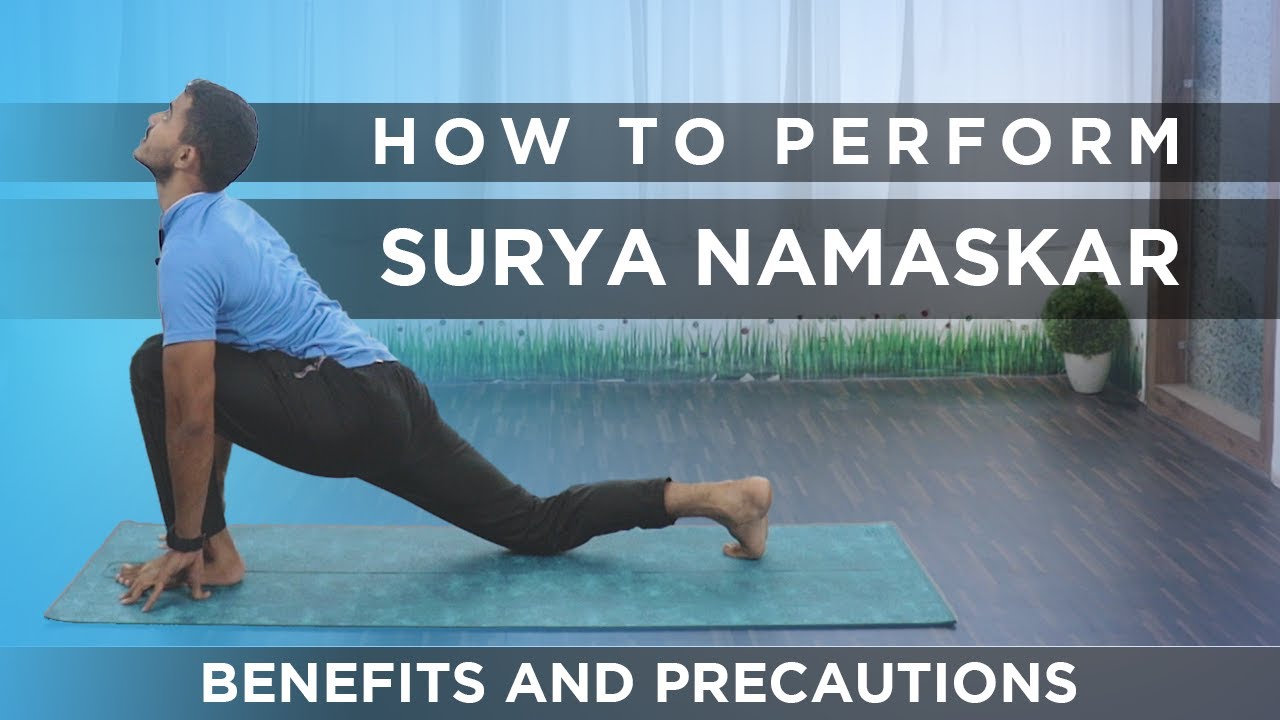
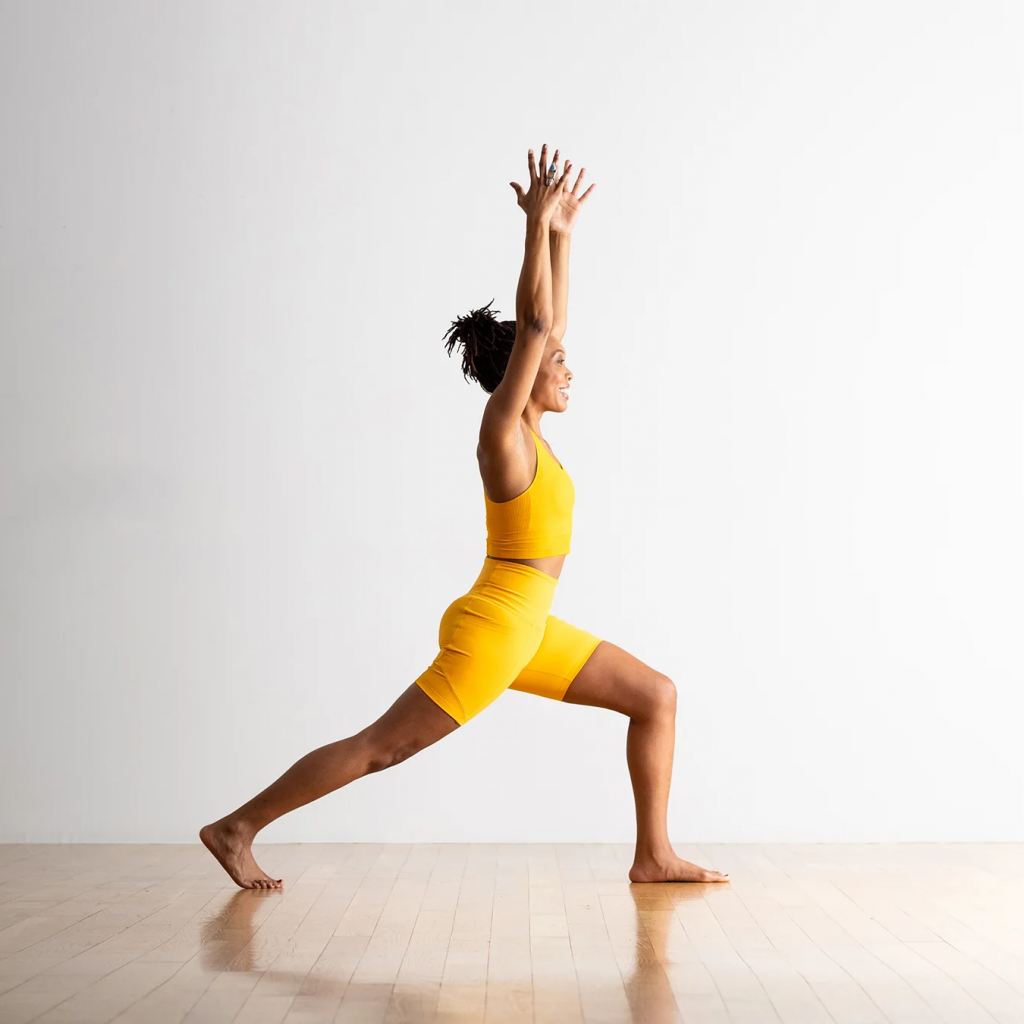
4. Ashwa Sanchalanasana (Equestrian Pose)
To perform Ashwa Sanchalanasana (Equestrian Pose), follow these steps:
- Start in a lunge position with your right foot forward and your left knee bent, resting on the floor.
- Place your hands on your right knee and inhale.
- Exhale and bring your left foot up to meet your right knee, with your left knee bent and pointing towards the ceiling.
- Push your right hand into the floor and raise your left arm towards the sky.
- Take a few deep breaths and hold the pose for several breaths.
- Inhale and release your left foot back to the starting position.
- Repeat on the other side.
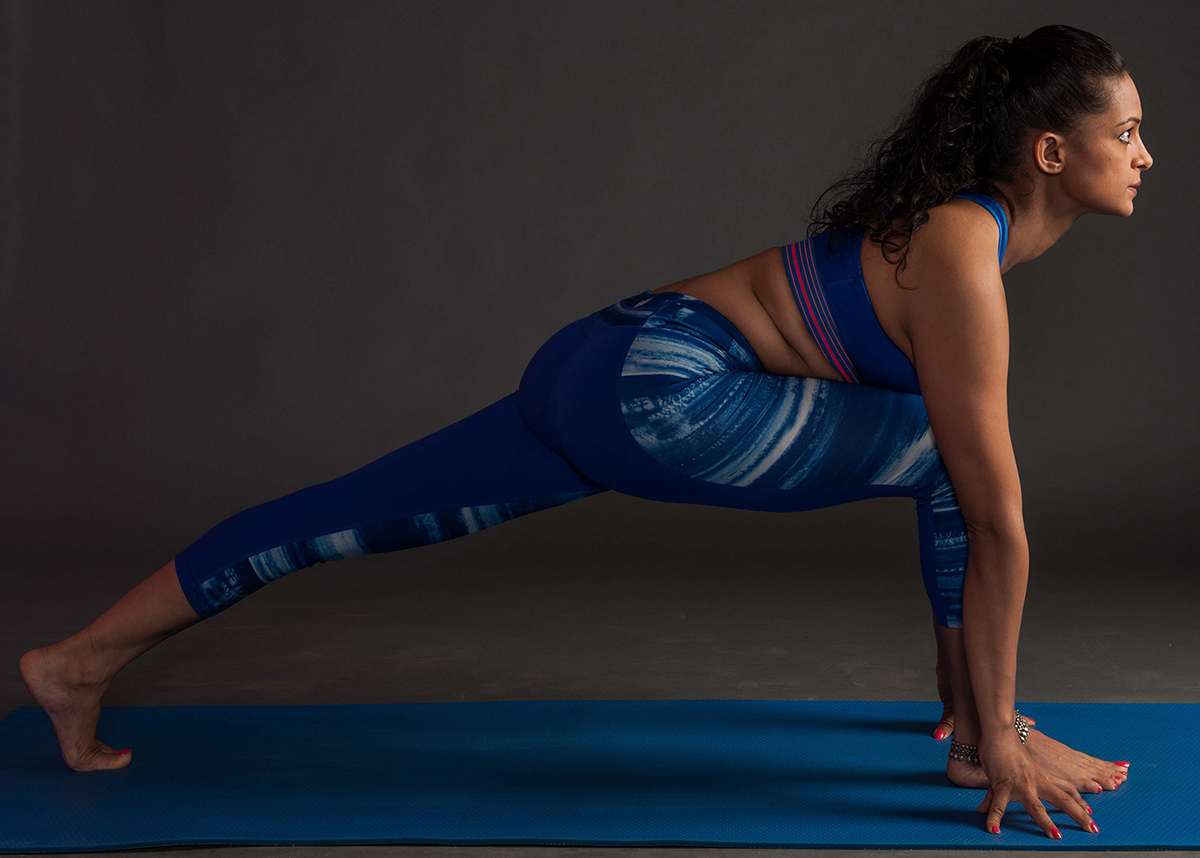
Note: This pose helps to stretch the hips, thighs, and groin. Make sure to keep your core engaged and your spine straight while performing the pose. If you have any knee or ankle injuries, you may want to avoid this pose or perform it with caution.
5. Dandasana (Plank Pose)
To perform Dandasana (Plank Pose), follow these steps:
- Start in a push-up position with your hands under your shoulders and your feet hip-width apart.
- Keep your body in a straight line, with your head, neck, and back aligned.
- Engage your core and hold the pose for several breaths.
- Exhale and release back to the starting position.
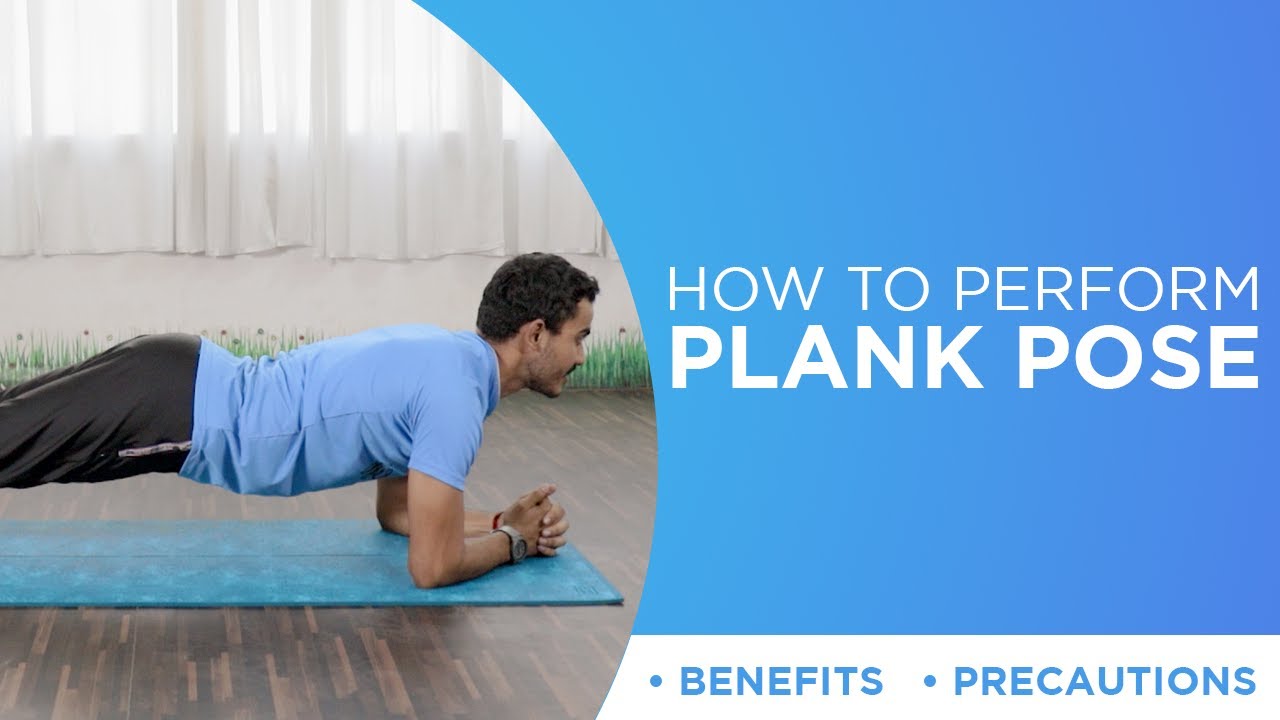
Note: This pose helps to strengthen the arms, shoulders, back, and core. Make sure to keep your neck relaxed and your gaze forward while performing the pose. If you have any wrist or shoulder pain or injuries, you may want to avoid this pose or perform it with caution. You can also modify the pose by lowering to your knees instead of keeping your legs extended.
6. Astanga Namaskara, Eight-Limbed Pose
To perform Ashtanga Namaskara (Salute with Eight Parts or Points), follow these steps:
- Begin in a kneeling position with your knees and hands on the floor.
- Lower your hips down so that your buttocks are resting on your heels.
- Move forward, so that your chest and chin touch the floor, while keeping your elbows close to your sides.
- Push up from the floor with your hands, straightening your arms, and lowering your knees to the floor.
- Move your left foot forward between your hands, with your knee bent.
- Move your right foot forward, so that both feet are flat on the floor, with your legs bent and your hands next to your feet.
- Stand up and bring your hands together in front of your heart in a prayer position.
- Take a few deep breaths and hold the pose for several breaths.
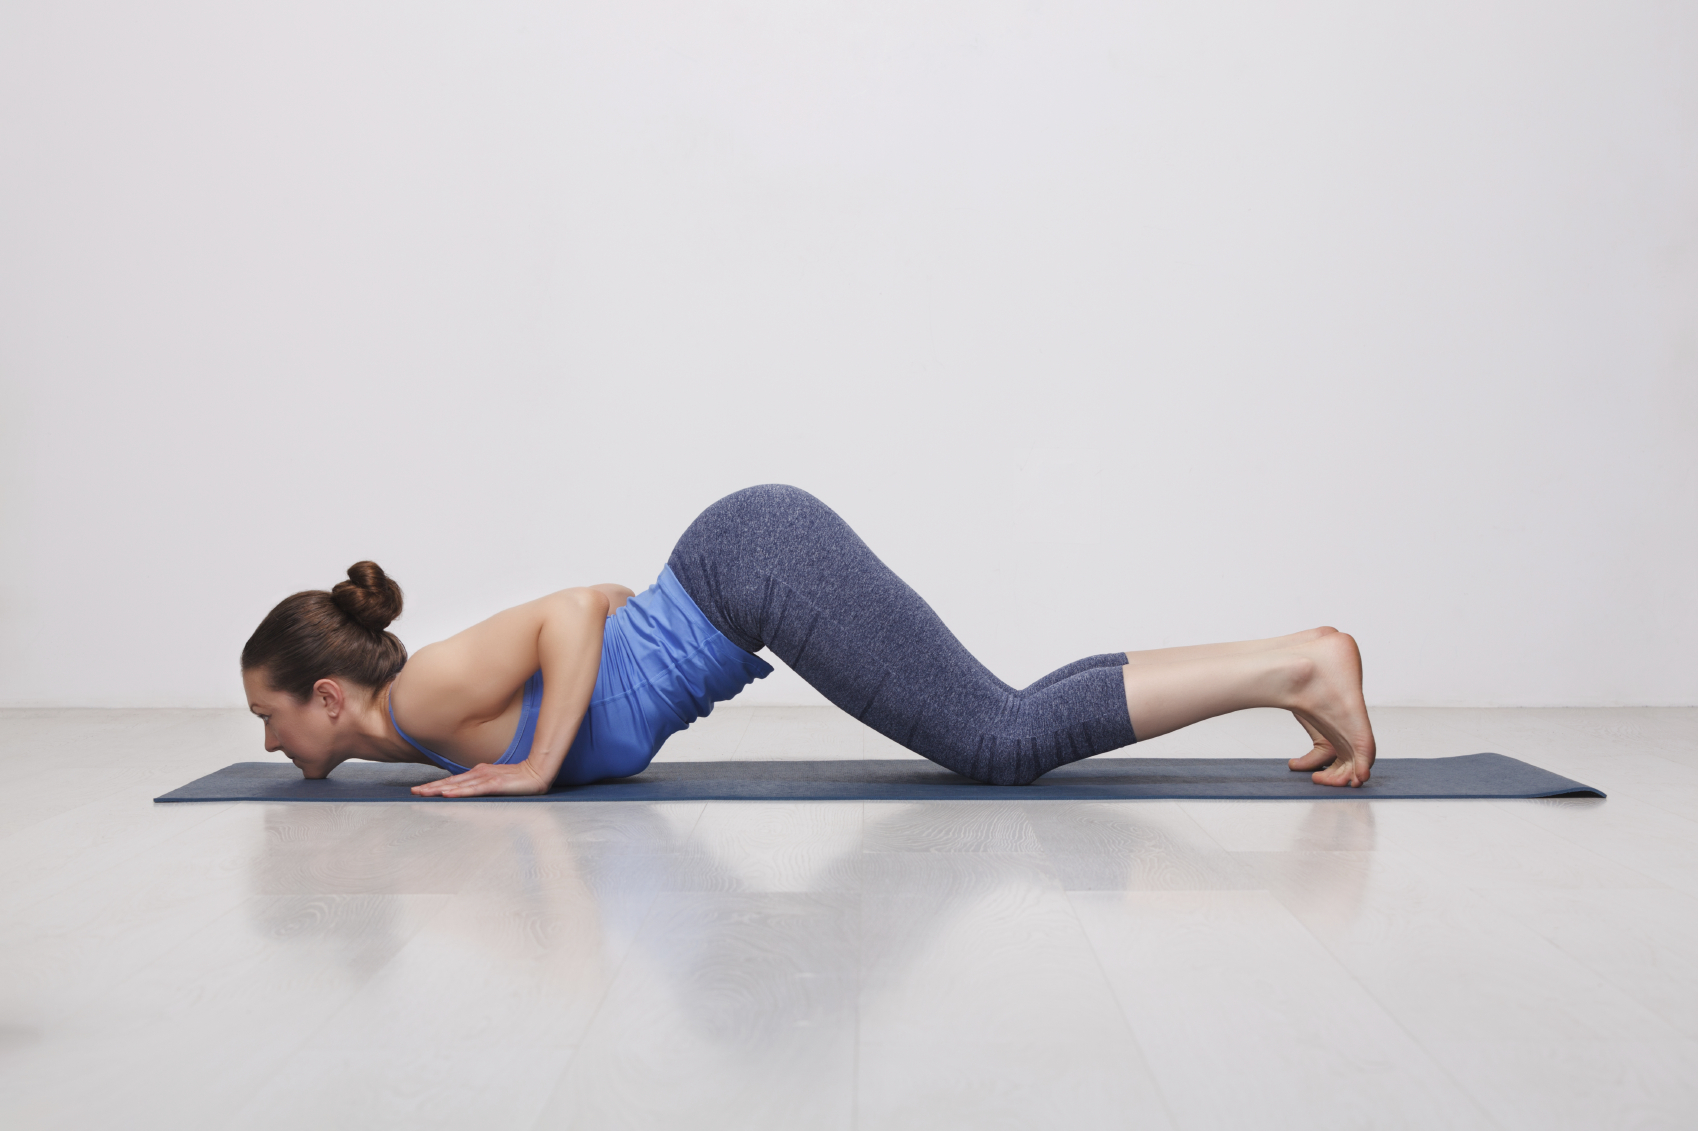
Note: This pose helps to stretch the hips, back, and legs. It is considered a warm-up pose for Sun Salutations and is often performed at the beginning of a yoga practice. Make sure to keep your gaze forward and your spine straight while performing the pose. If you have any knee or wrist injuries, you may want to avoid this pose or perform it with caution.
7. Bhujangasana (Cobra Pose)
To perform Bhujangasana (Cobra Pose), follow these steps:
- Start lying on your stomach with your hands under your shoulders and your elbows close to your sides.
- Place your palms on the floor and inhale.
- Exhale and use your back muscles to lift your chest and head off the floor, keeping your elbows close to your sides.
- Keep your shoulders relaxed and your gaze forward.
- Take a few deep breaths and hold the pose for several breaths.
- Exhale and release back to the starting position.

Note: This pose helps to strengthen the back, hips, and chest. Make sure to keep your core engaged and your neck relaxed while performing the pose. If you have any back pain or injuries, you may want to avoid this pose or perform it with caution. You can also modify the pose by keeping your elbows bent and placing your hands on your lower back for support.
8. Parvatasana (Mountain Pose)
To perform Parvatasana (Mountain Pose), follow these steps:
- Stand at the front of your mat with your feet together and your arms by your sides.
- Inhale and raise your arms overhead, keeping your shoulders down and your palms facing each other.
- Exhale and fold forward from your hips, reaching towards the floor.
- Place your hands on the floor next to your feet. If you can’t reach the floor, rest your hands on your shins or on blocks.
- Keep your knees slightly bent and your back flat.
- Take a few deep breaths and hold the pose for several breaths.
- Inhale and slowly come back to the standing position.
Note: This pose helps to stretch the hamstrings, back, and spine. Make sure to keep your core engaged and your neck relaxed while performing the pose. If you have any back pain or injuries, you may want to avoid this pose or perform it with caution.

9. Ashwa Sanchalanasana, High Lunge Pose
To perform this:
- Breathe in and take the right foot forward. The foot should be between the hands and the knee bent.
- Bring the left knee down to the ground with the leg stretched behind.
- Press the hips and lookup
10. Pada Hastasana, Standing Forward Bend
- Breathe in and bring both the feet together.
- Keep the position of the hand the same as before and exhale slowly.
- Exhale and bend the torso to go to this pose.
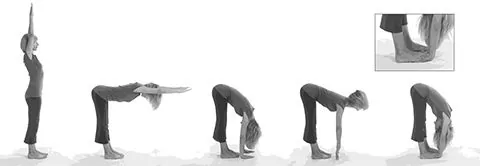
11. Uttana Hastasana, Raised Arms pose
- The hands should be raised above and the spine stretched.
- The palms should be on the ground and knees bent.
- Look towards the ceiling and the biceps should be next to the ears as in the second asana.
12. Pranamasana, Prayer Pose
This is the last of the Surya namaskar steps.
- Breathe out and stand in a relaxed manner.
- Hold the palms in front of the chest lowering the arms. This completes the Surya Namaskar.
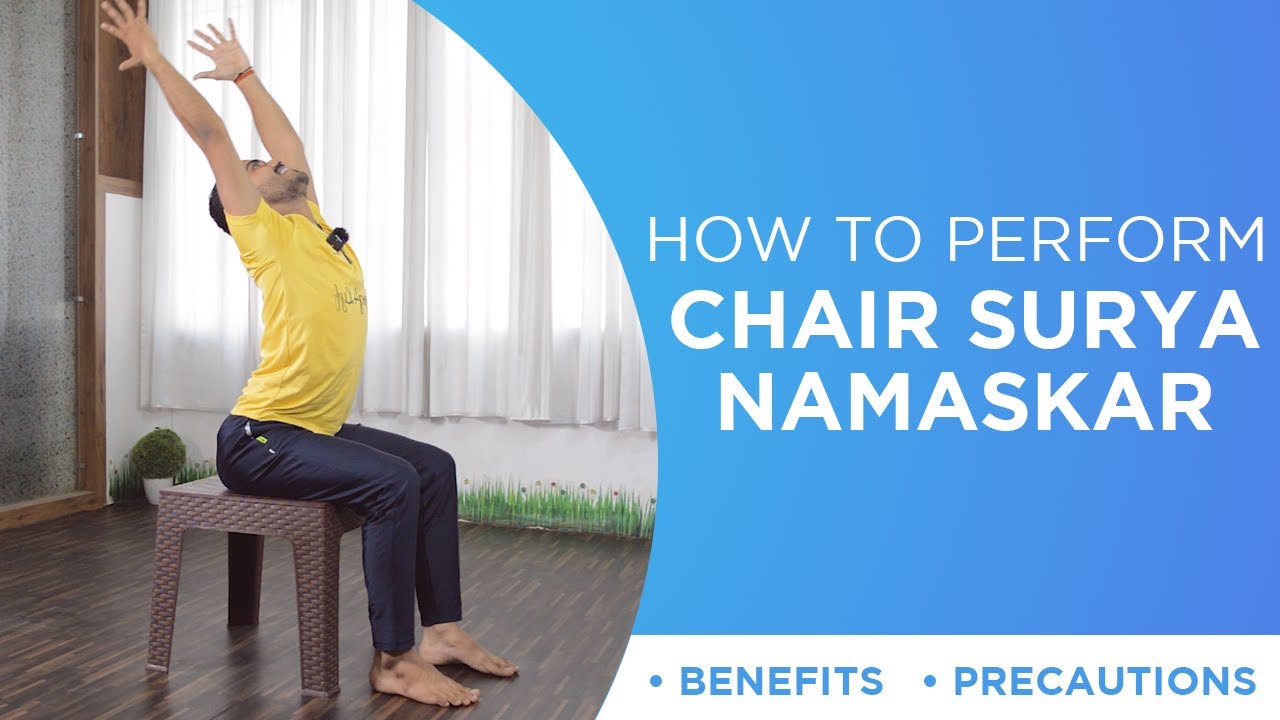
Suryanamaskar for Senior Citizens
It is commonly seen that old age persons find it difficult to inculcate yoga into their routine because of problems like knee pain, back pain, poor mobility, and more. However, there are alternative for them as well!
Senion citizens can go for Chair Surya Namaskar if they are’t able to perform the steps otherwise.
PS: Chair surya namaskar is also an easy way out for those who are on their chairs for long hours. This exercise will stretch your whole body and leave you feeling refreshed.
Suryanamaskar Mantras
People who perform Suryanamaskar for spiritual reasons can chant these mantras with all the 12 poses mentioned above:
- Om Maitreya namah
- Om Ravaye namah
- Om Suryaya namah
- Om Bhanave namah
- Om Khagaya namah
- Om Pushne namah
- Om Hiranyagarbhaya namah
- Om Marichaye namah
- Om Adityaya namah
- Om Savitre namah
- Om Arkaya namah
- Om Bhaskaraya namah
All twelve Surya Namaskar poses, can be practiced at any age. The only thing you need to do is modify the asanas based on your current fitness level.
For example, if you’re over the age of 60 and wish to practice Surya Namaskar poses, you should start with a very basic series and do it every day. As you get stronger and more flexible, you can adapt the series and make it more challenging.
Benefits of Suryanamaskar
1. Enhancement Of Blood Circulation
The Surya Namaskar sequence encourages a dynamic breathing pattern that keeps the blood oxygenated and the lungs aerated. The continual flow of fresh blood is an effective way to rid the body of any toxins and carbon dioxide.
2. Enhancing The Performance Of The Digestive System
By increasing the blood flow around the digestive organs, Surya Namaskar helps to enhance the functioning of the digestive system. Additionally, the forward bend posture helps to create space in the abdomen. This enables trapped gases to be expelled from the system.
3. Weight Loss Benefits Of Surya Namaskar
Practicing the Surya Namaskar series regularly and quickly strengthens the muscles. It helps to reduce stubborn fat stored around the stomach. Furthermore, the asanas strengthen the musculoskeletal system while also toning the abdominal muscles.
4. Detoxification Assistance
The process of active breathing and exhalation helps to completely ventilate the lungs and oxygenate the blood, thus aiding in the detoxification of the body by getting rid of carbon dioxide and other toxins.
5. Healthy Lower Limbs
The very first and last posture of Surya Namaskar, the pranamasana is beneficial in strengthening the lower body. It is efficient in strengthening the legs, calves, and feet, as well as in reinforcing the hips and relieving sciatica. On top of that, it also helps in preventing flat feet. One of its most remarkable scientific benefits is that it links the two hemispheres of the brain.
6. Radiant Skin and Lustrous Hair
The various yoga asanas that make up Surya Namaskar improve blood and oxygen flow. This results in a luminous complexion and thick, healthy hair. It promotes blood circulation, which helps to restore the glow of the skin. It also protects against wrinkles and makes it look younger and more vibrant.
Precautions to take
- Refrain from consuming food or beverage before and after doing Surya Namaskar.
- Make sure to do a proper warm-up prior to the exercise.
- Ensure that you are breathing in a coordinated manner while executing the yoga.
- People with any medical condition ought to seek the advice of their doctor.
- Surya Namaskara should not be attempted when a person is menstruating or pregnant.
- The best place for this practice should be an area that has clean air and is tranquil.
- It is recommended to carry out Surya Namaskar on a daily basis in order to accustom your body to the process.
- Stick to the directions offering guidance on how to keep the correct body position.
- Attempt to not keep complex postures for an extended period of time as it could result in an injury.
- Make sure to remain focused during Surya Namaskara as it can obstruct the outcomes.
- Wear attire that is comfortable and doesn’t hinder the exercise.
Conclusion
It is recommended to perform Surya Namaskar on a regular basis to experience its multiple health advantages. It is best to do it with the guidance of a qualified yoga instructor or talk to a medical professional if you have any medical issues.
Doing Surya Namaskar can have positive effects on an individual’s physical and mental well-being.